What is the Odepro NT21? It is a new light from a maker I’ve known about for quite some time. It is so new it isn’t shown on their web page. The best description to be found online is from their Amazon sales page. I put the light through my review process to find out more.
Thank you to Odepro for allowing me to review this light and battery set. I ordered my kit from Amazon to receive a typical production sample. Shipping and delivery had the usual Amazon efficiency and speed. The light was well packaged and arrived with no damage to the light or packaging.
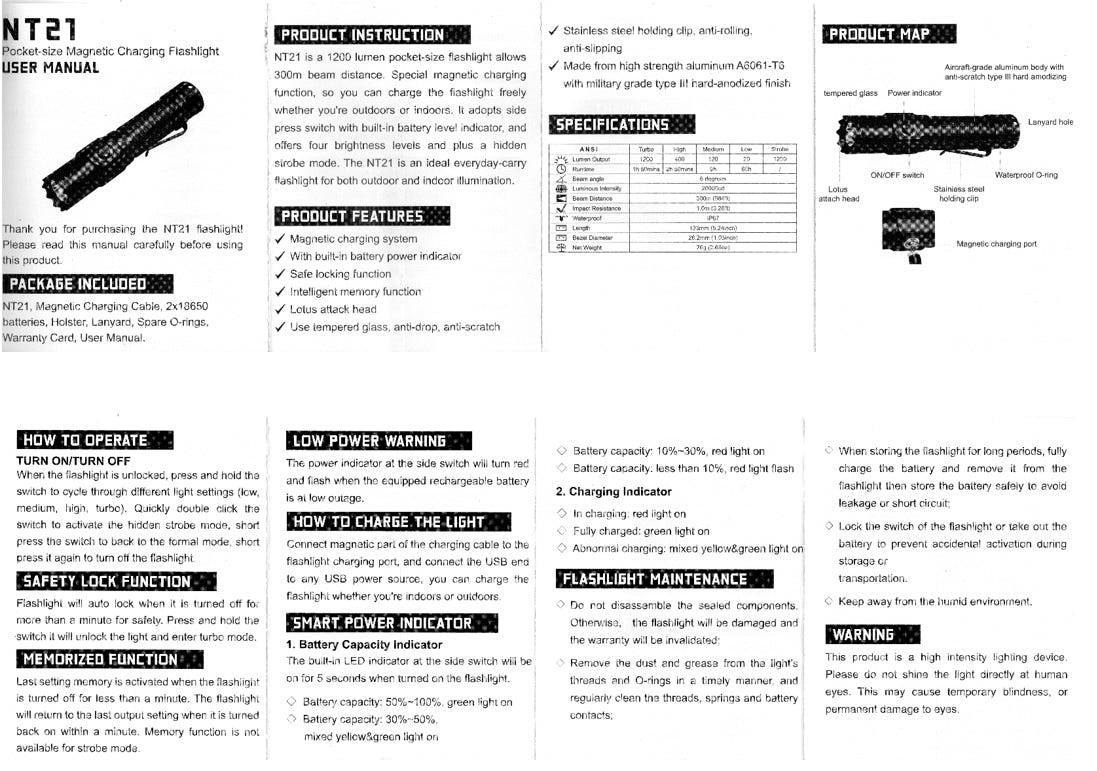
Manufacturer Specifications

I’ve included warranty details in the spec chart. My light performed flawlessly, so I did not need to use their service. I did ask their representative some questions during the review process. Each time I received a quick response, even a few times when she needed to consult their engineering staff before replying.
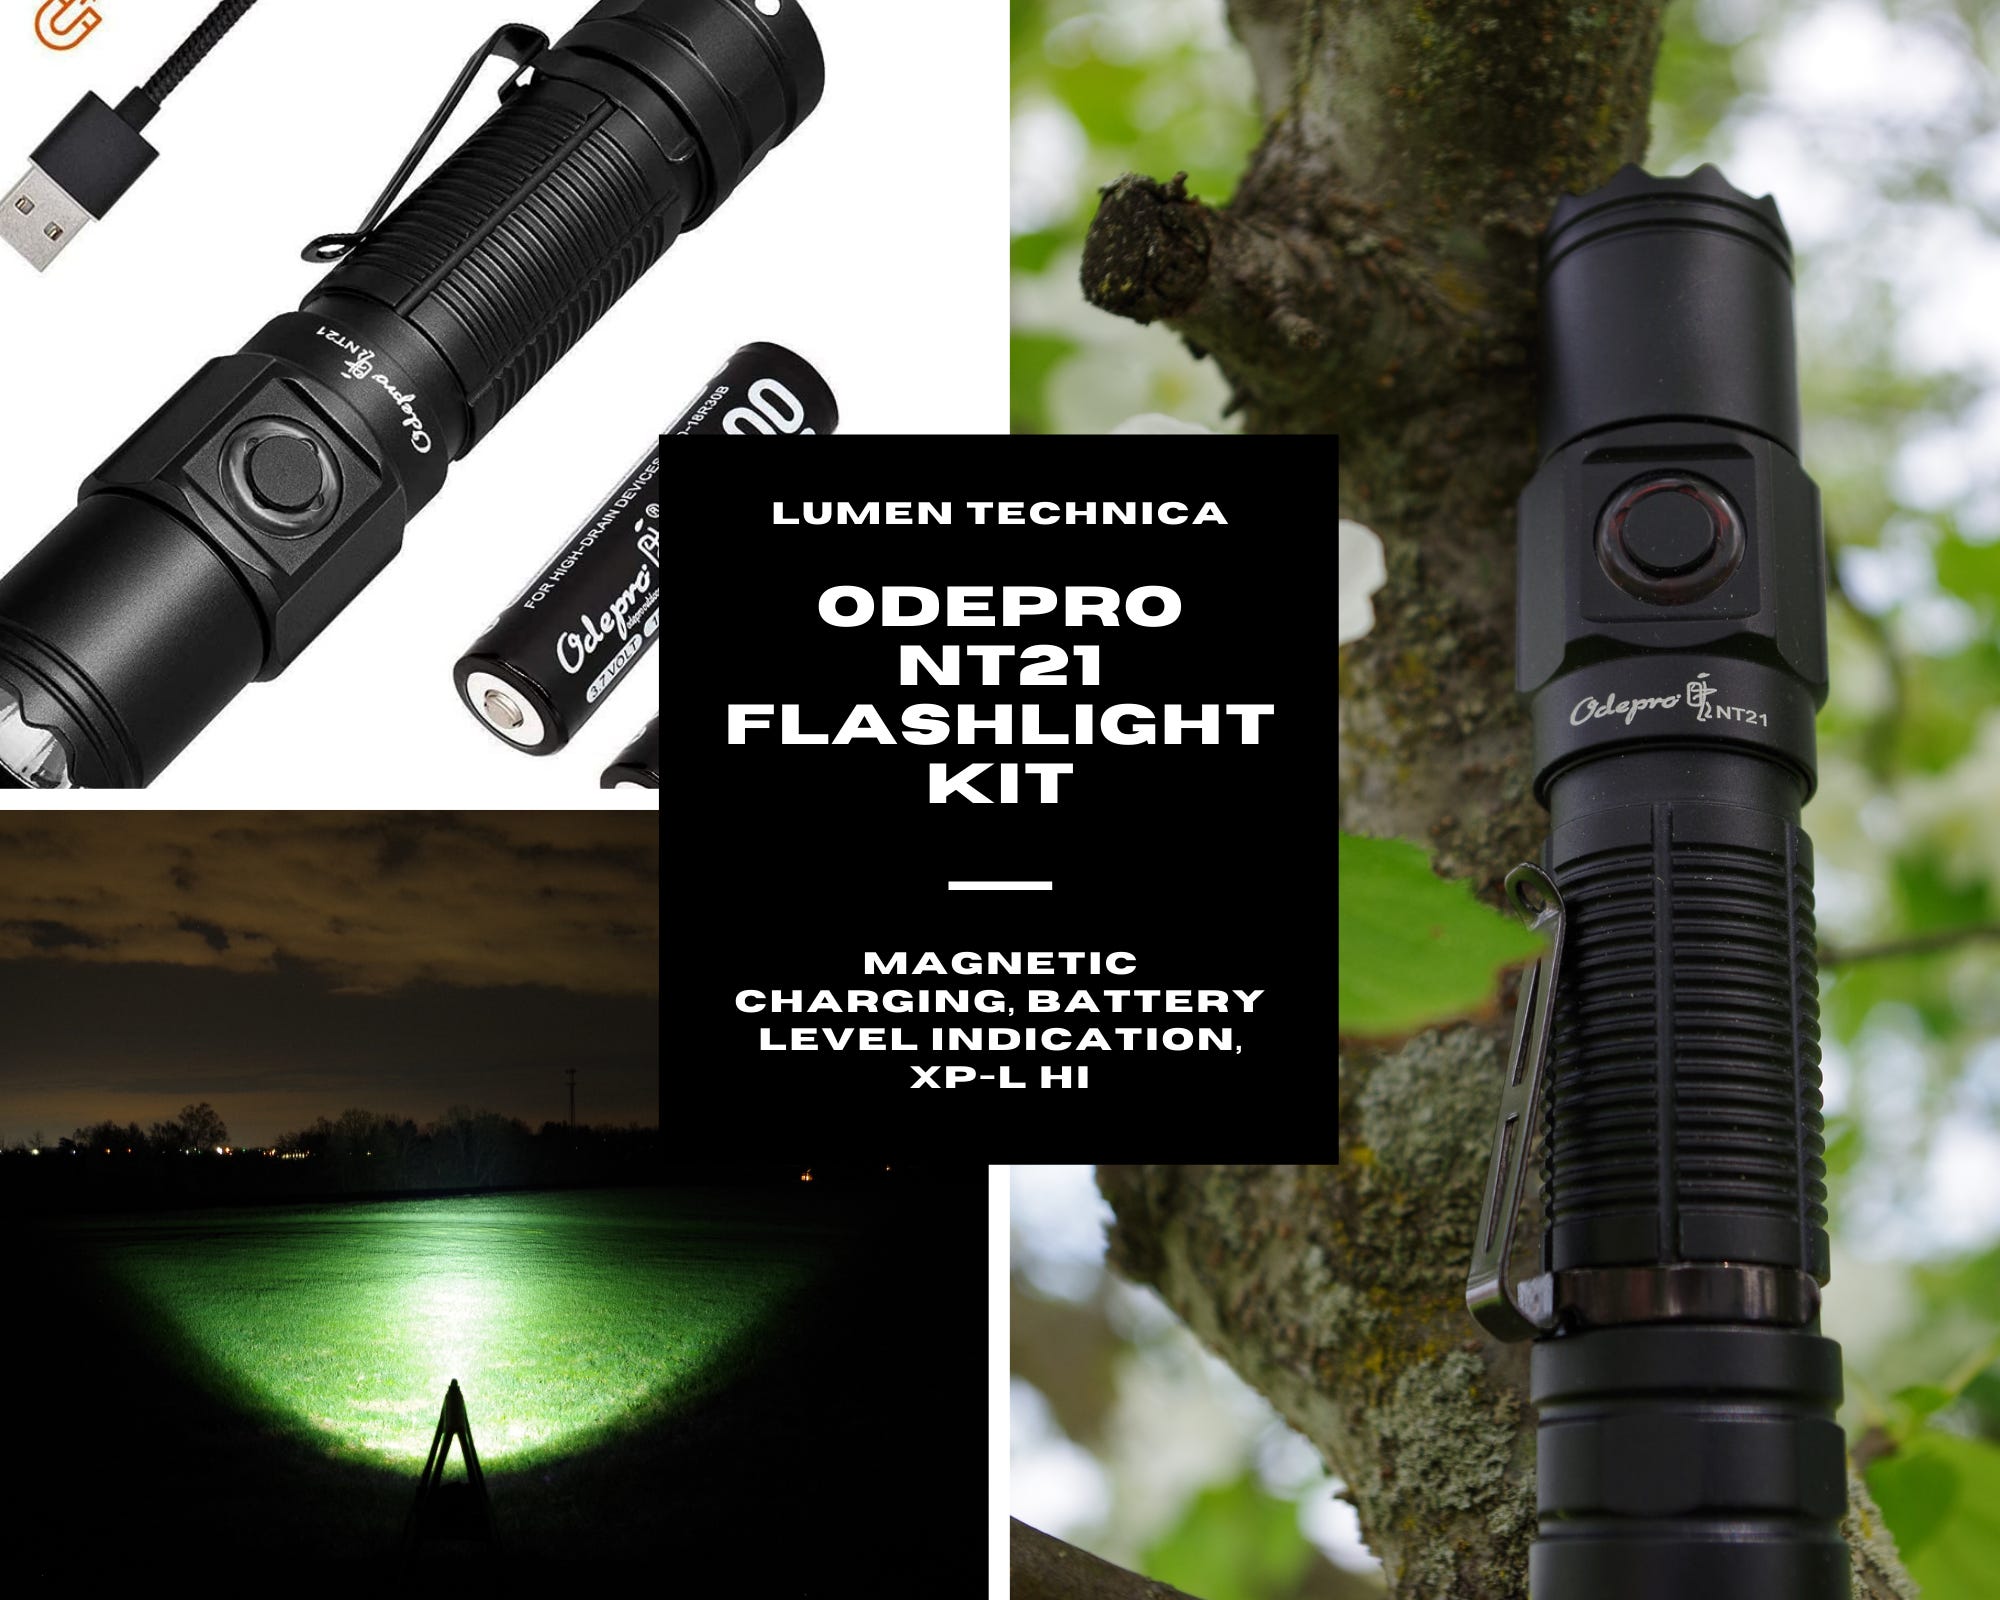
What’s In the Box?
NT21 flashlight
Two 18650 batteries
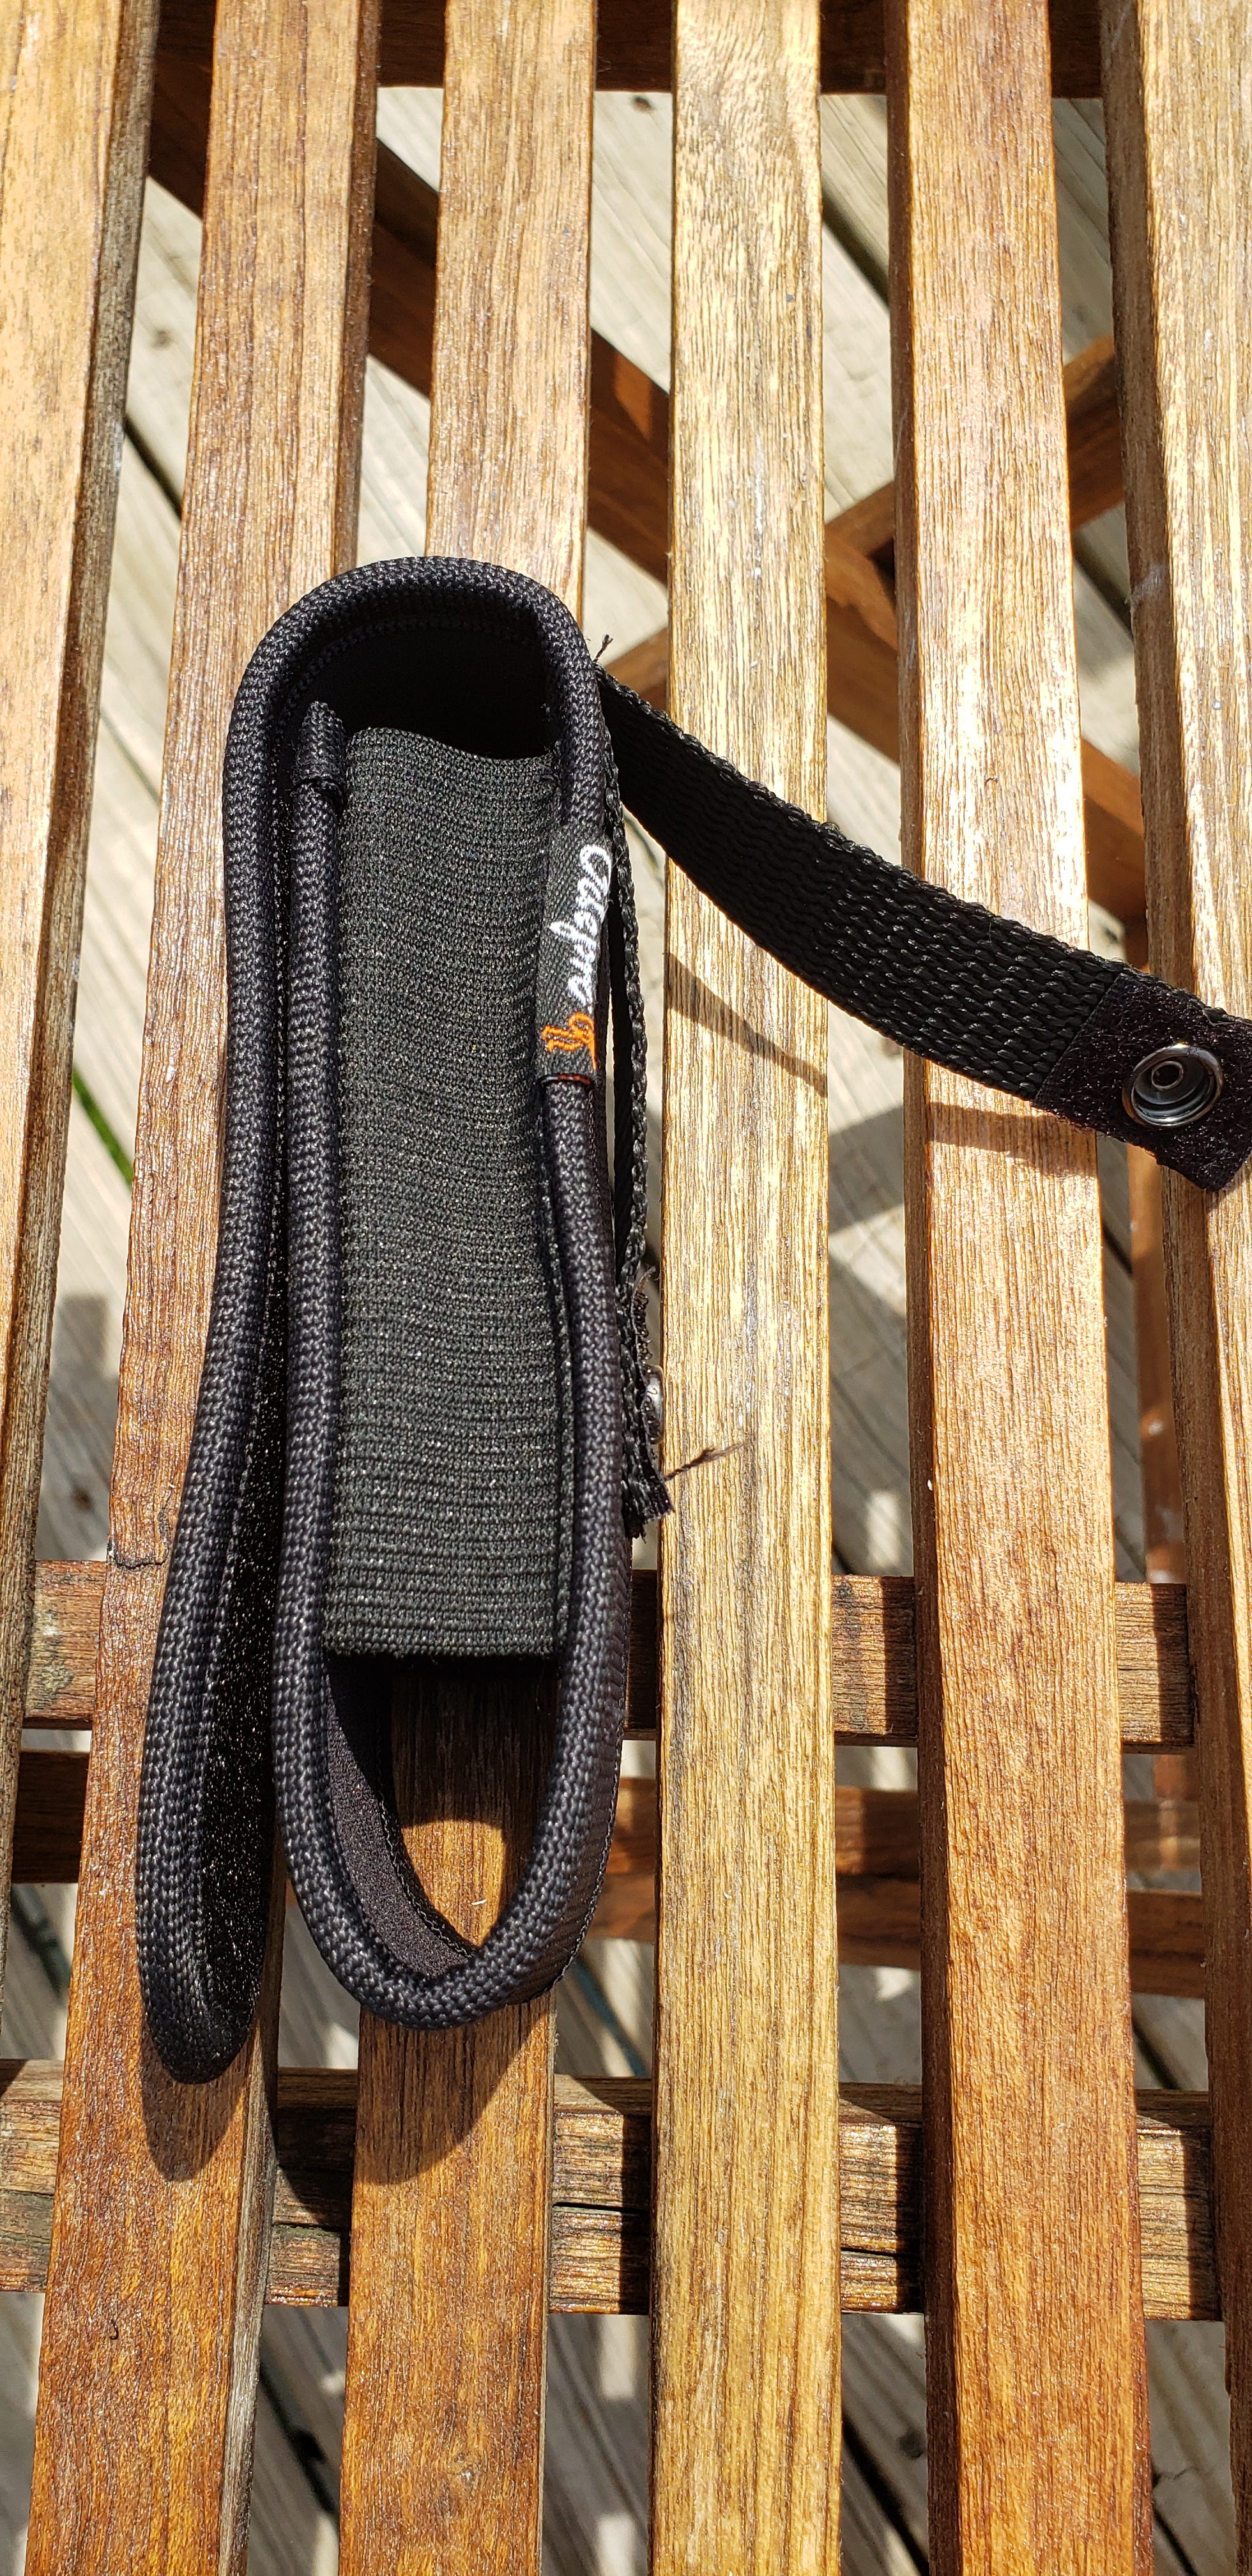
Holster with two straps, one with snap/Velcro and one fixed
Magnetic charging cable
Spare O-rings
Lanyard
Documentation
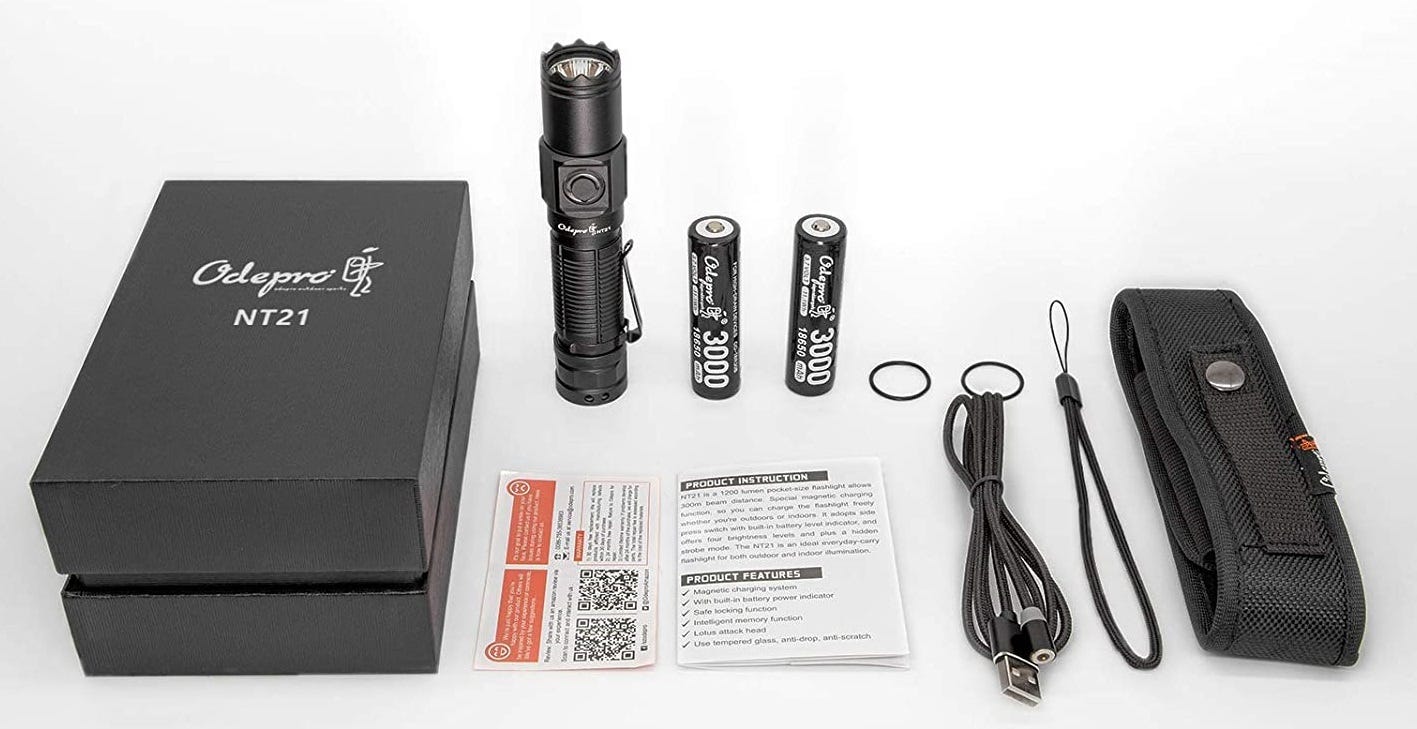
The box has foam inserts to protect the light and other items. The included documentation is quite good. The diagram card shows proper operation graphically on one small sheet. The other side of this sheet explains the safety lock. This card should be the standard for all flashlight makers, with clear instructions condensed to one small card. There is a second booklet with more detail and specifications, but the small card is all you need to get going. All documentation is in English.
The holster is set up nicely for carry, with one loop stitched and one loop able to open via a combination snap and Velcro pad. This allows the option for removal from a belt or backpack or a more secure attachment to a belt. The opening loop will work with molle webbing on a backpack, but it is not full molle strap length to weave through multiple loops.
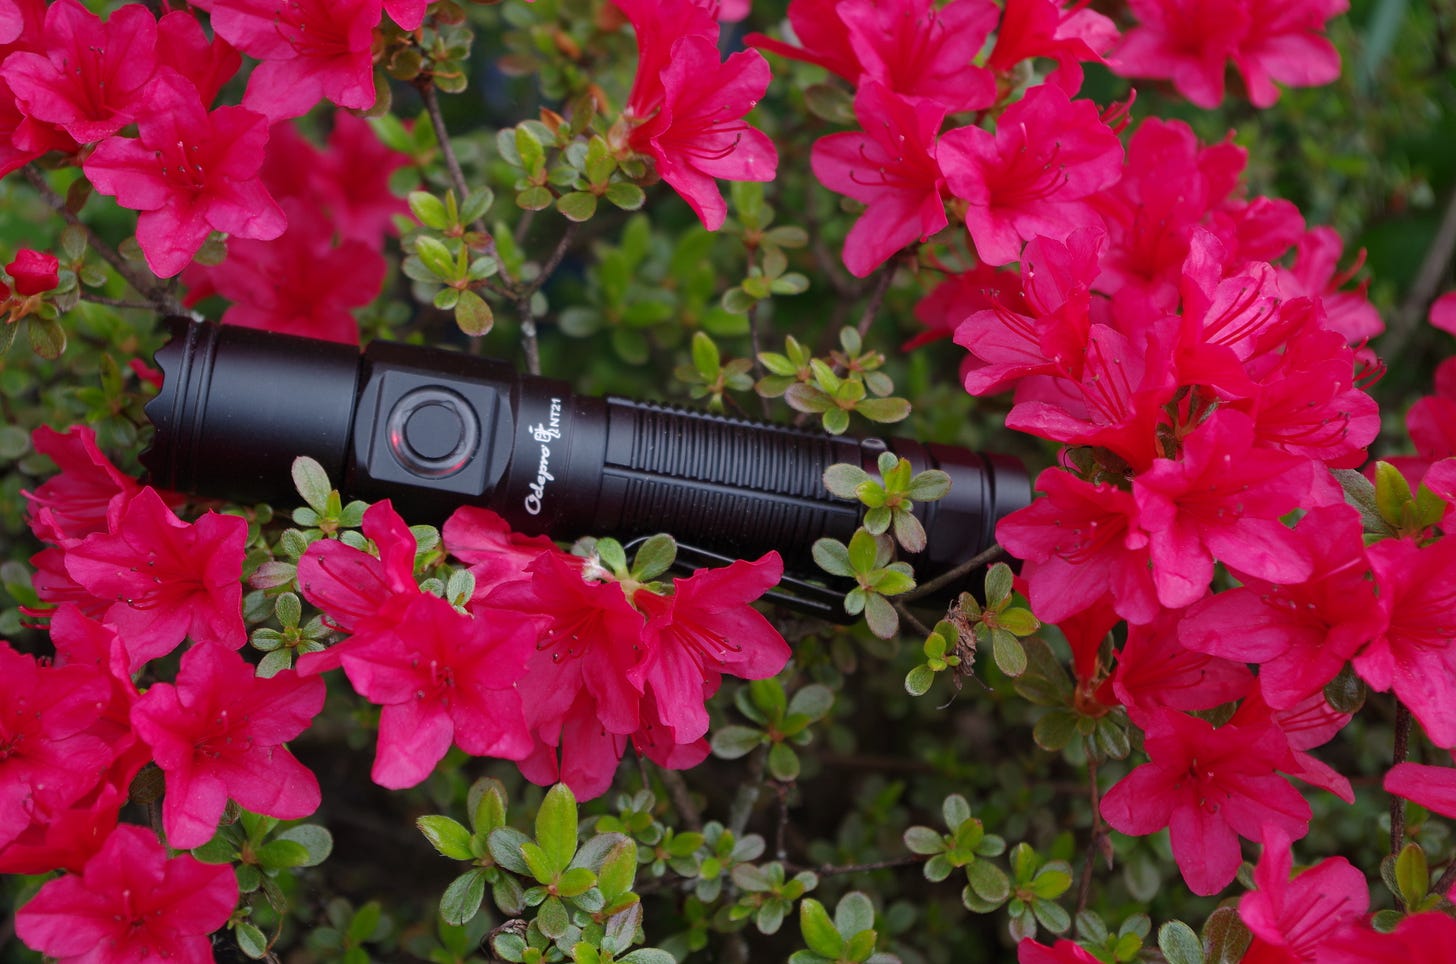
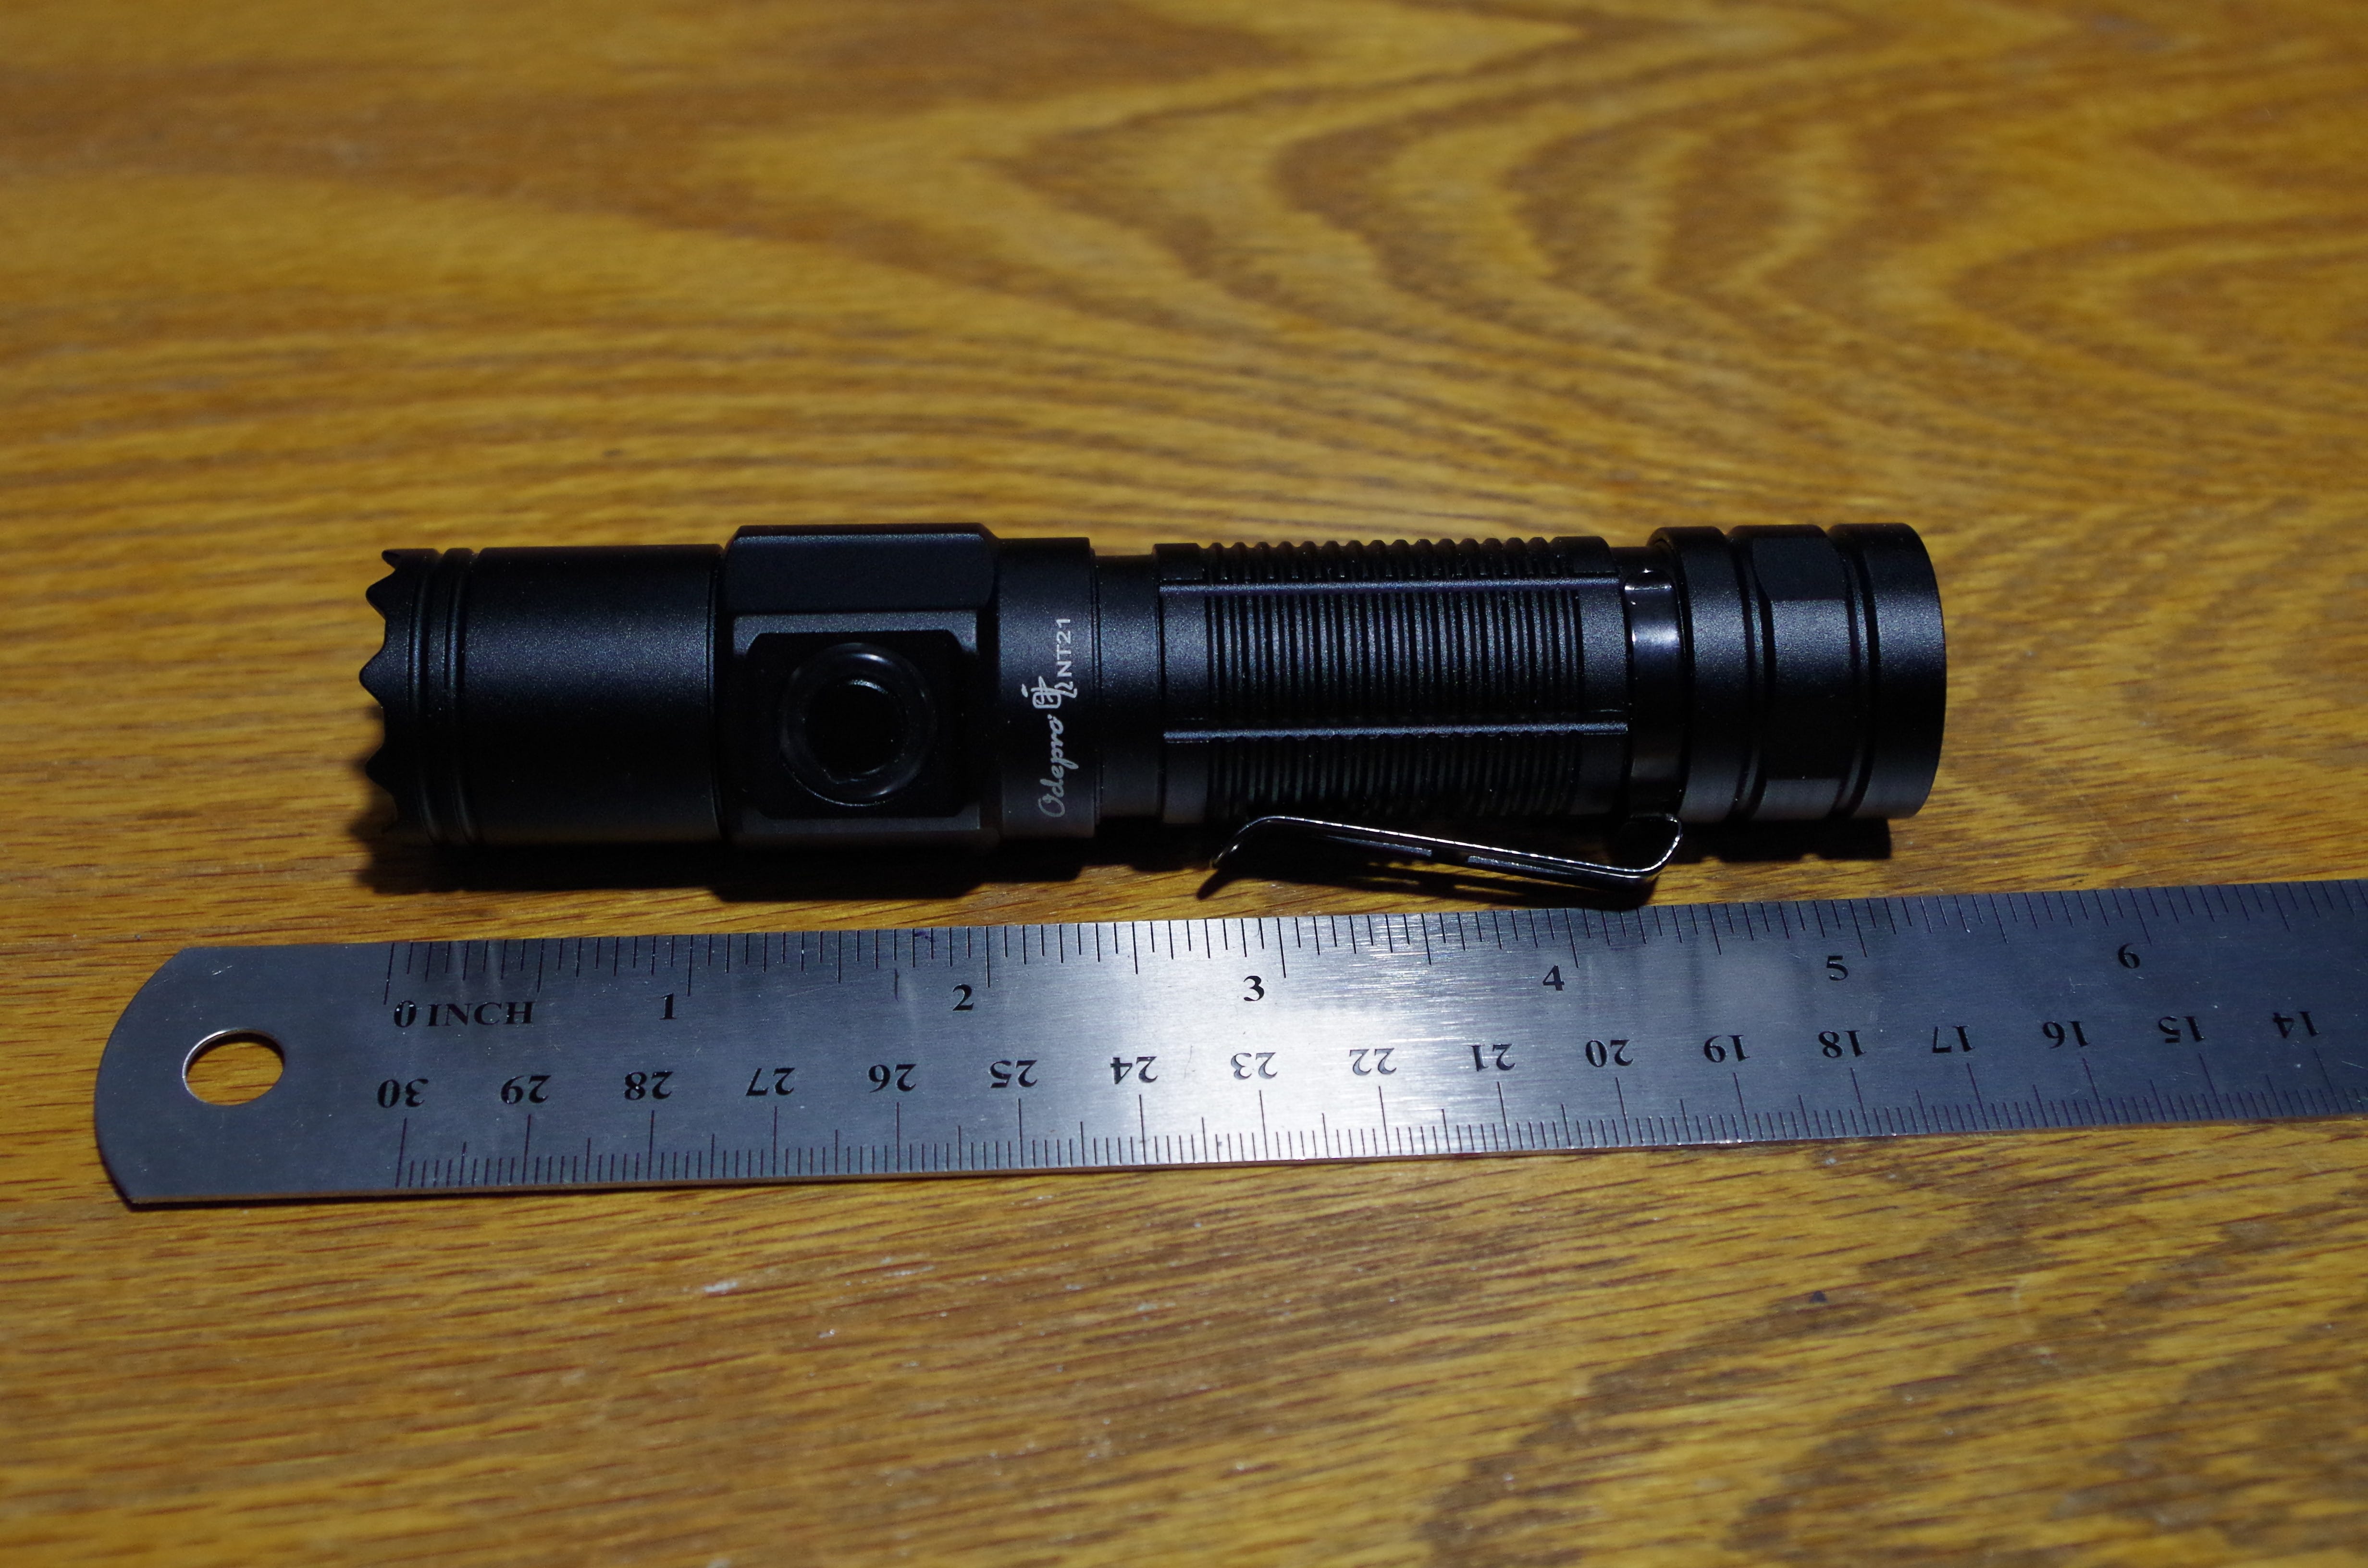
The Light
If you have used 18650 powered lights before you will be familiar with the size and shape of this light. It is a little longer and heavier than some other lights, which is explained by the rugged build and the crenulations on the bezel. I would not call the bezel sharp enough to be a dangerous weapon. The crenulations do allow you to see if the light is on when it is placed on the table lens down. The clip is springy and holds well to pockets without being too stiff.

The lens is glass and appears to be AR coated. When viewed from an off-angle the purple tint of the coating is visible.
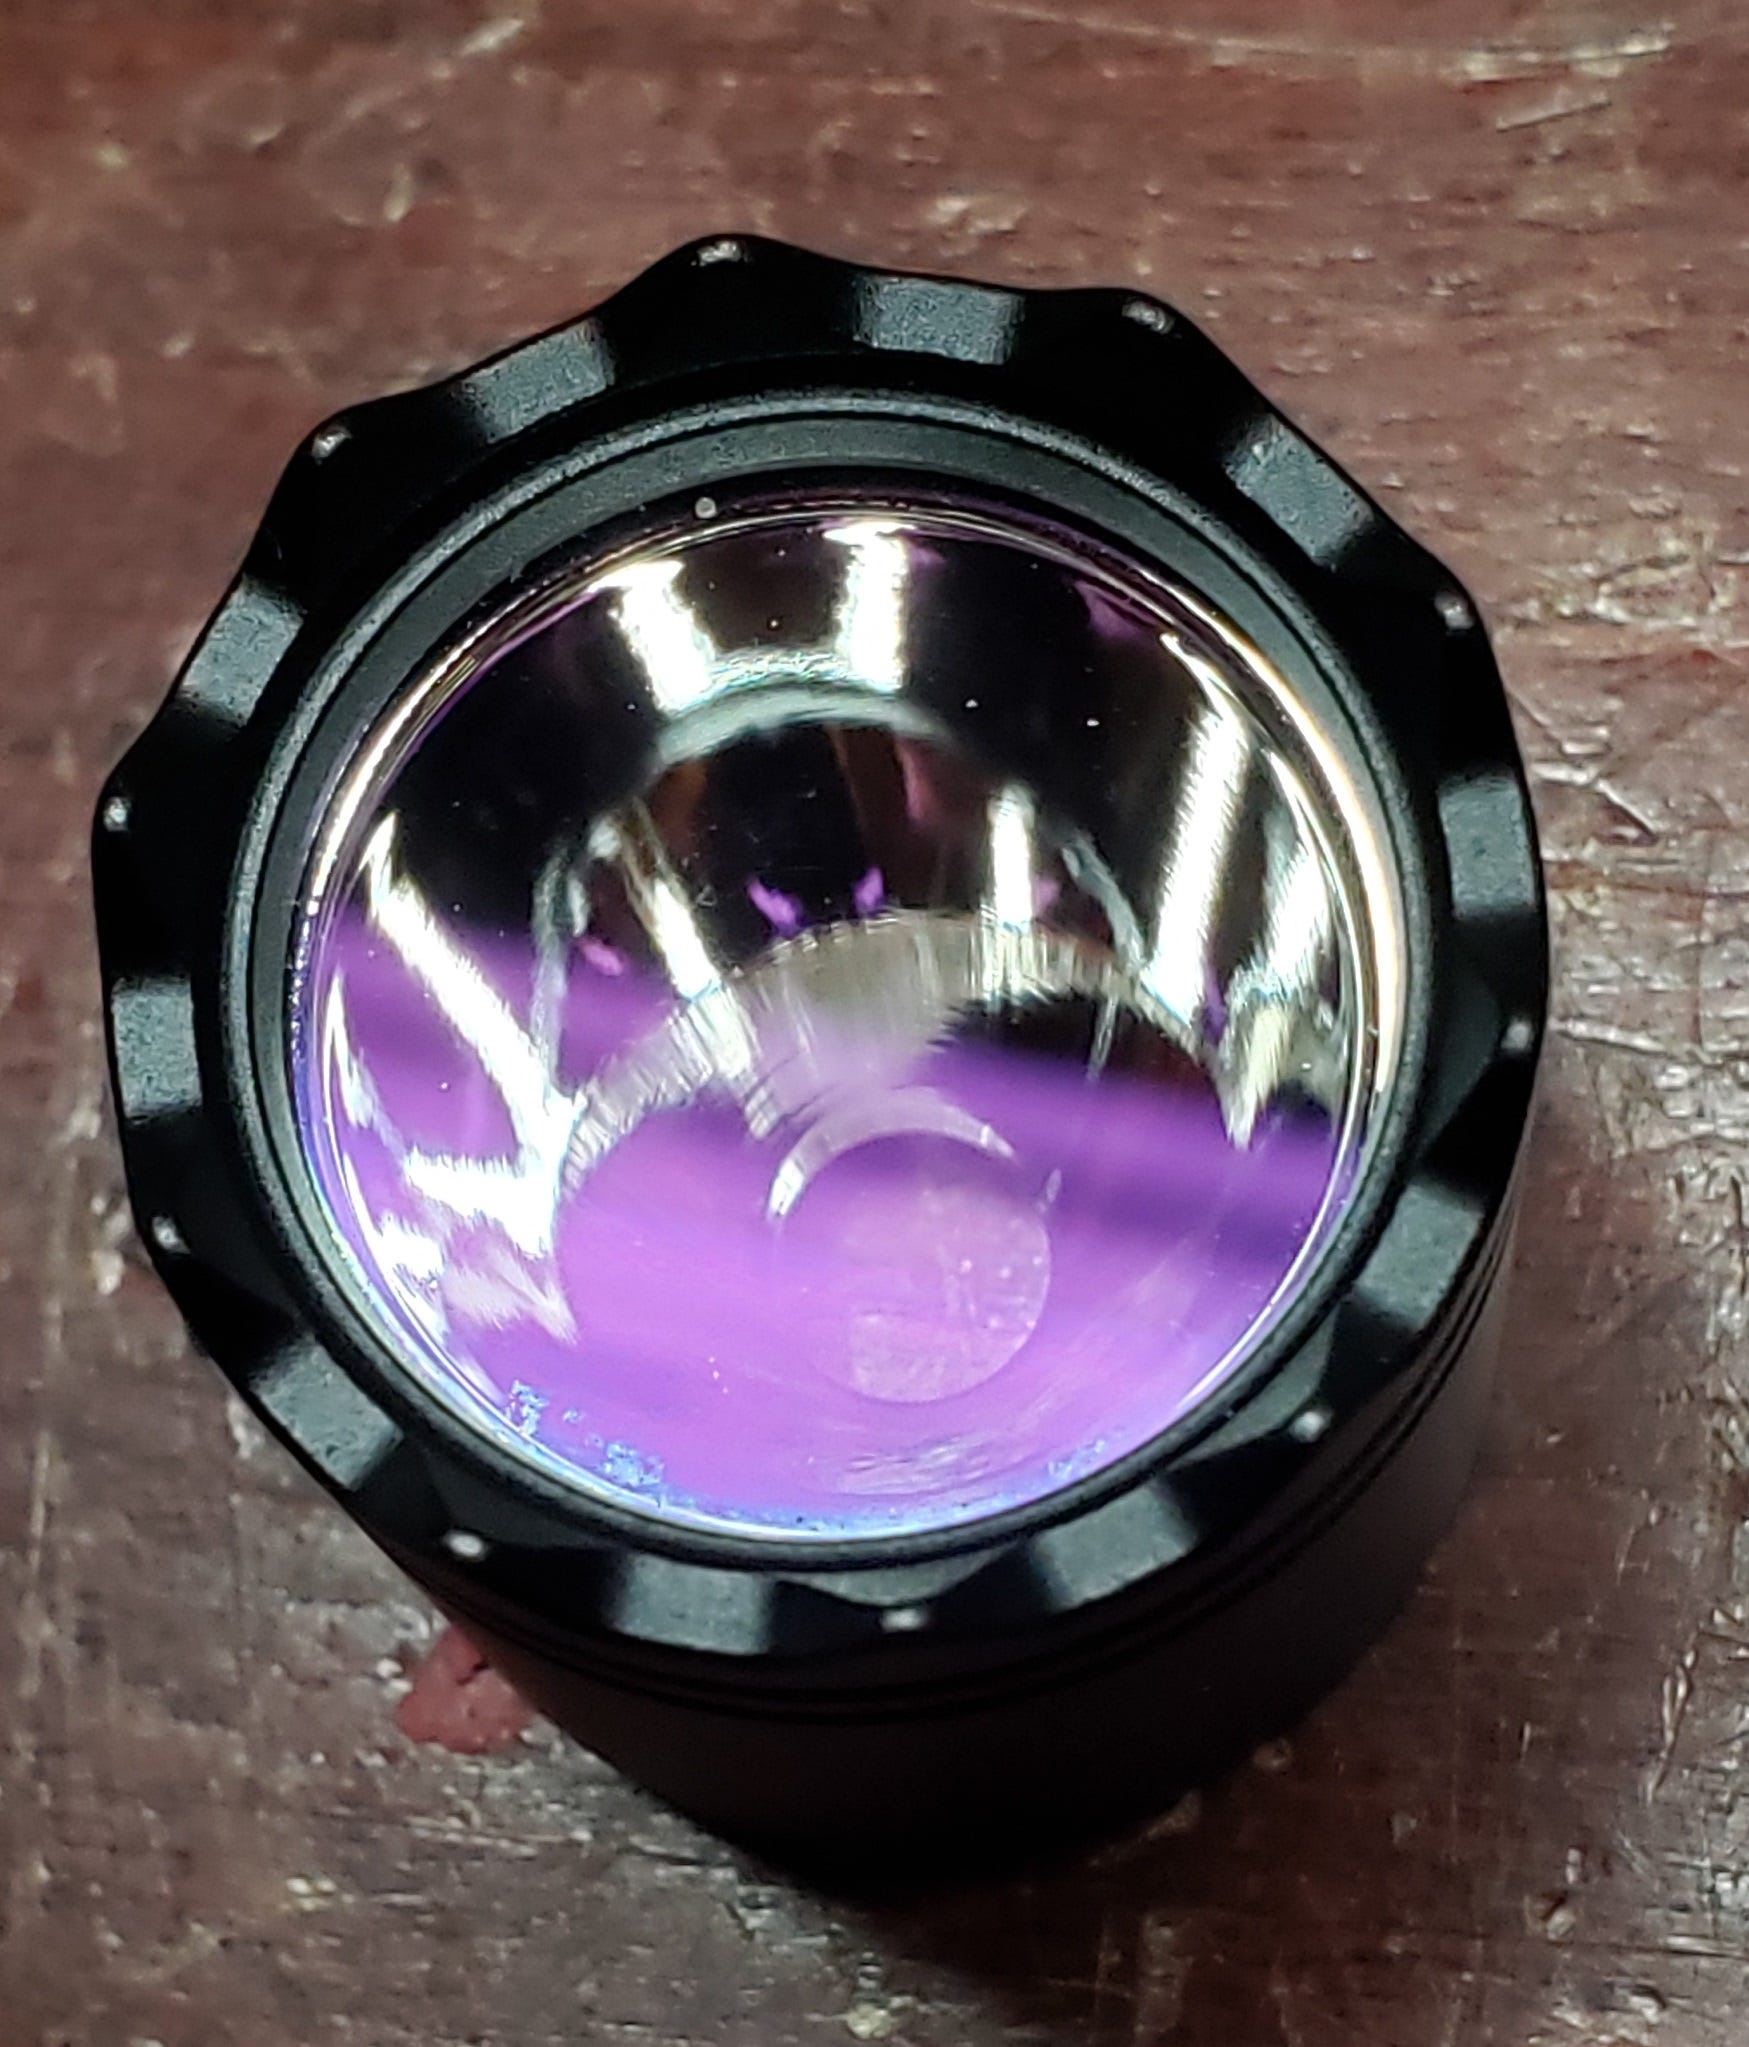
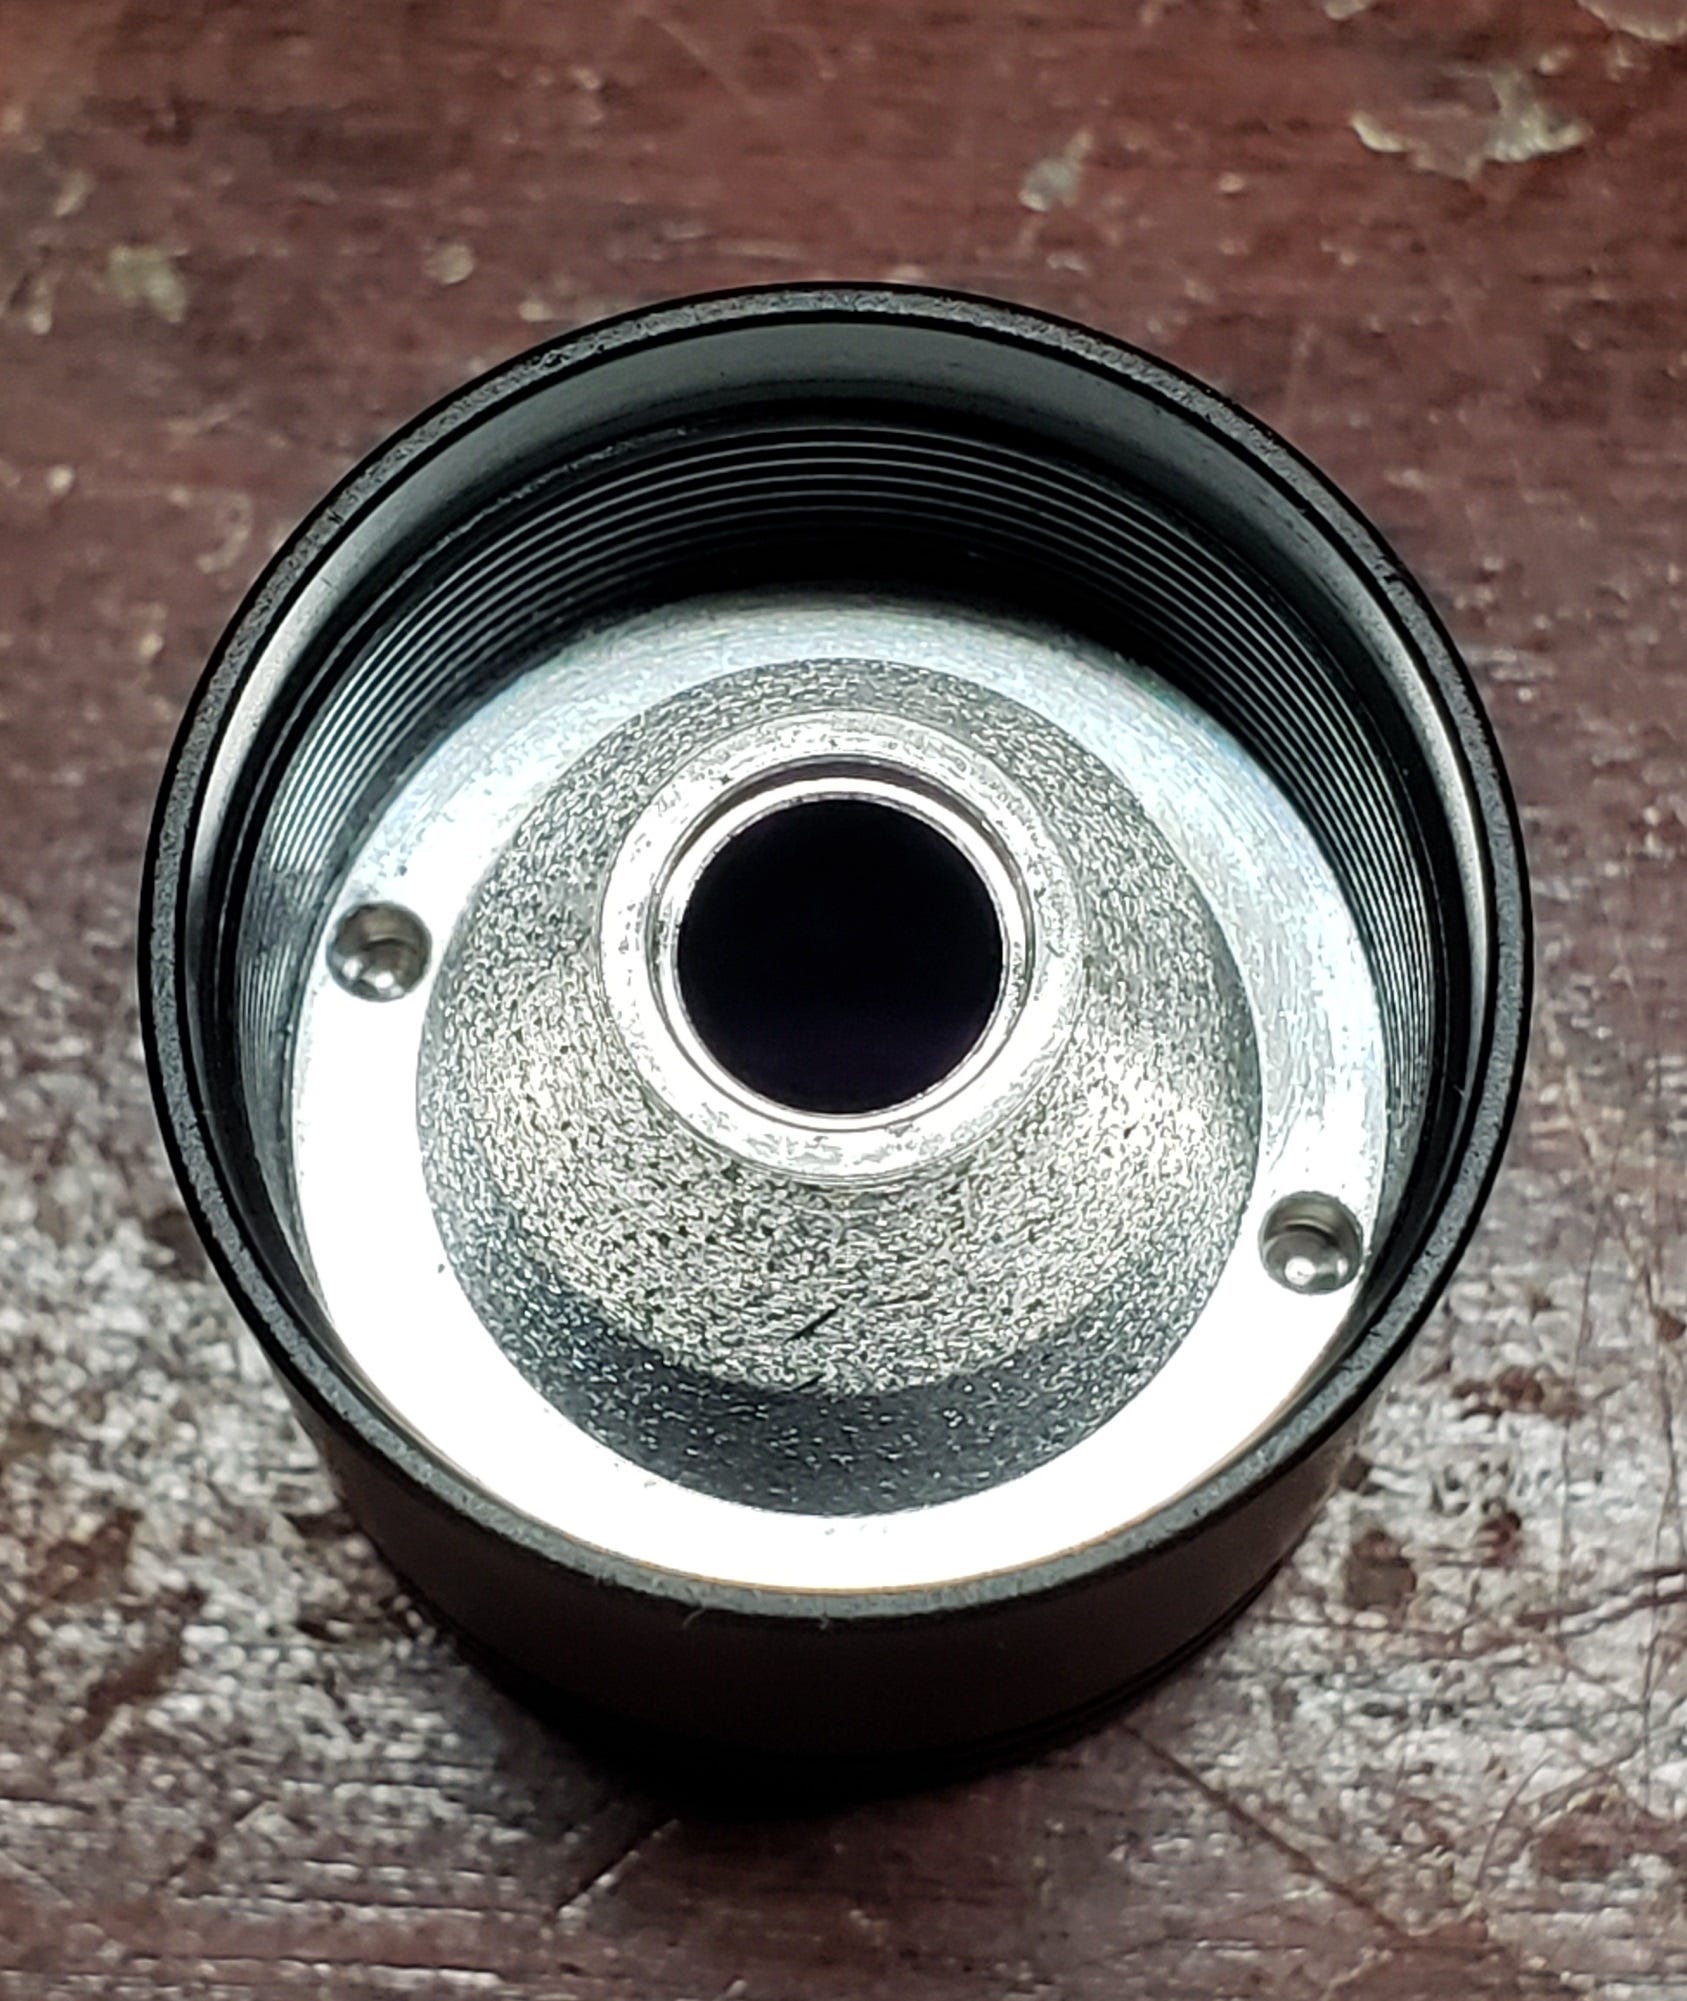
The deep reflector is smooth polished aluminum and screws into the head.
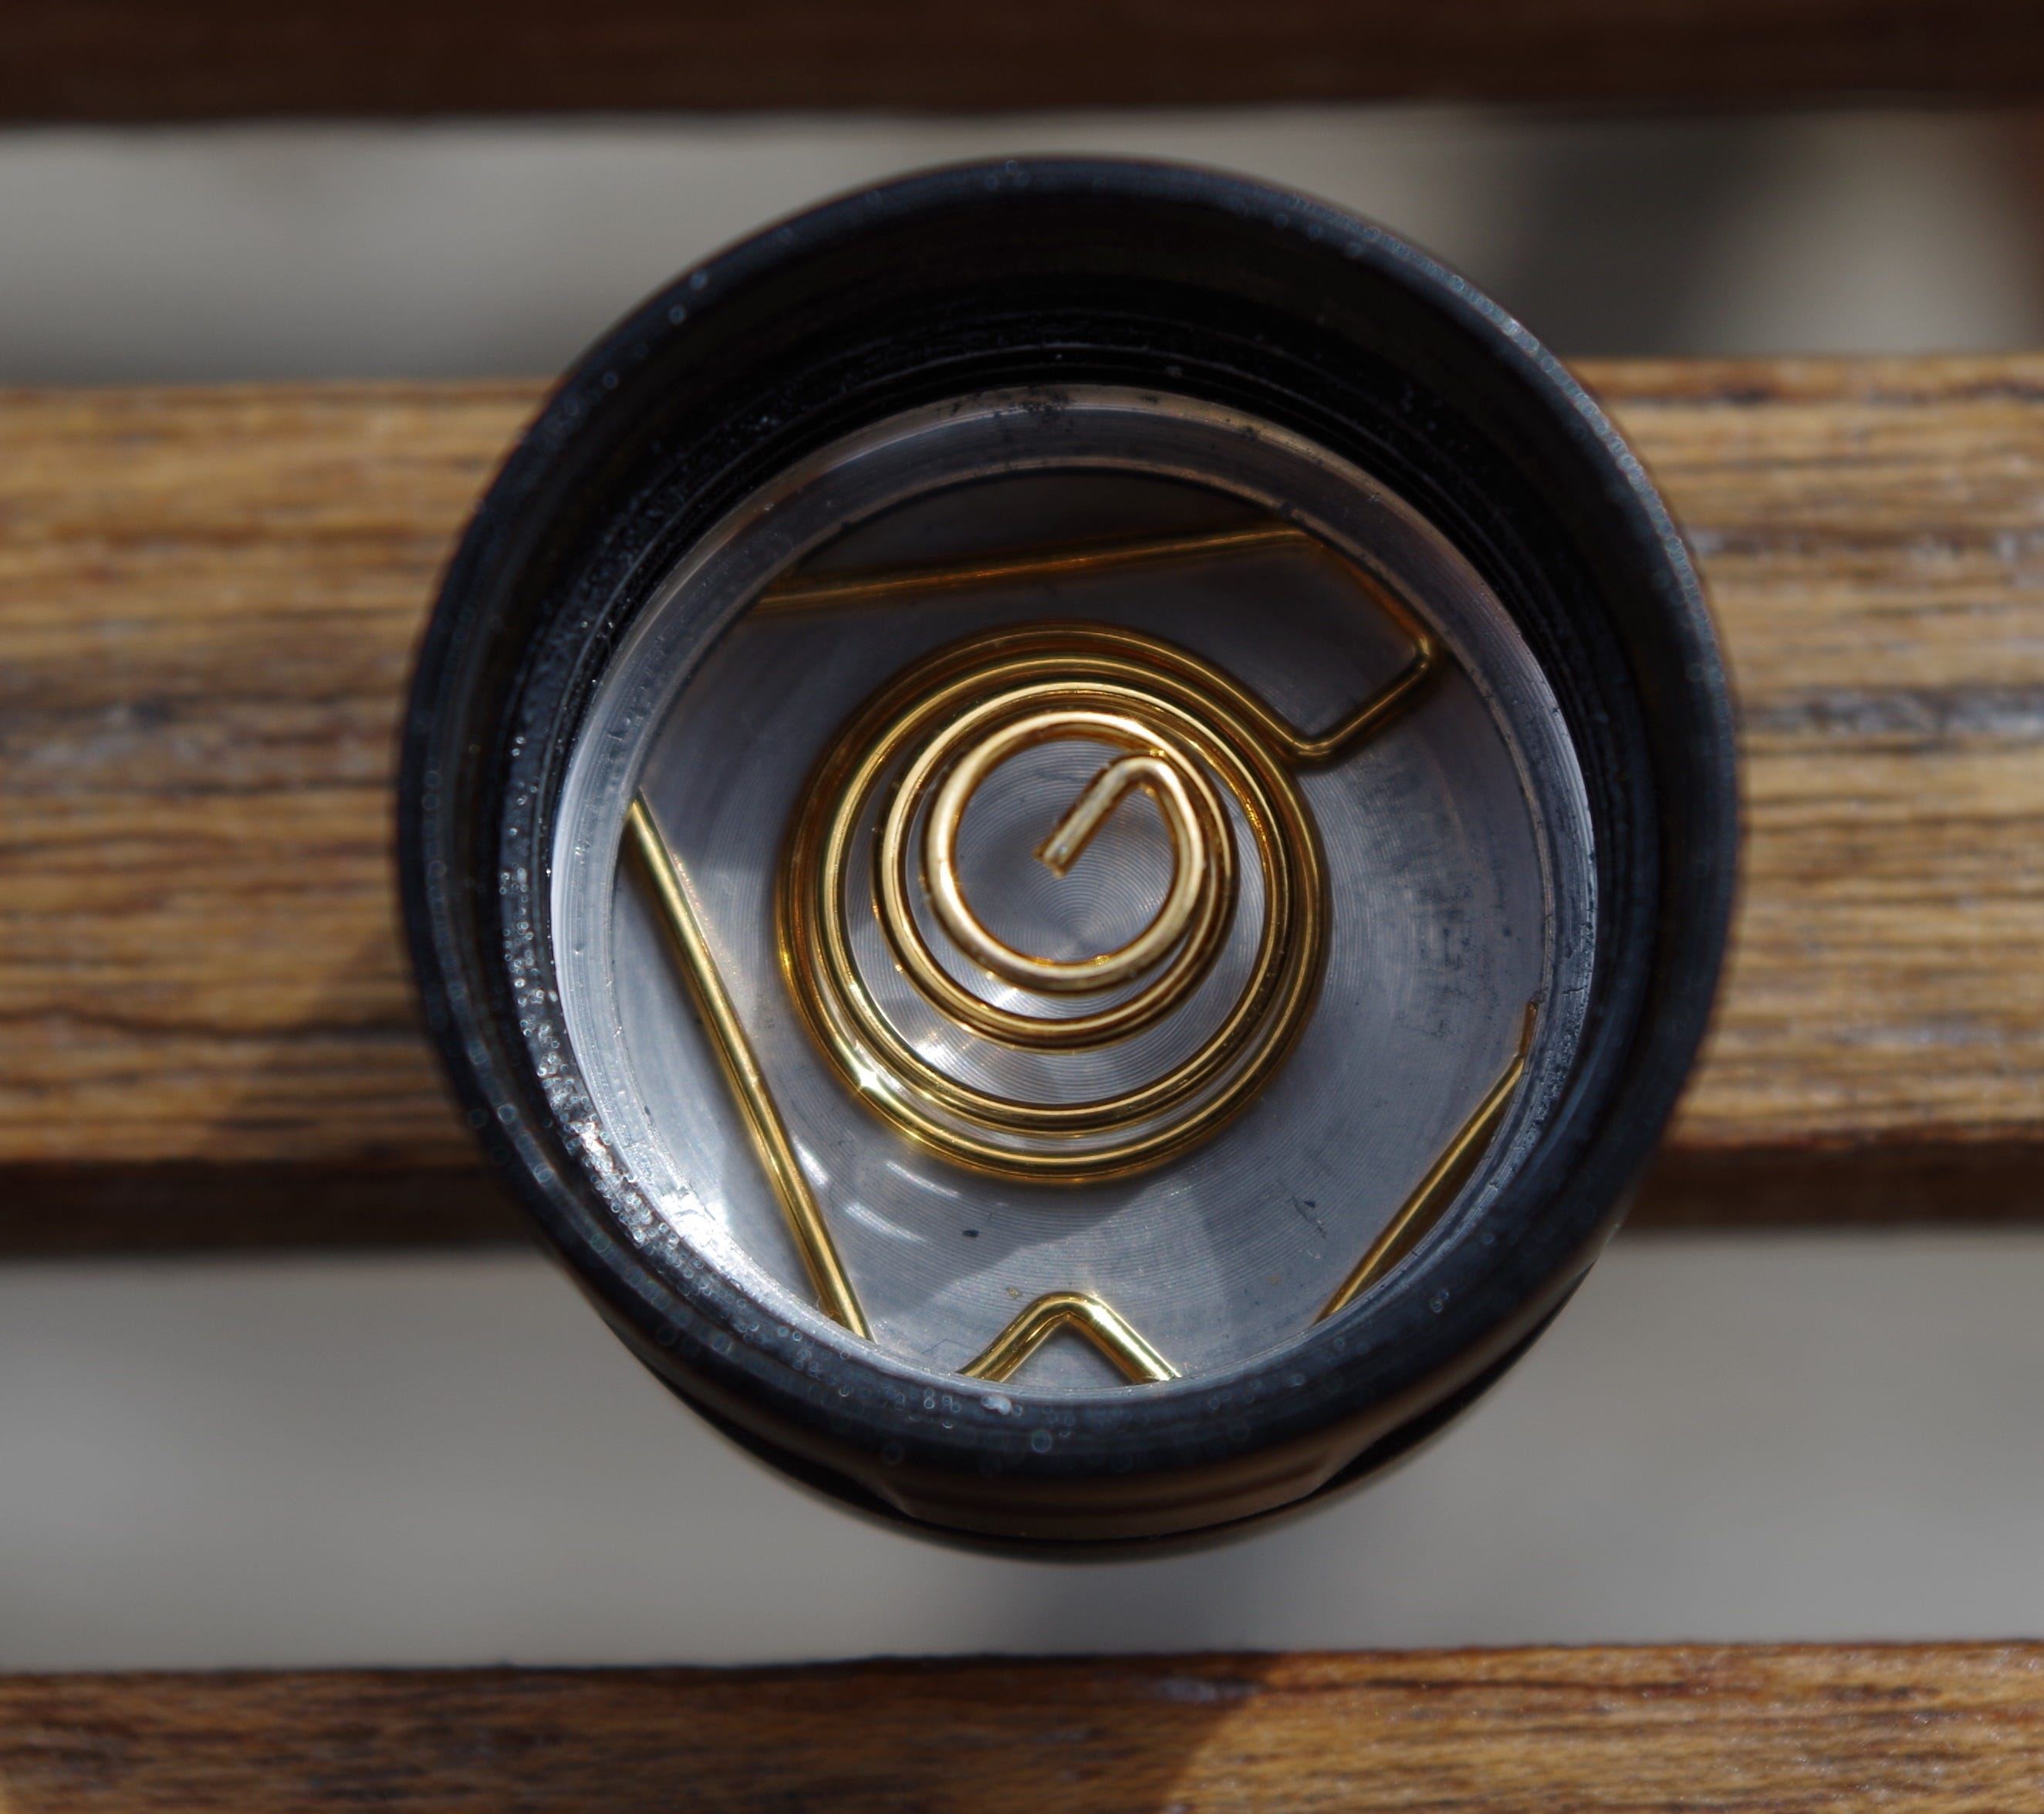
The light uses springs at both ends, with the tail cap spring held in by tension. Since there is no tail switch there is no need for a circuit board or other parts in the tail. Button or flat top, protected or unprotected, every 18650 I tried worked in this light.
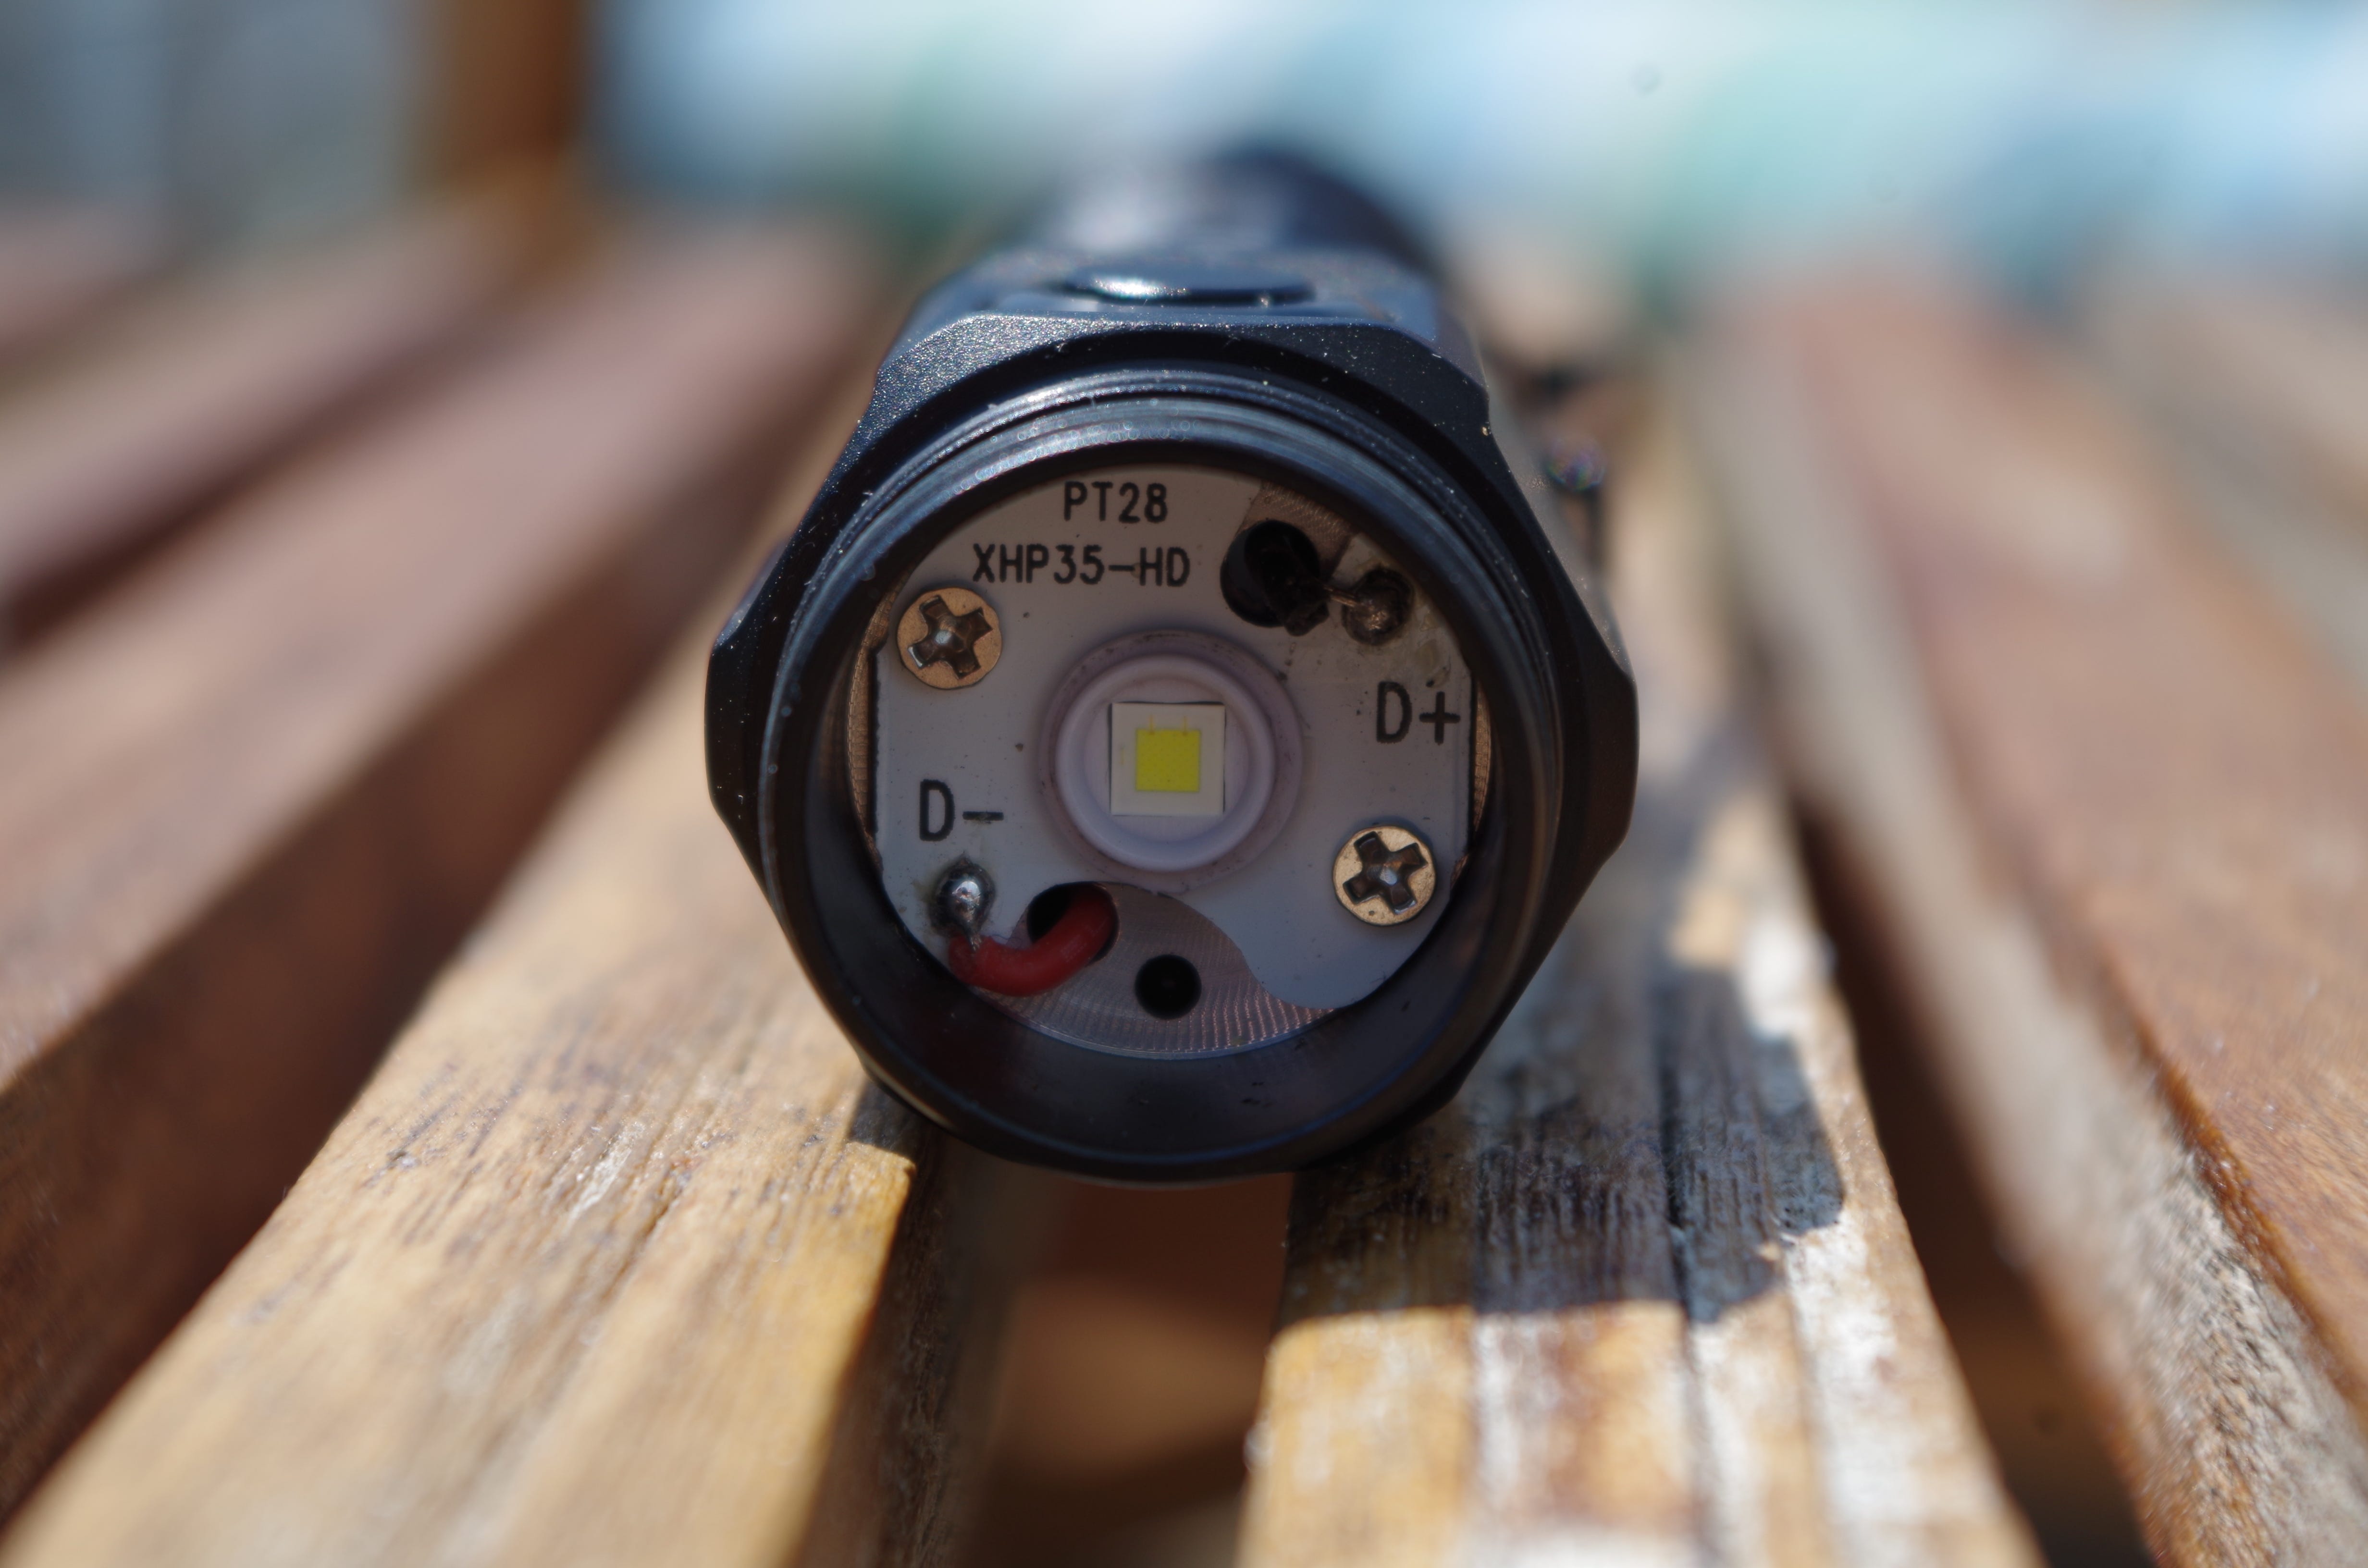
The emitter is clean and centered in the reflector.
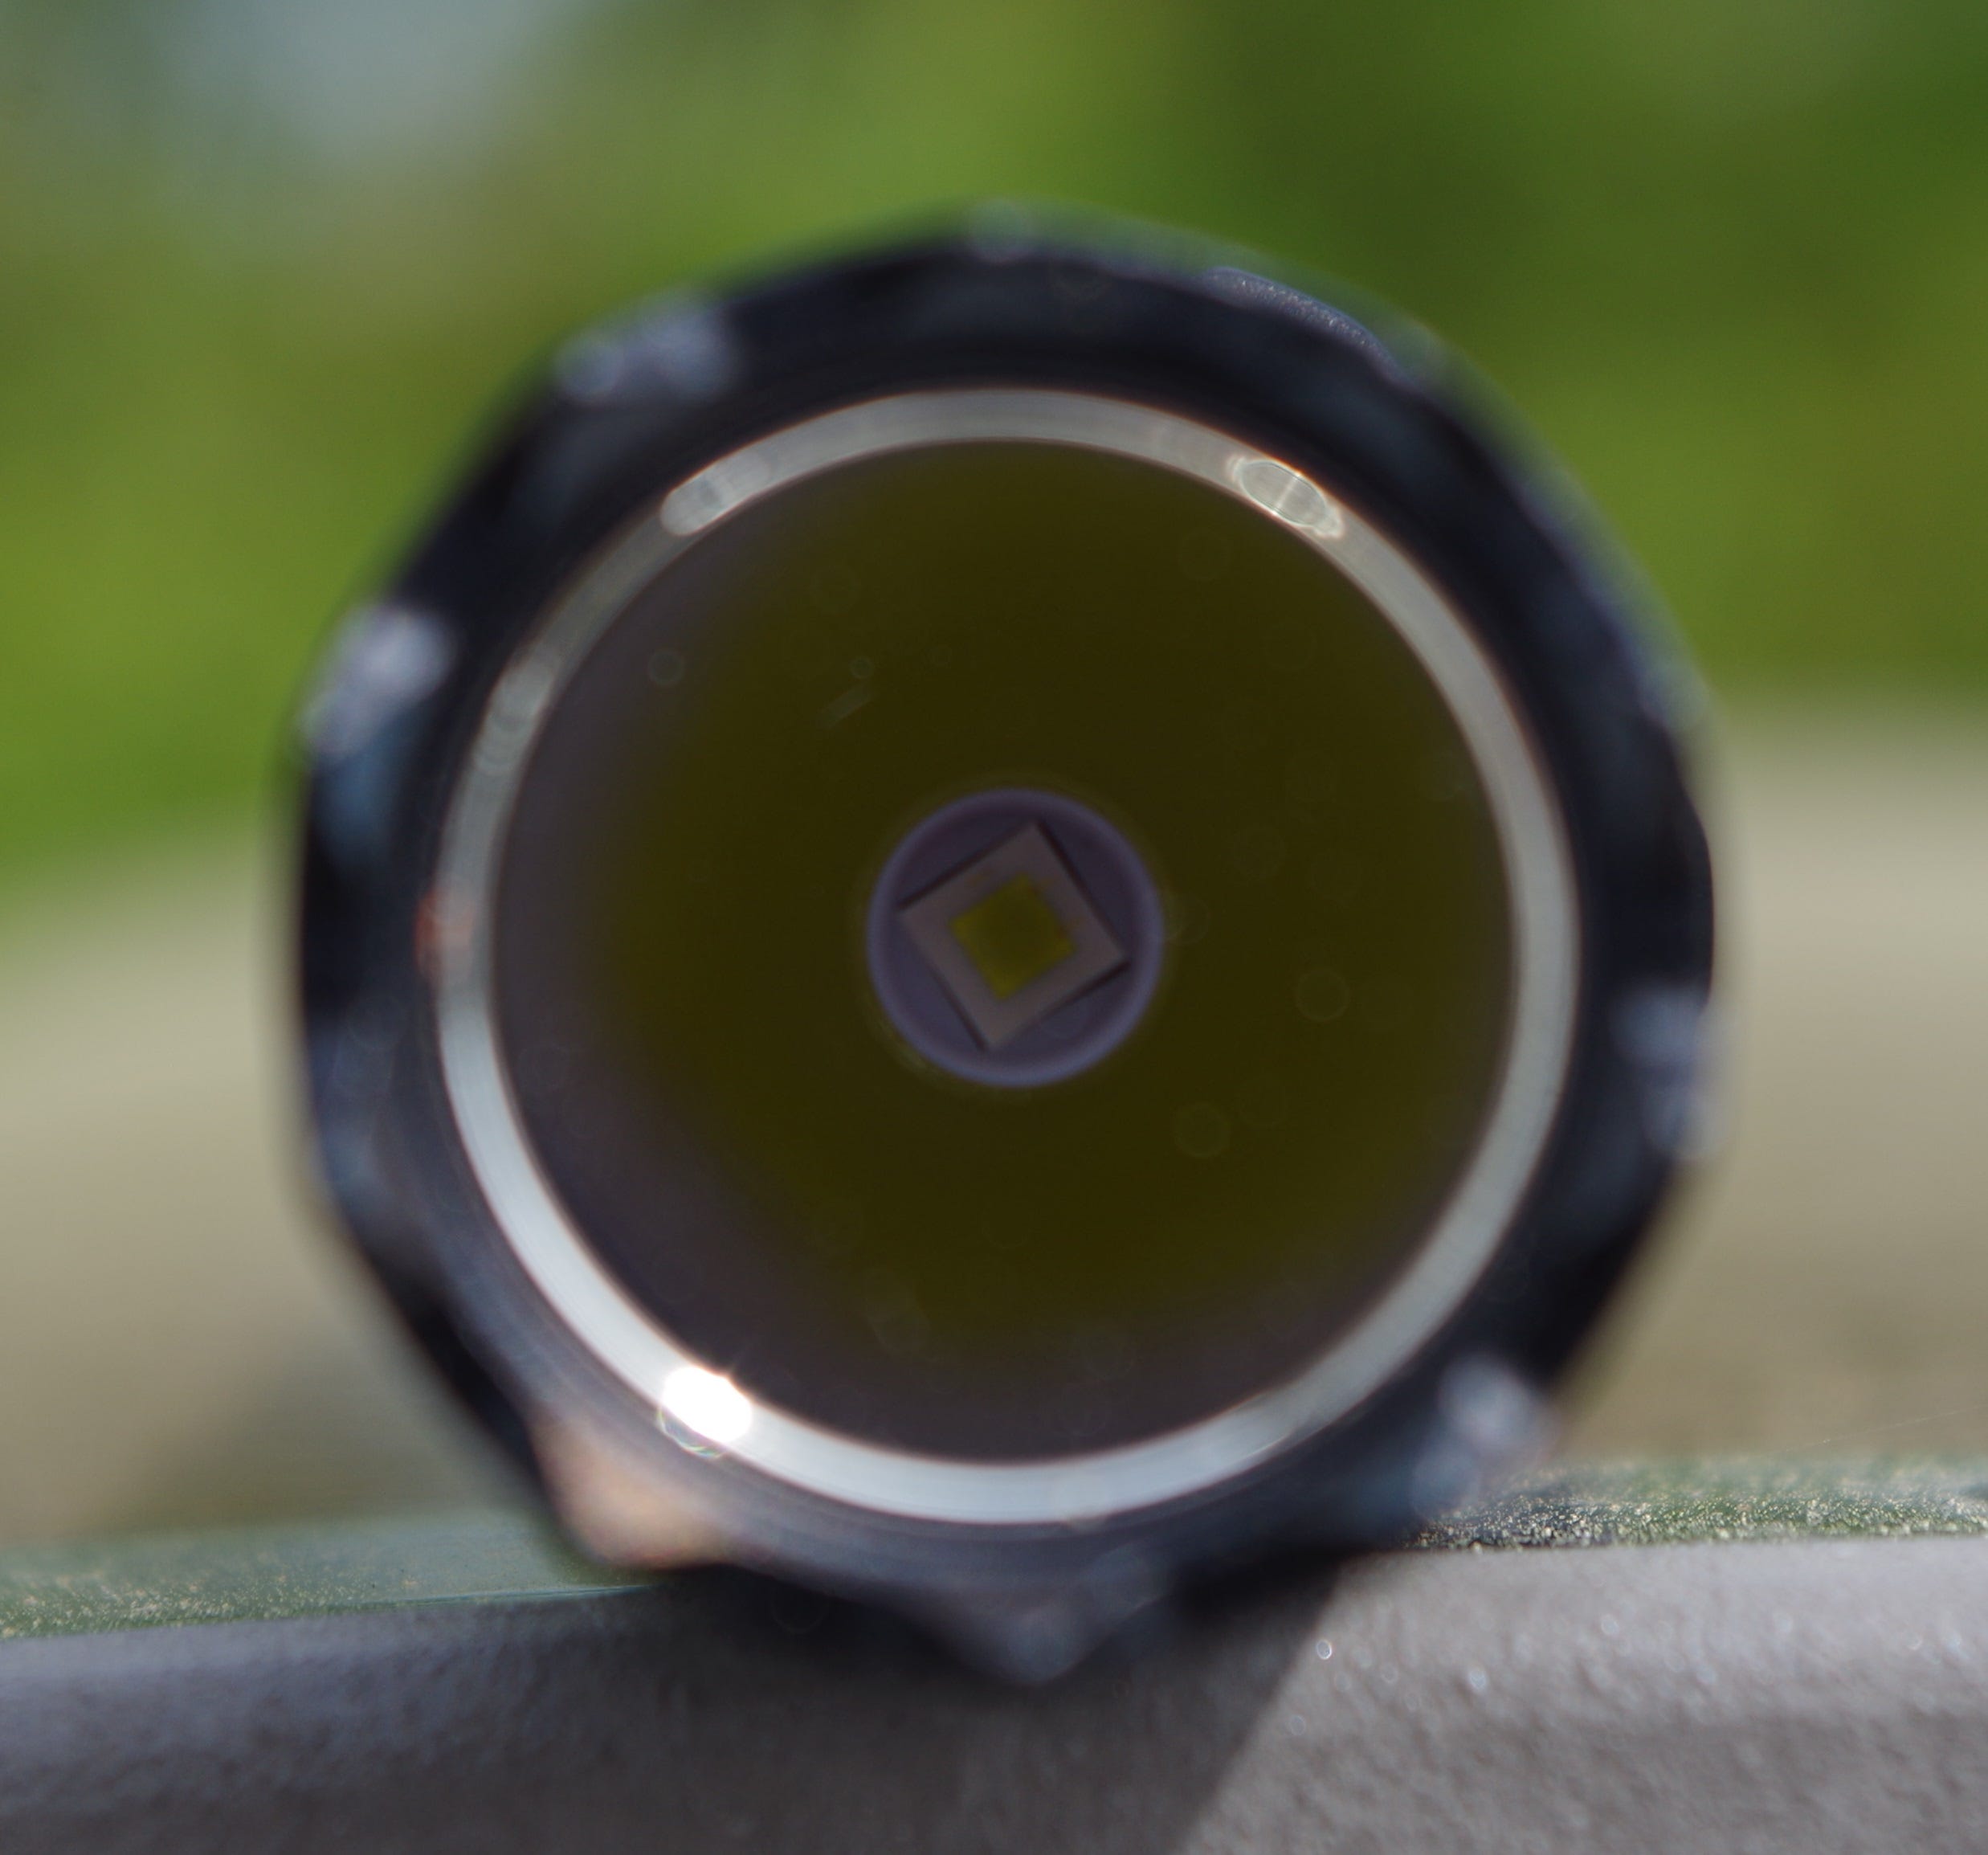
The LED mounting board is held in by two screws so it stays in place even with the lens and reflector removed. Note that the XP-L HI (for High Intensity) LED is flat, not domed. This provides from the factory the “de-doming” that enthusiasts have done to increase the throw of other LEDs. The XP-L HI achieves this without the tint shift seen on DIY de-doming modifications.
User Interface
Operation is simple using the supplied diagram. The light turns on in turbo, then cycles to low, medium, high, and turbo. There is mode memory, so turning the light off at low will make it restart at low – but only for 3 minutes of inactivity. After 3 minutes, the indicator light turns red and the NT21 enters locked mode. When locked, press and hold the switch until the light comes on at the turbo level. The strobe is accessed via a double click.

A 2-sided instruction document provides specifications and more details.
Lab Testing
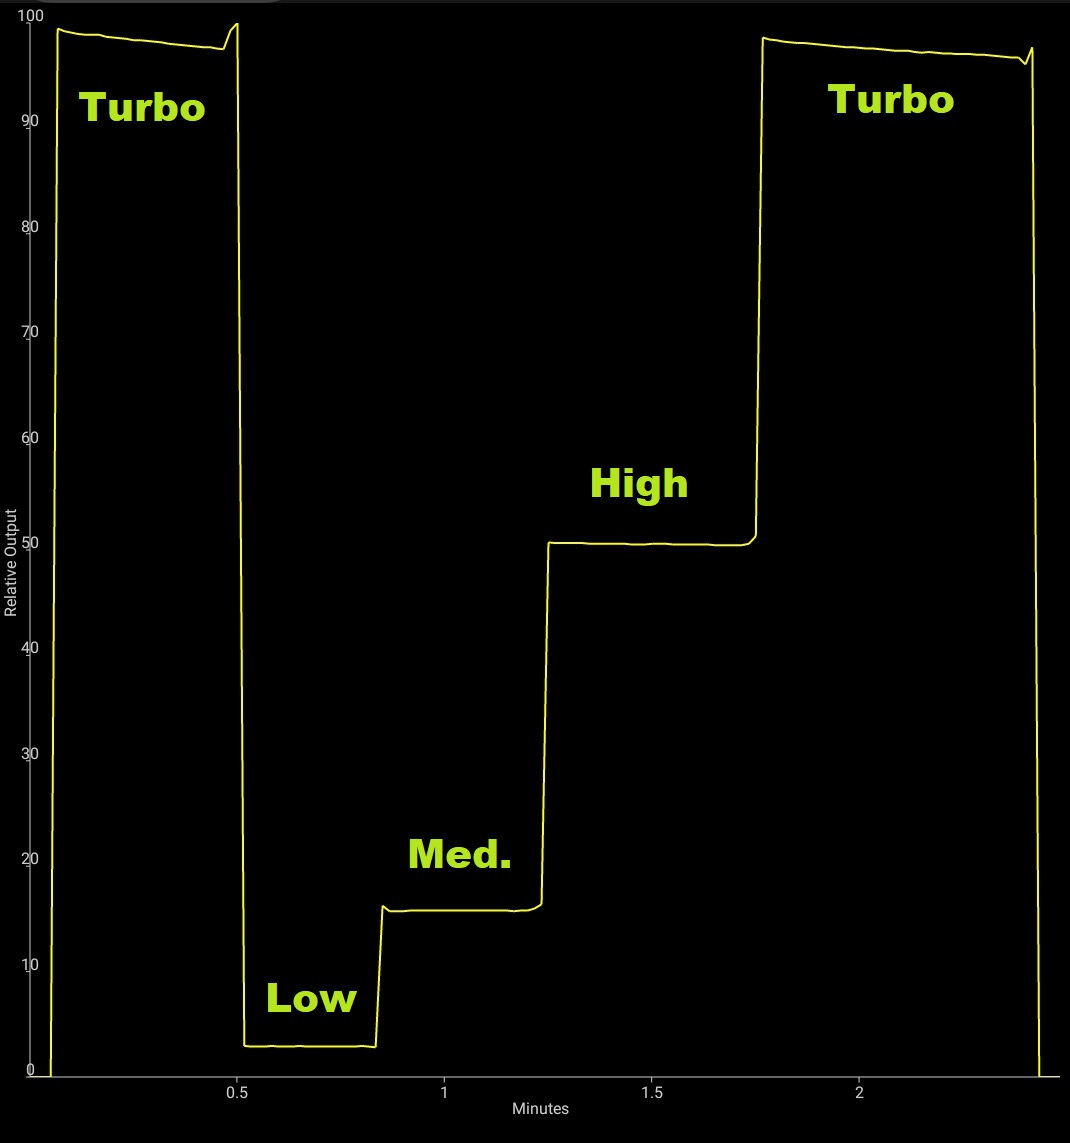
Using the Ceilingbounce app in my Samsung S9 phone, I tested the output of the light inside a white test chamber. This testing provides relative lumen levels along with runtime. The first test shows the different levels for the NT21 using the provided 18650
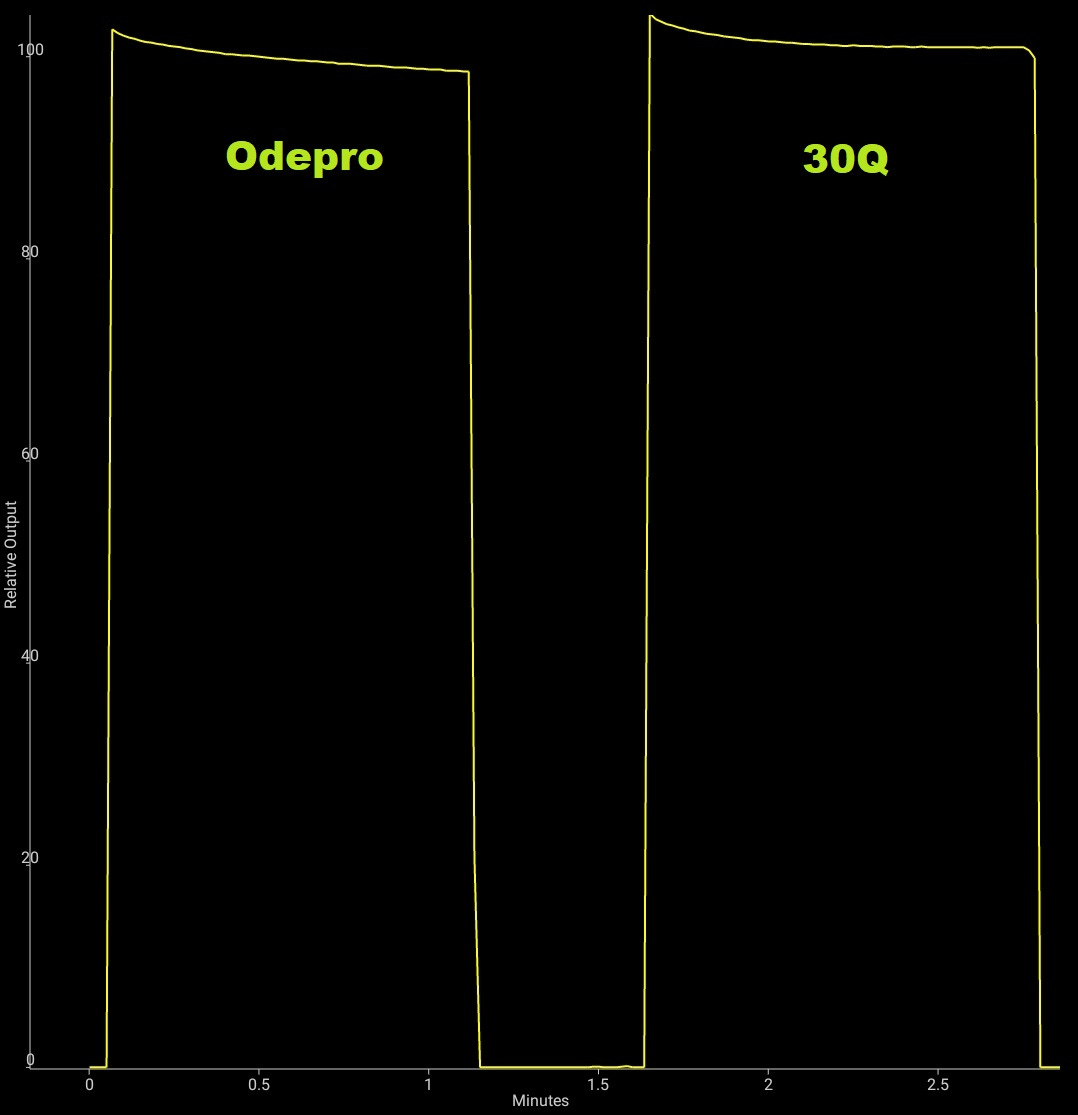
Next, I tested the output on turbo using the Odepro 18650 as well as a Samsung 30Q unprotected cell. There is little difference, showing the protected cell is not limiting the performance of the light.
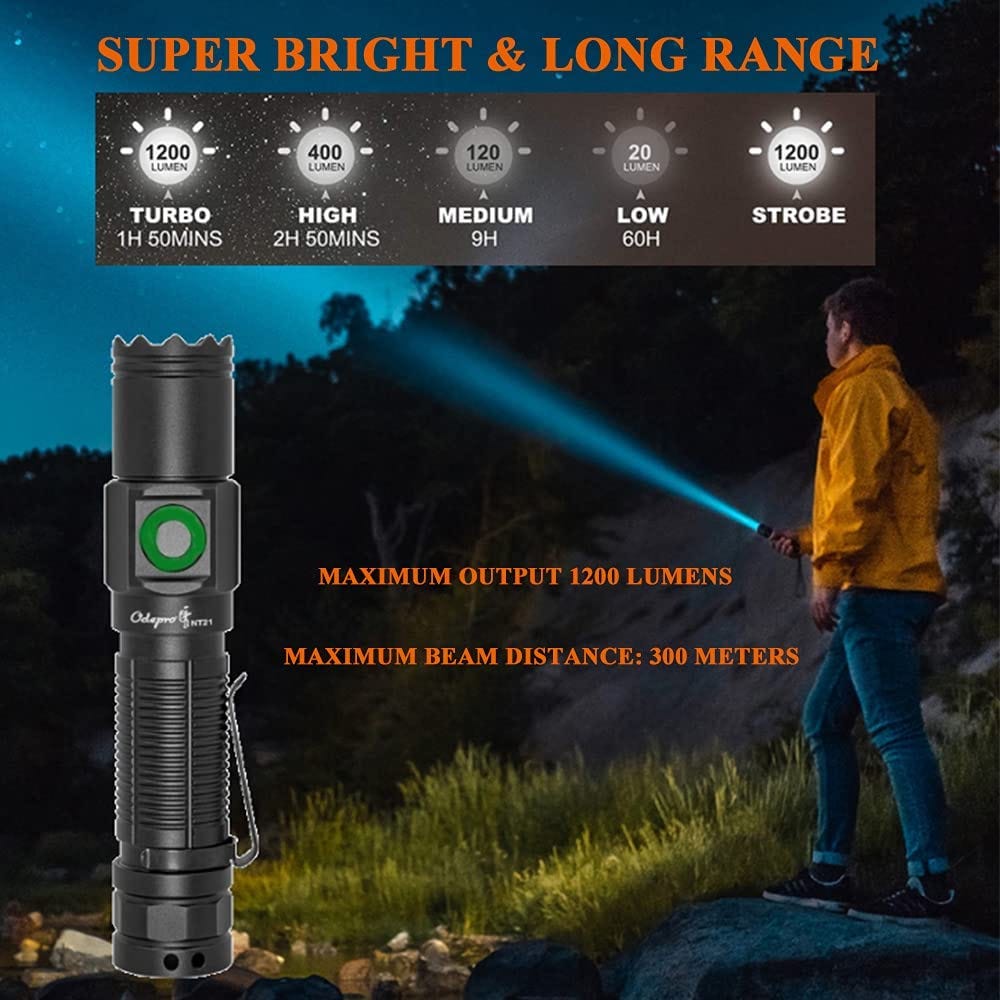
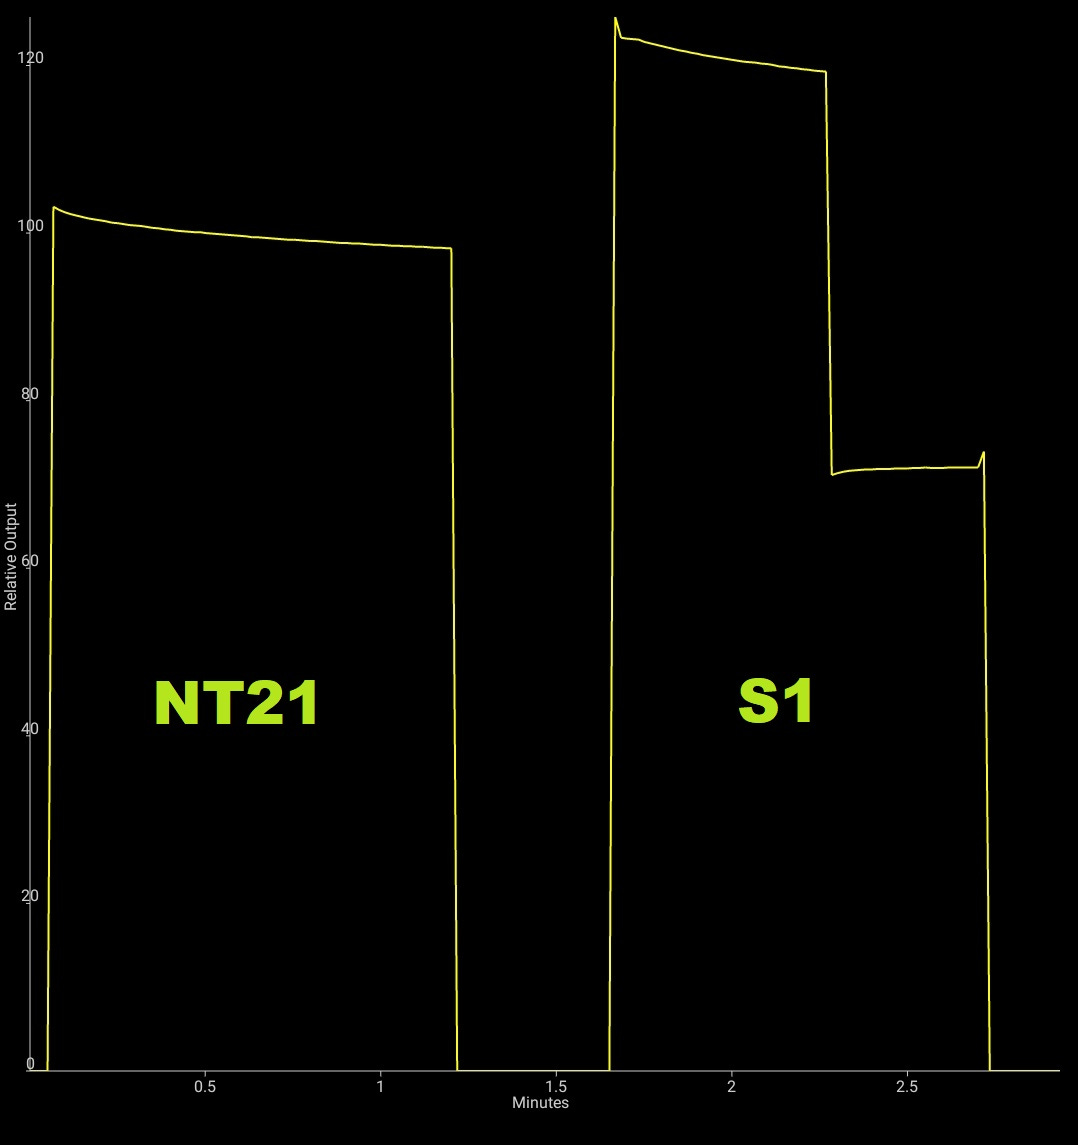
To check the lumen ratings, I compared the NT21 to an Astrolux S1, a light that has been around for a long time and is well documented. This light is rated as 1200 to 1400 lumens on turbo, and 800 lumens at the next step down. If we look at the ratios, assuming the S1’s stepdown is 800 lumens, the S1’s high level is over 1300 lumens and the NT21 comes in around 1150. This is certainly within the margin of error of my measurements against the NT21’s 1200 lumen rating.
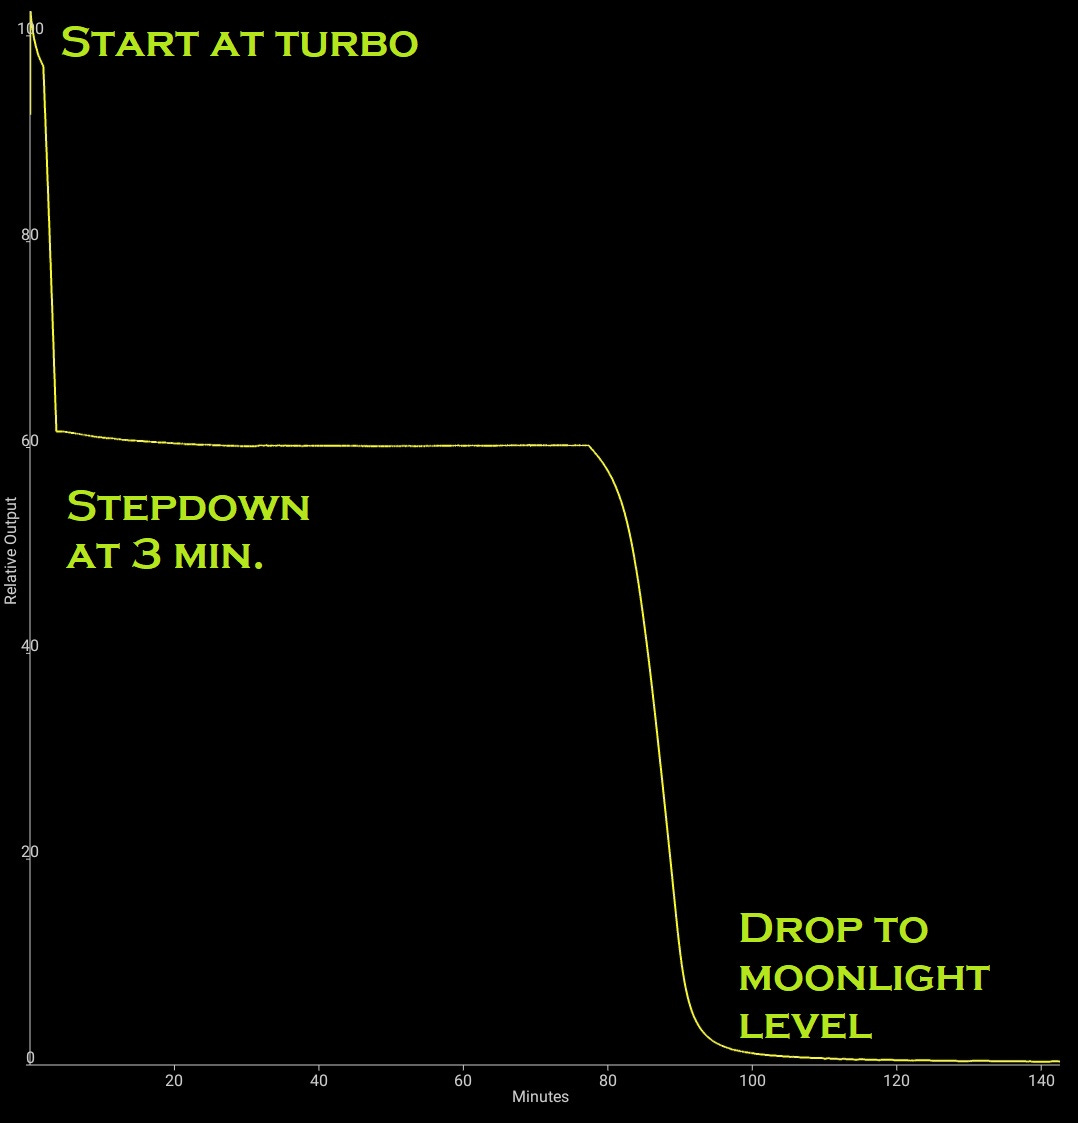
Runtime testing shows the light remains on turbo for 3 minutes, and then steps down. It remains on this level until near the end of the battery’s charge, dropping to below the low level at the end. This final level is like the moonlight setting on other lights, still bright enough to carefully navigate in the dark. Of course, the status LEDs would have indicated low charge before reaching this point. I would not expect to be caught by surprise with a dead battery in the NT21.
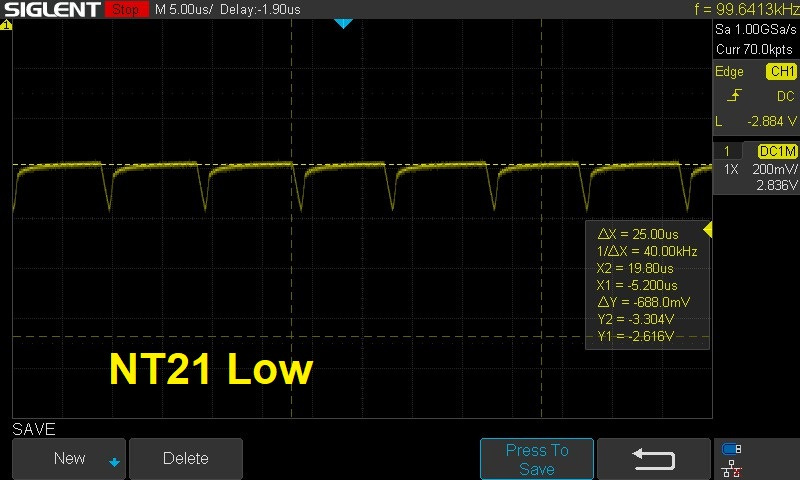
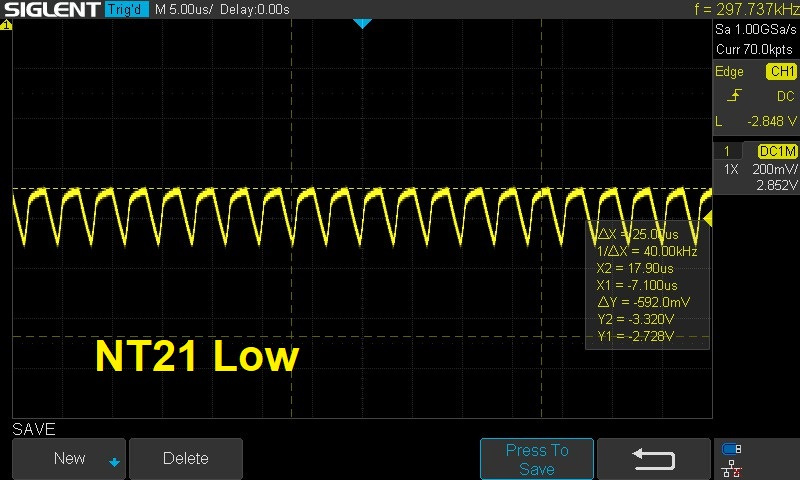
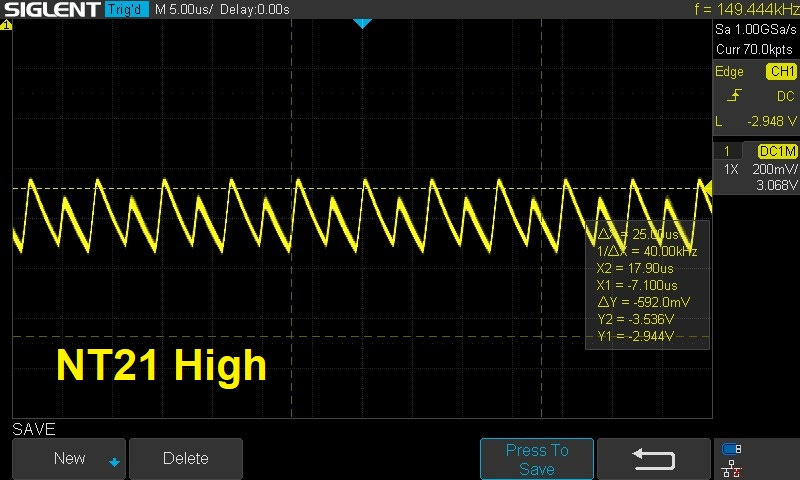
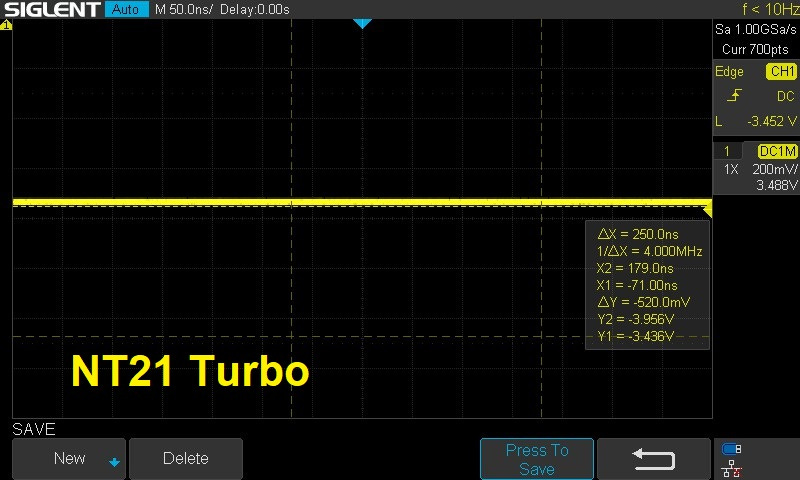
With the head removed I was able to attach oscilloscope probes to the wiring at the LED board. This shows the drive for each level, with the turbo reading DC to the LED. On the lower levels the switching frequency is shown, although the drive never turns the LED off as was done with older pulse width modulation (PWM) drive methods. There is no visible evidence of PWM when using the light. The Y1 indicator shows the voltage at the upper level of the drive signal for each test.
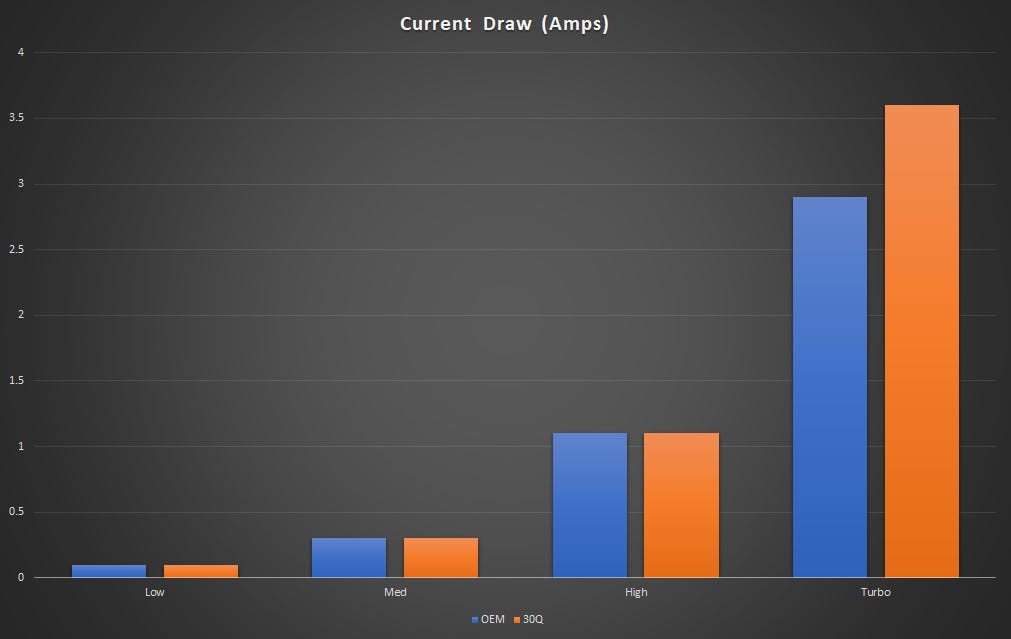
Finally, I tested the current draw from the battery at different light levels. The low level used my DMM test leads while the other levels used a short, large AWG wire jumper and a clamp on ammeter. This method avoids the measurement error from small diameter meter test leads at higher current levels. The graph shows the Odepro battery and the Samsung 30Q.
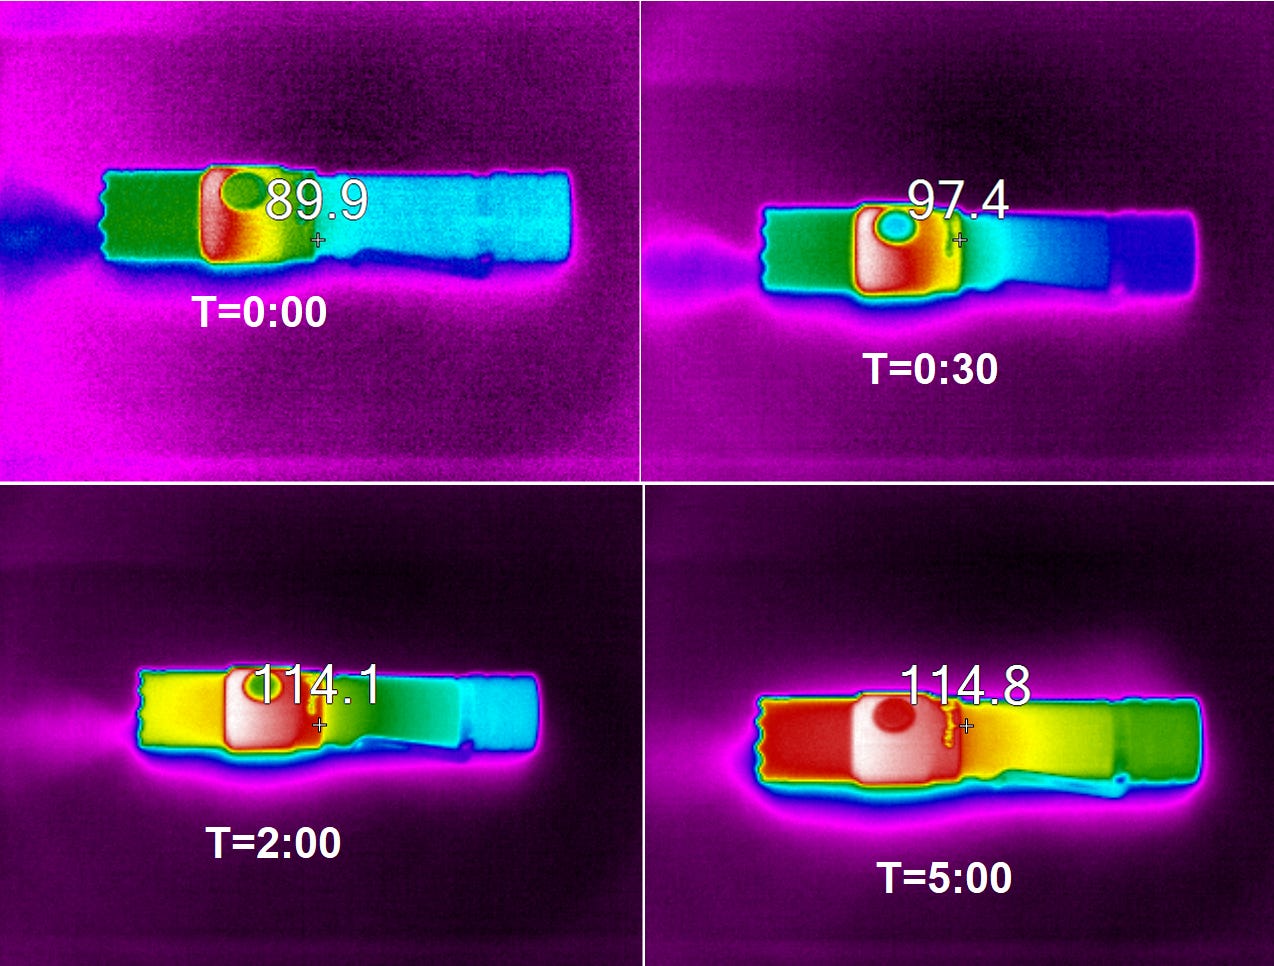
The 3-minute step-down from turbo is longer than on may lights I own. Even with the longer working time the light does not get too hot. This sequence of thermal images shows the temperature at the edge of the usual grip area on the light (indicated by the small cross). Running the test longer than 5 minutes did not result in higher temperatures. The highest temperature recorded on the test, in the area of the head, was 120F. Time (T) is indicated in M:SS on the images.
Batteries
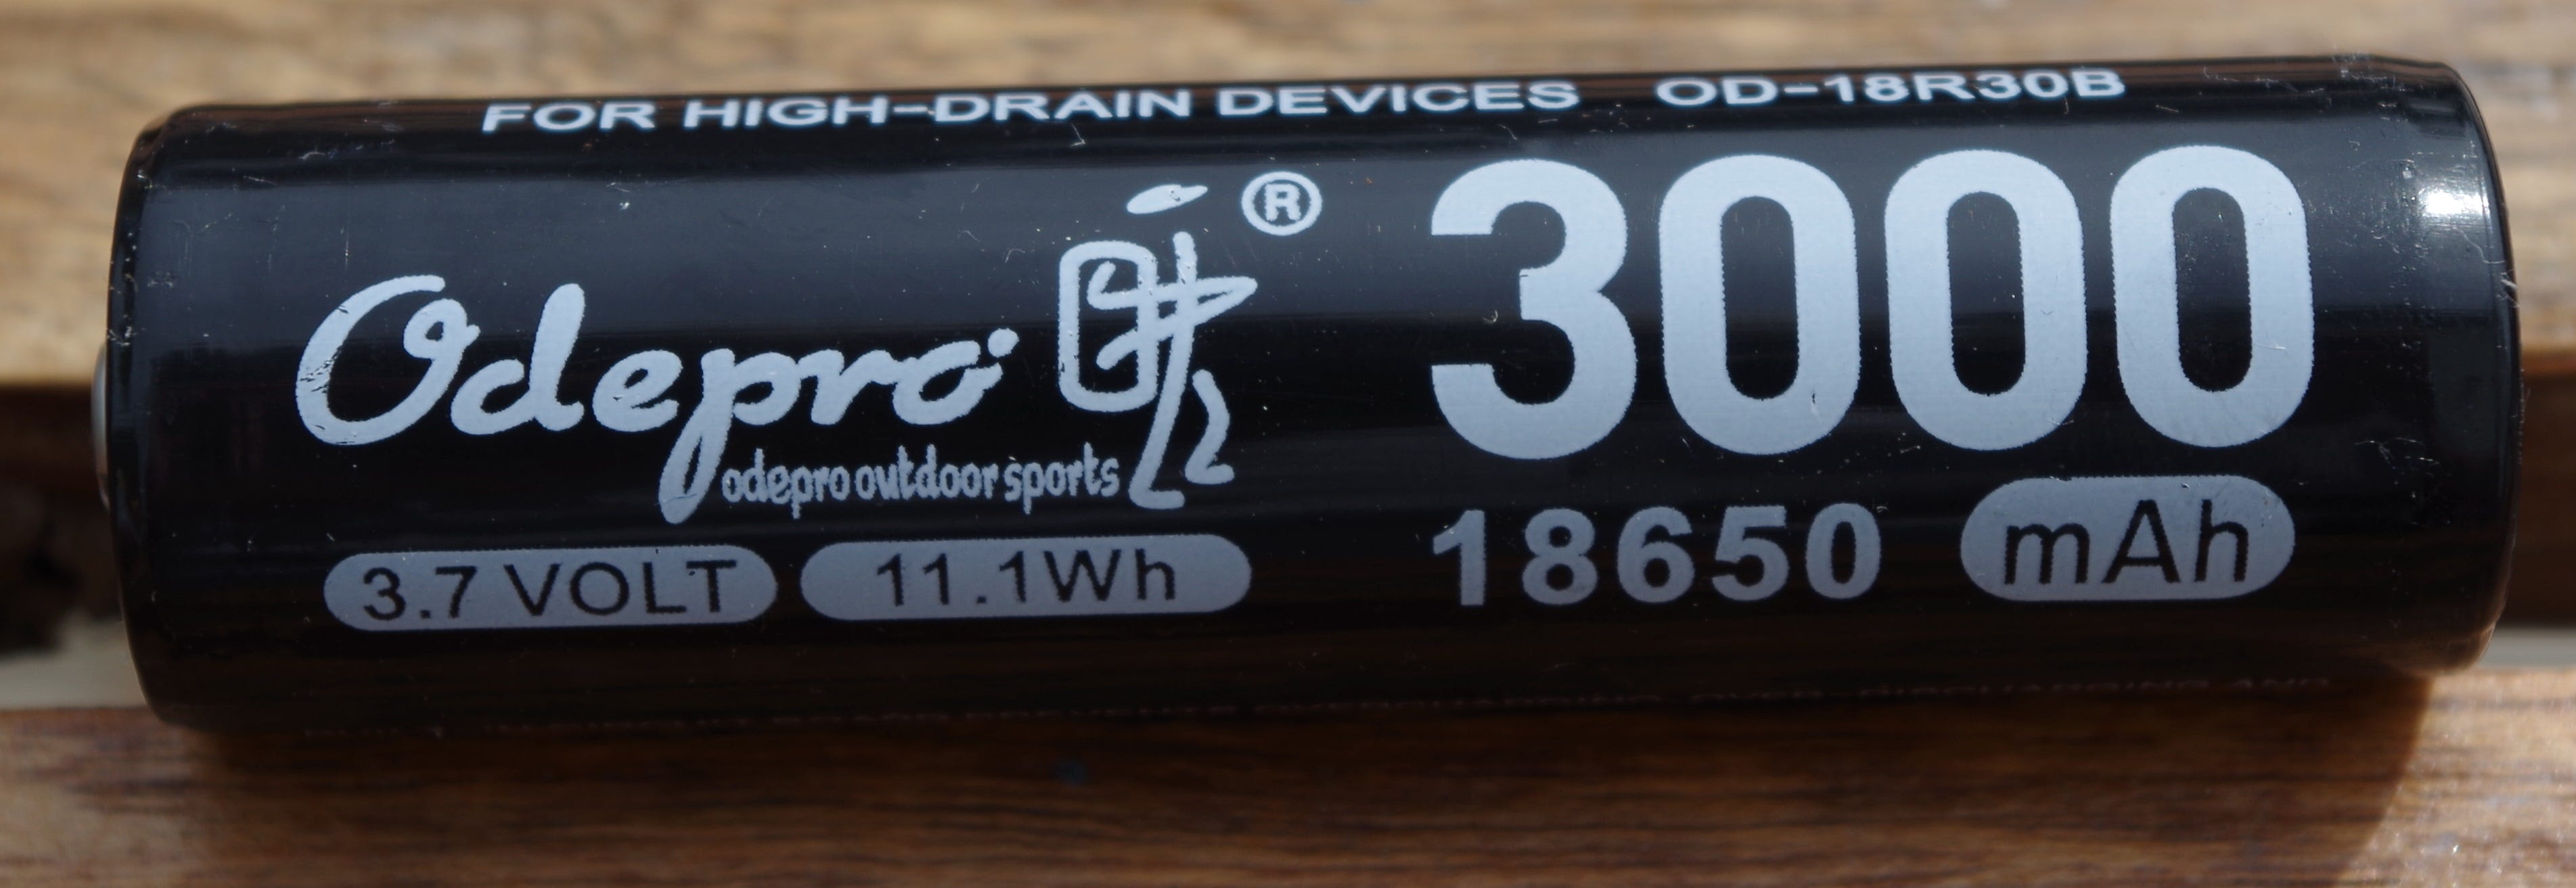
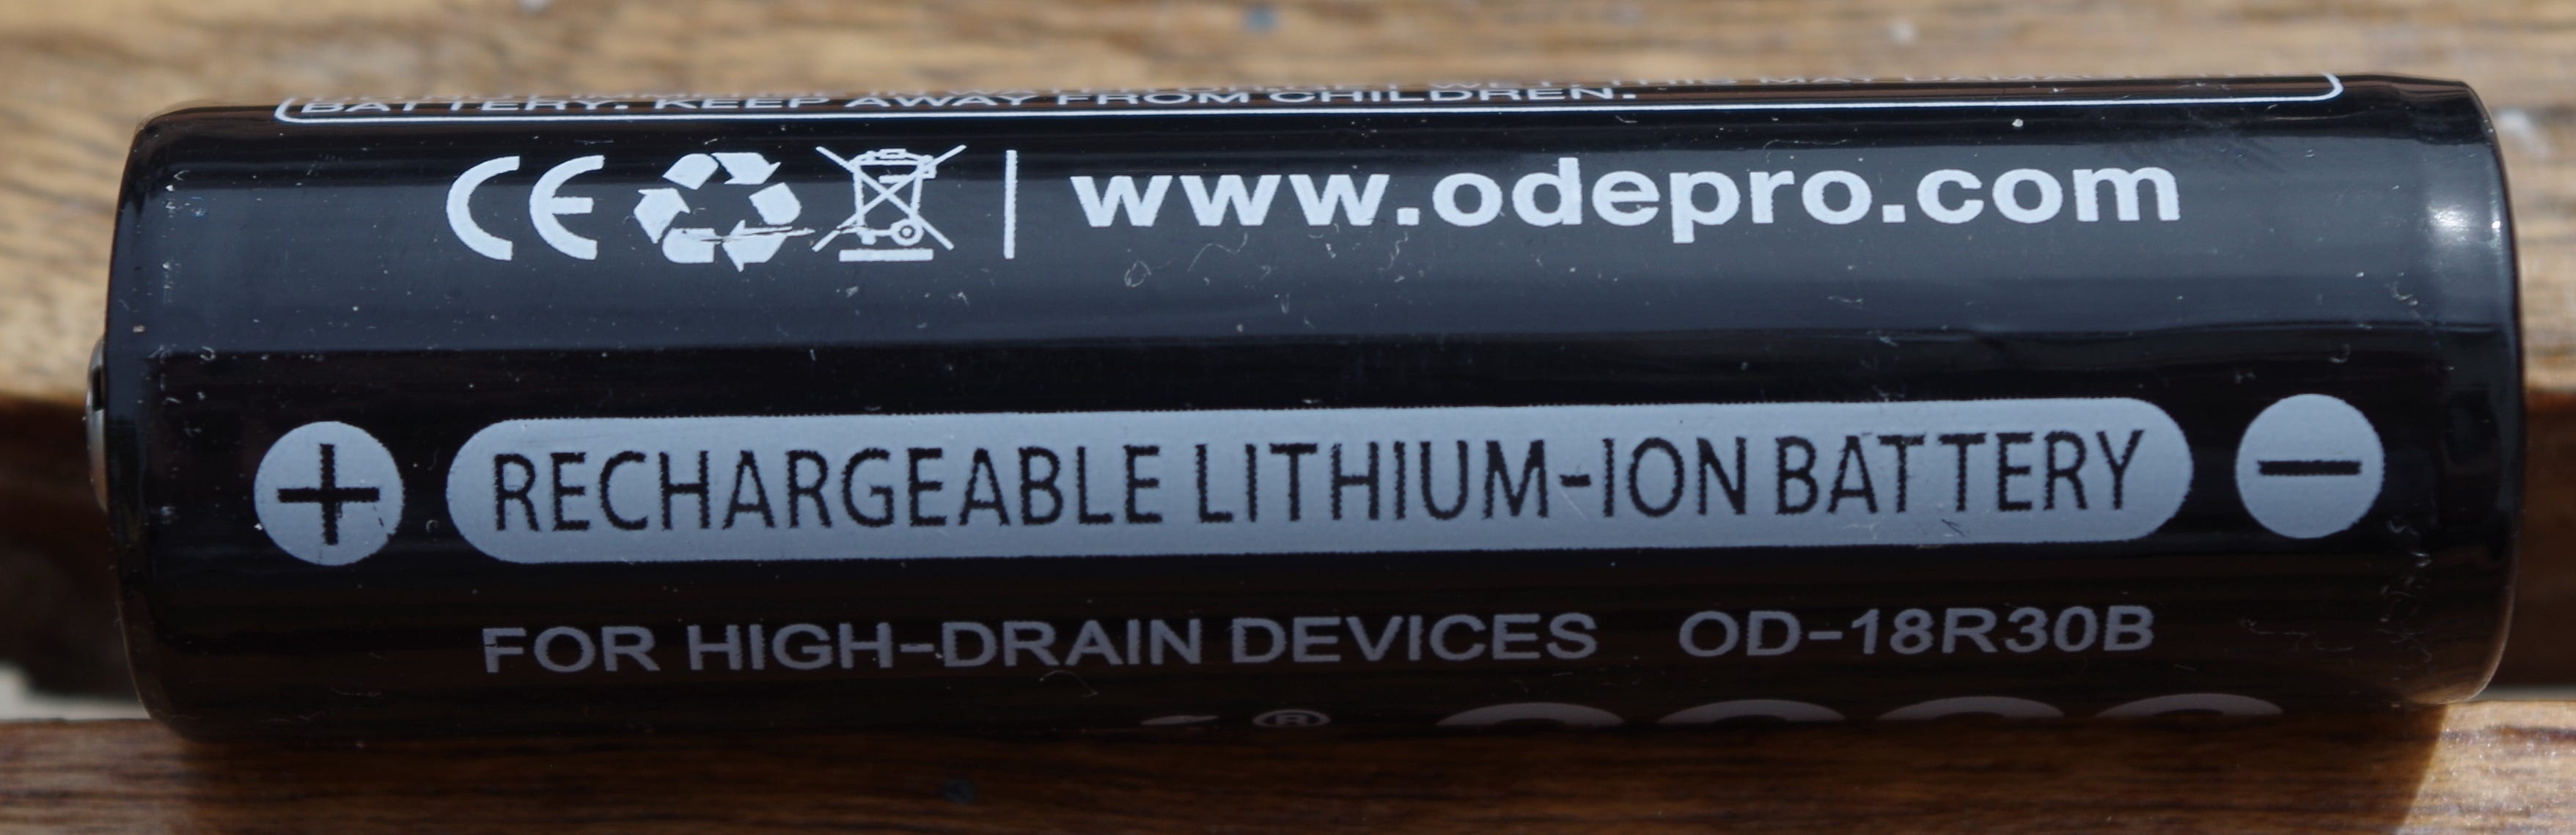
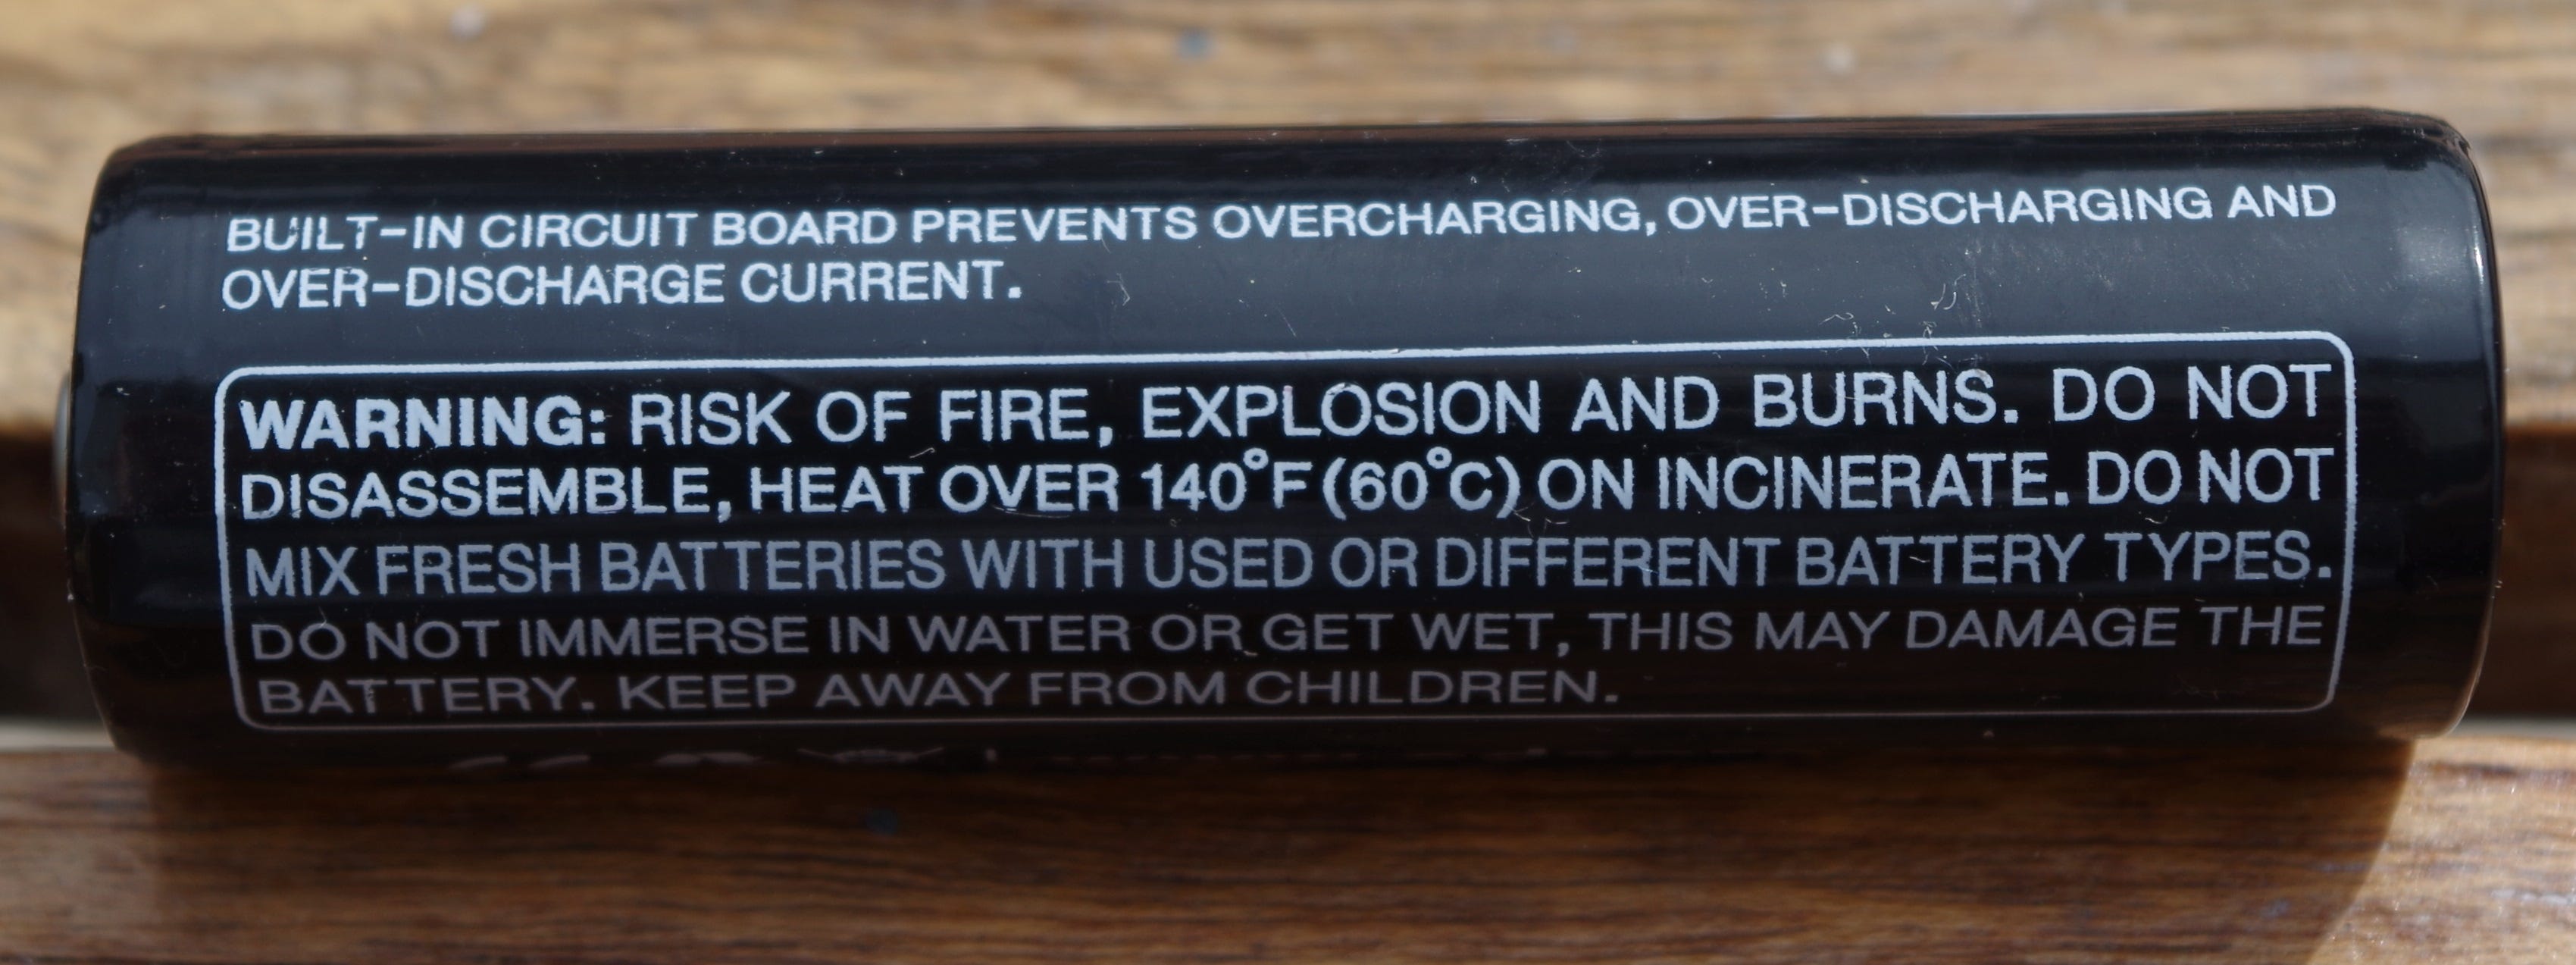
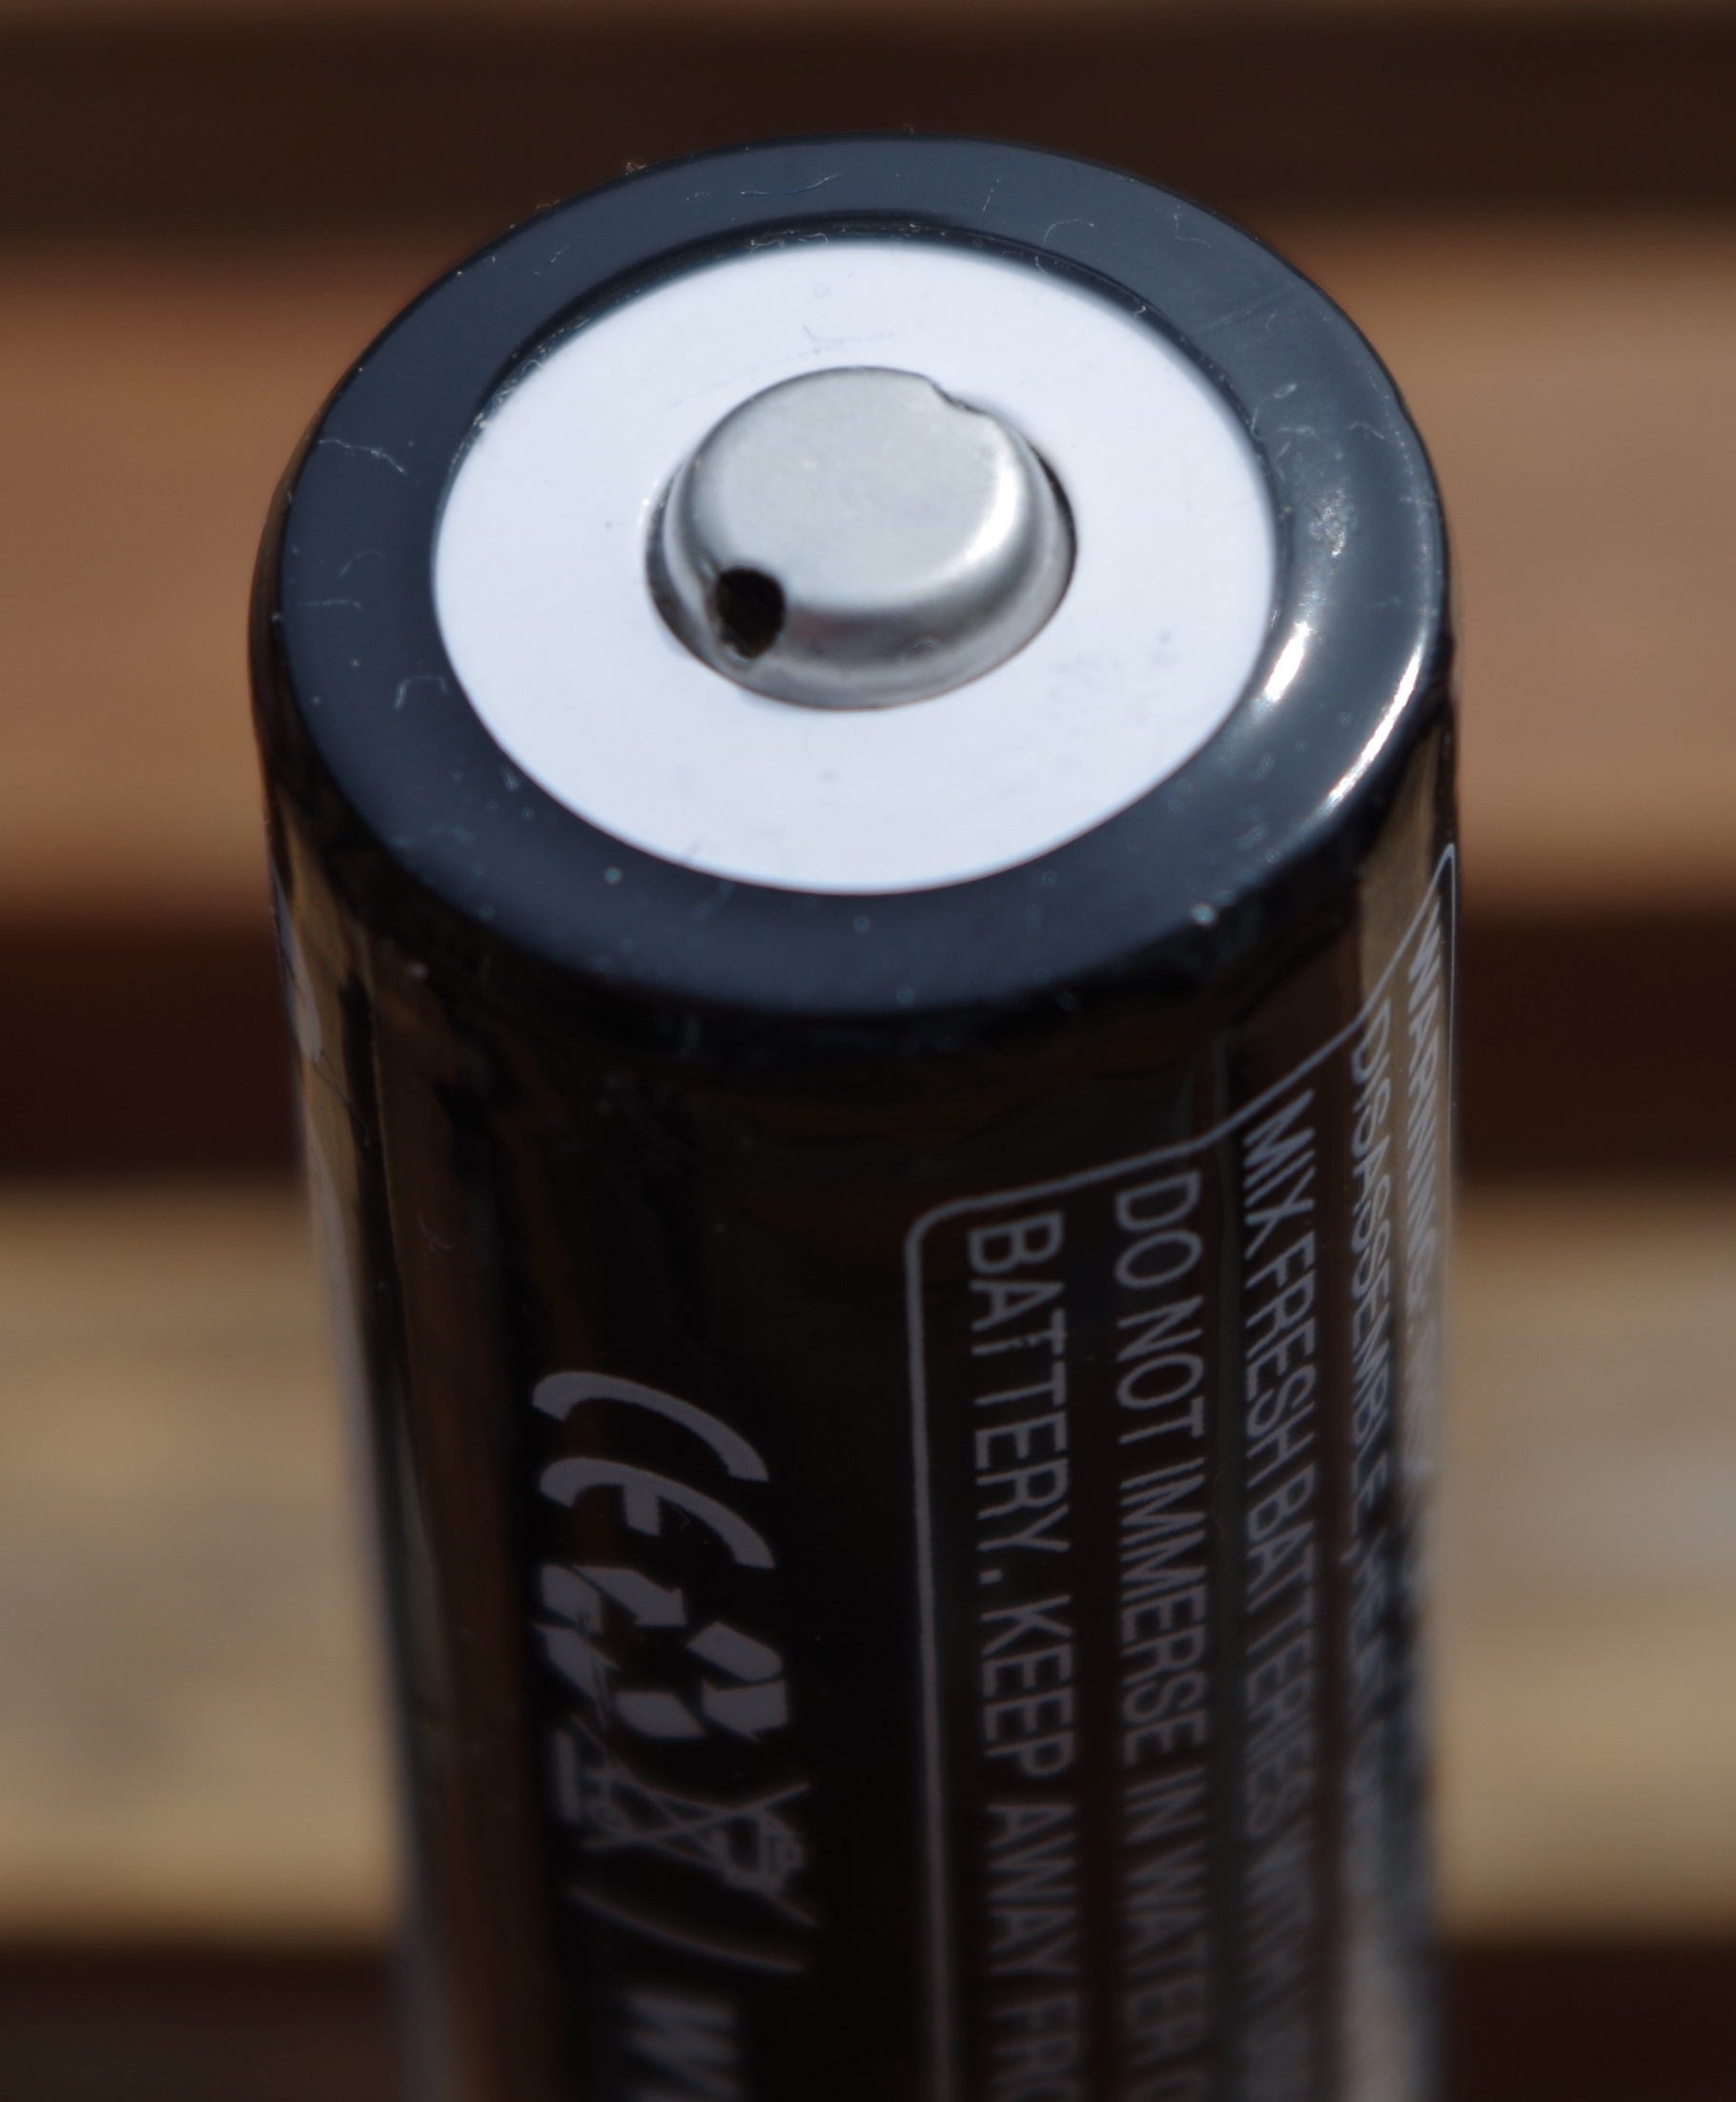
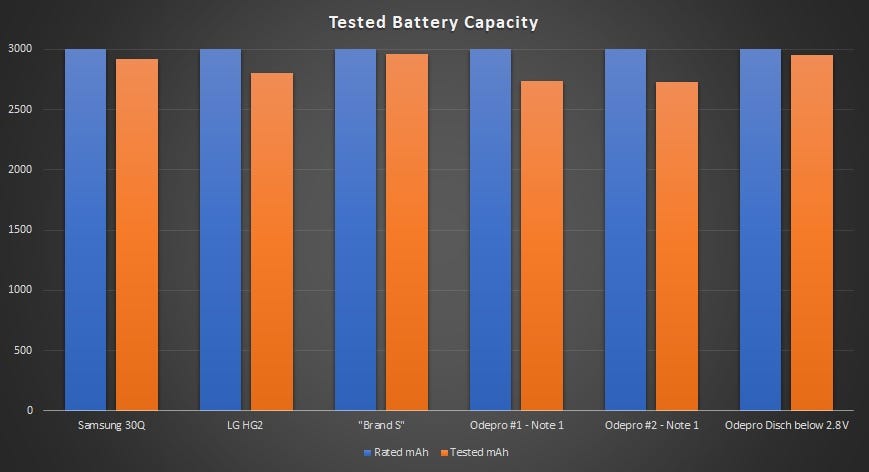
Yes, batteries not battery. Odepro includes two 18650 batteries with this kit. They are protected cells rated at 3000mAh. They are button top and measure a bit longer and larger in diameter than my unprotected cells.
I tested the battery capacity two ways. First, I used the capacity test cycle of my charger. I tested each battery along with some other batteries I had on hand to compare ratings. This test discharges the cells to 2.8V. The two Odepro values in the chart shown as “Odepro – Note 1” represent these tests. The second test was to take the depleted cell from the runtime test and see the amount of charge it accepted to return to fully charged in my charger. This is the final set of graphs, showing discharge below 2.8V in the flashlight. With a little deeper discharge, we needed to add more to charge it. Either way, they are similar to other 3000mAh cells I use.
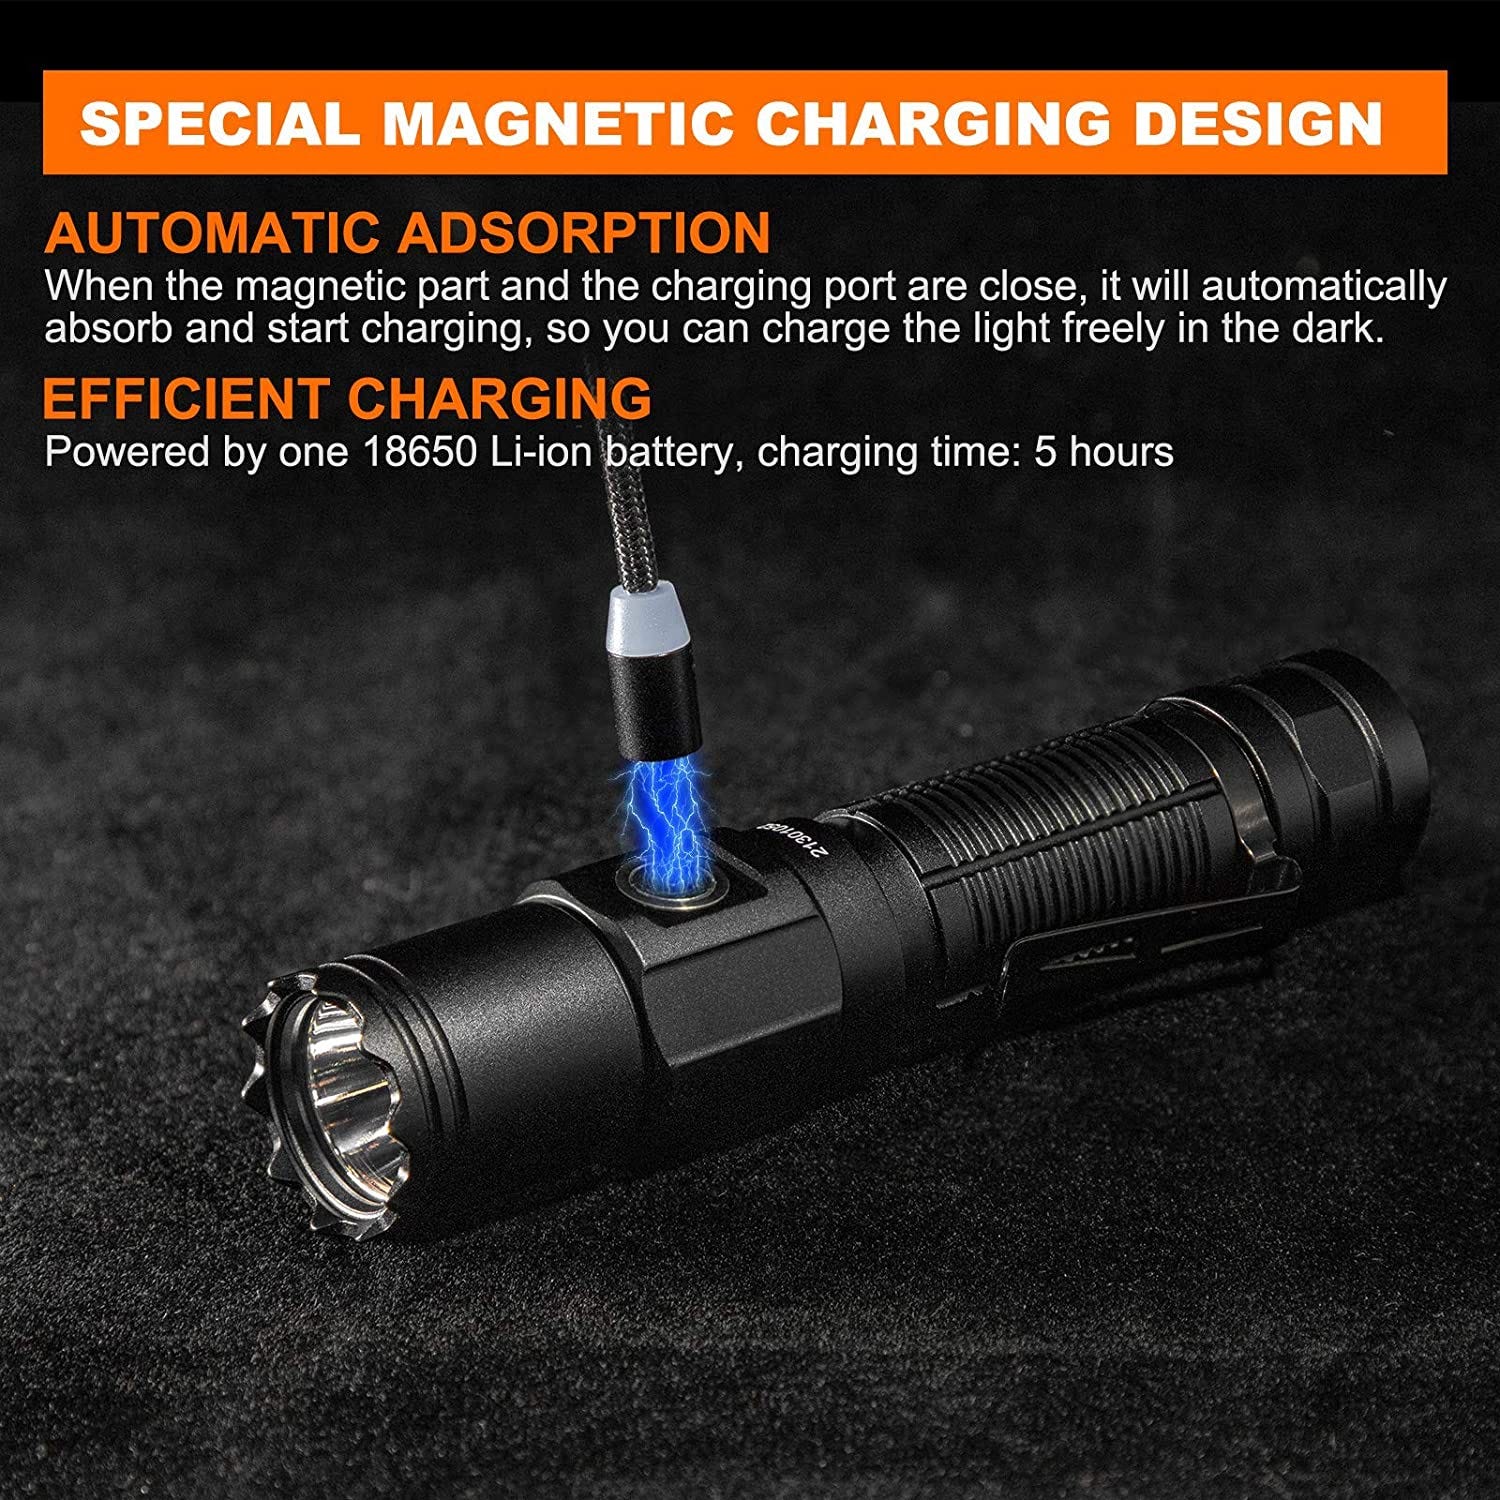
Charging
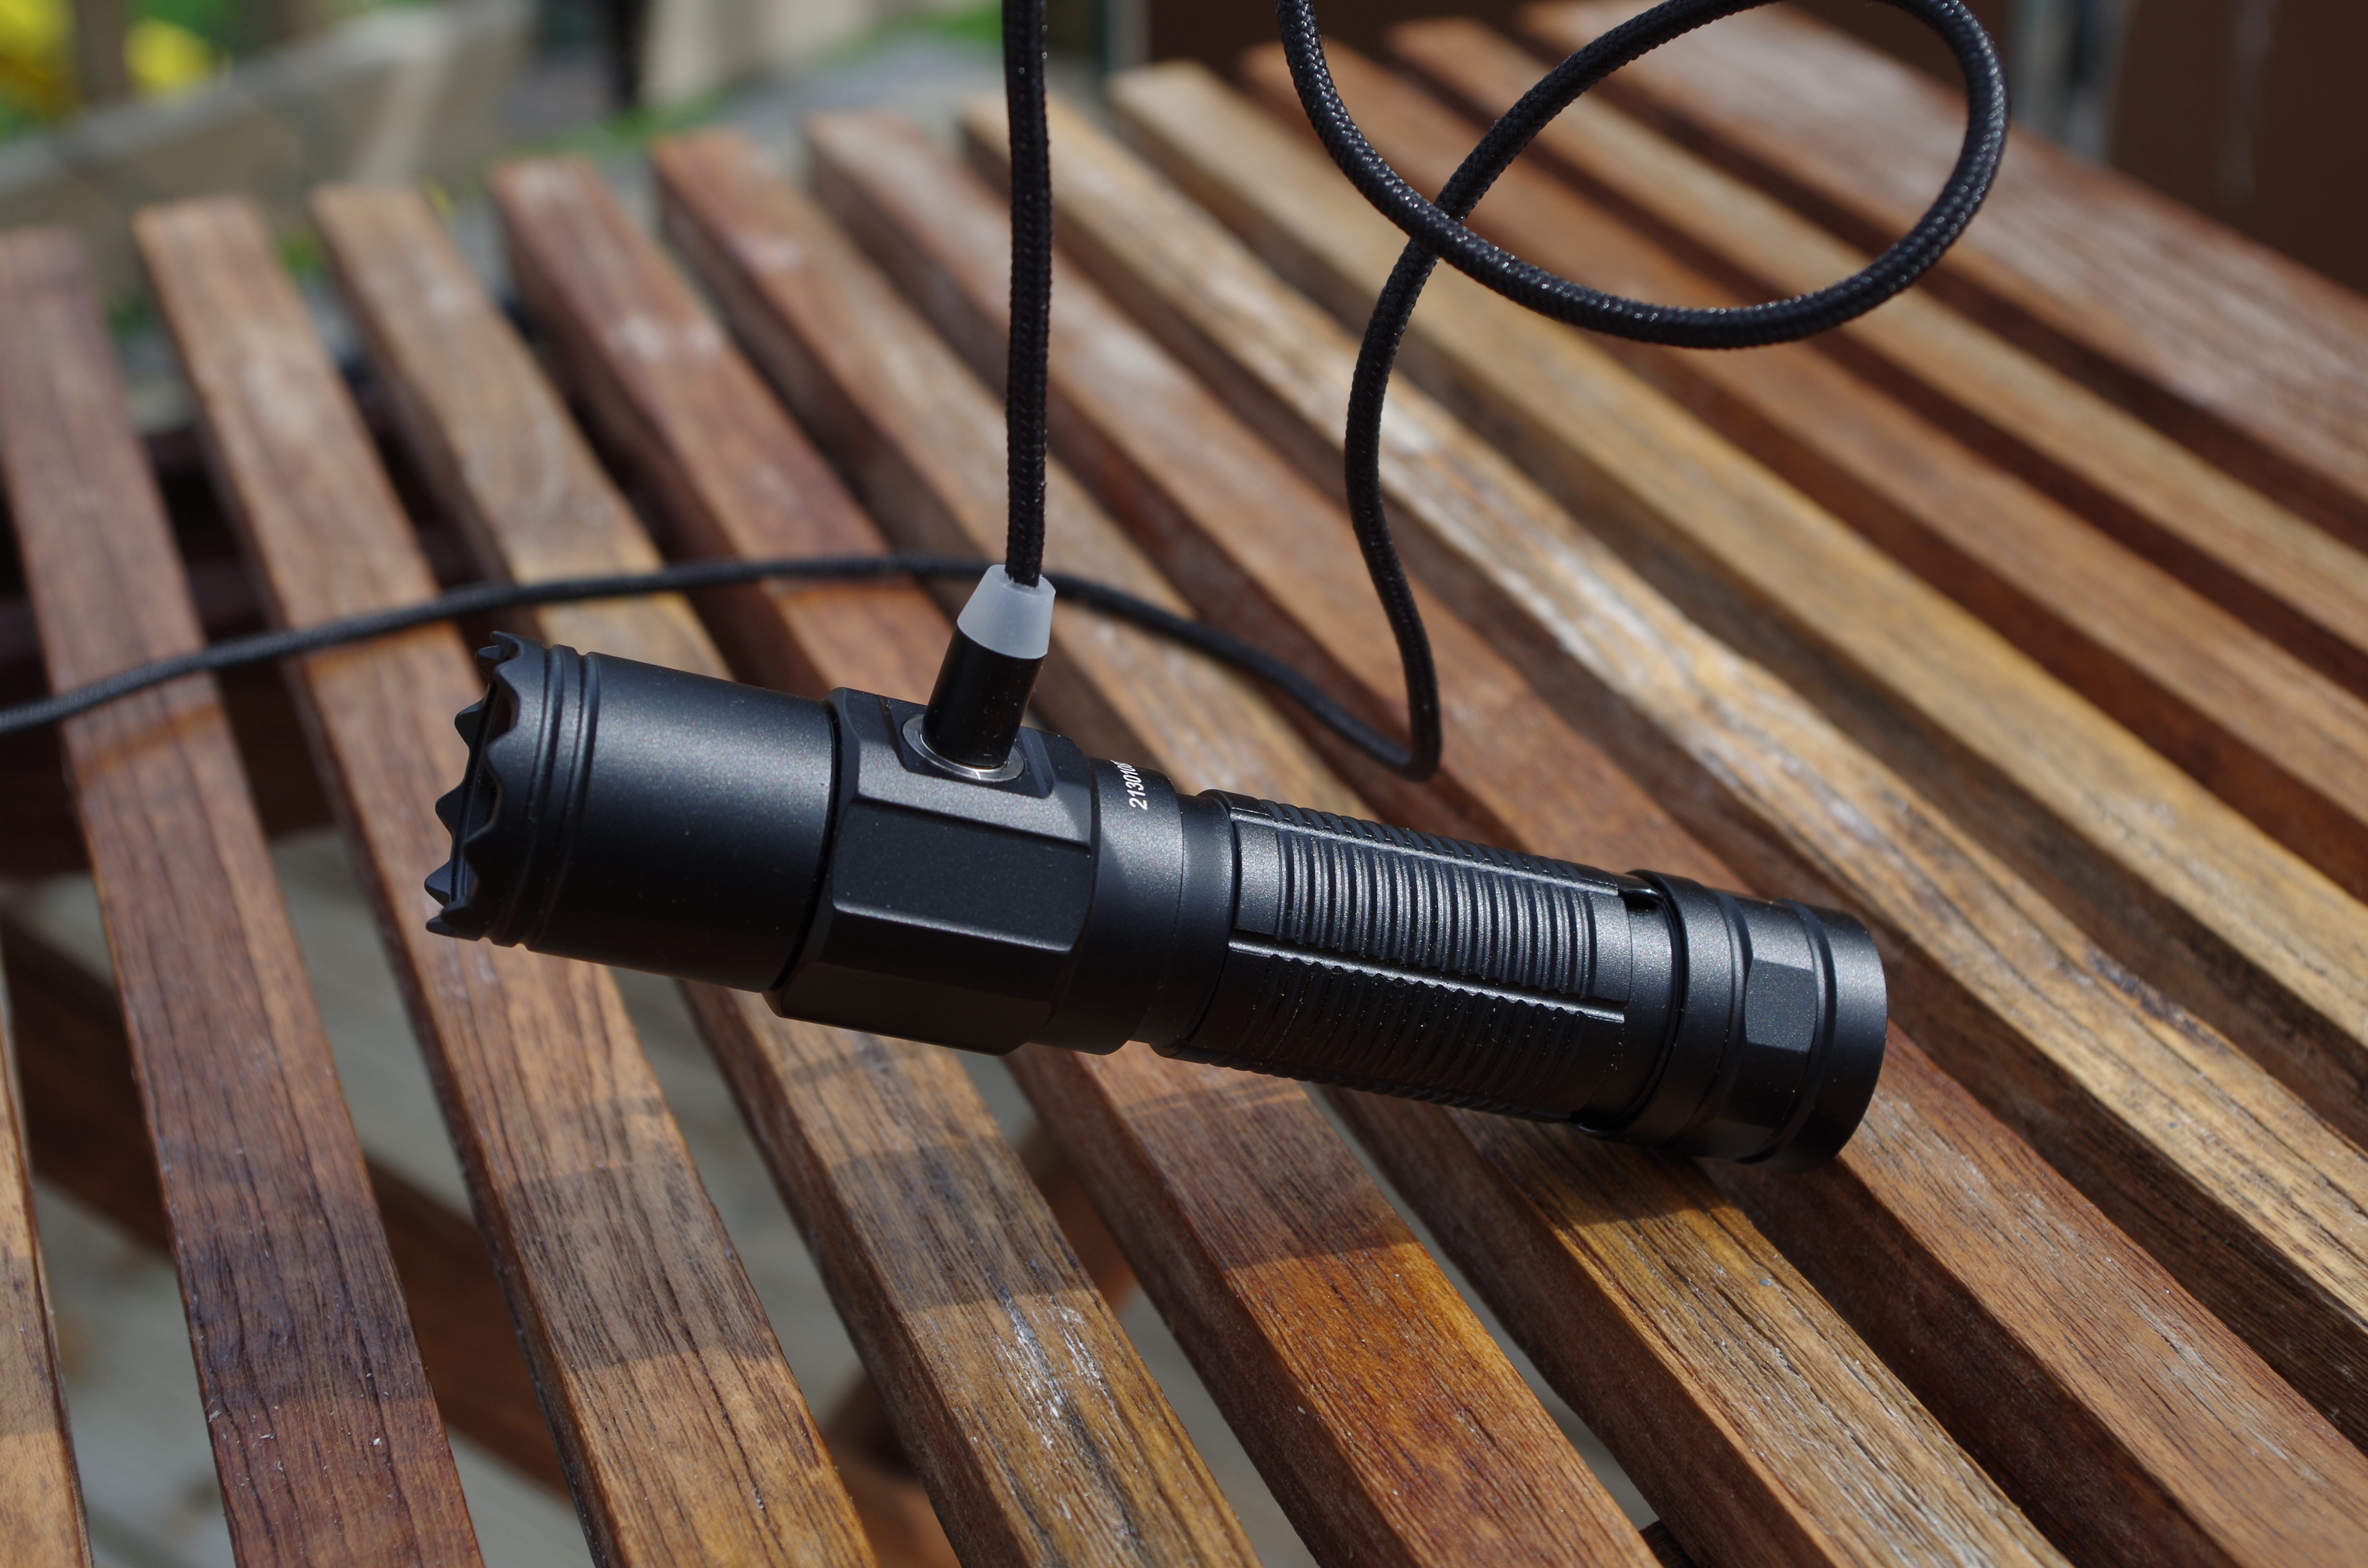
The in-light charging system on the NT21 allows it to remain waterproof without rubber port covers or other devices that can fail. The charger connects via a self-centering magnetic connection. The other end of the cable is a standard USB type A to fit almost any USB power source.
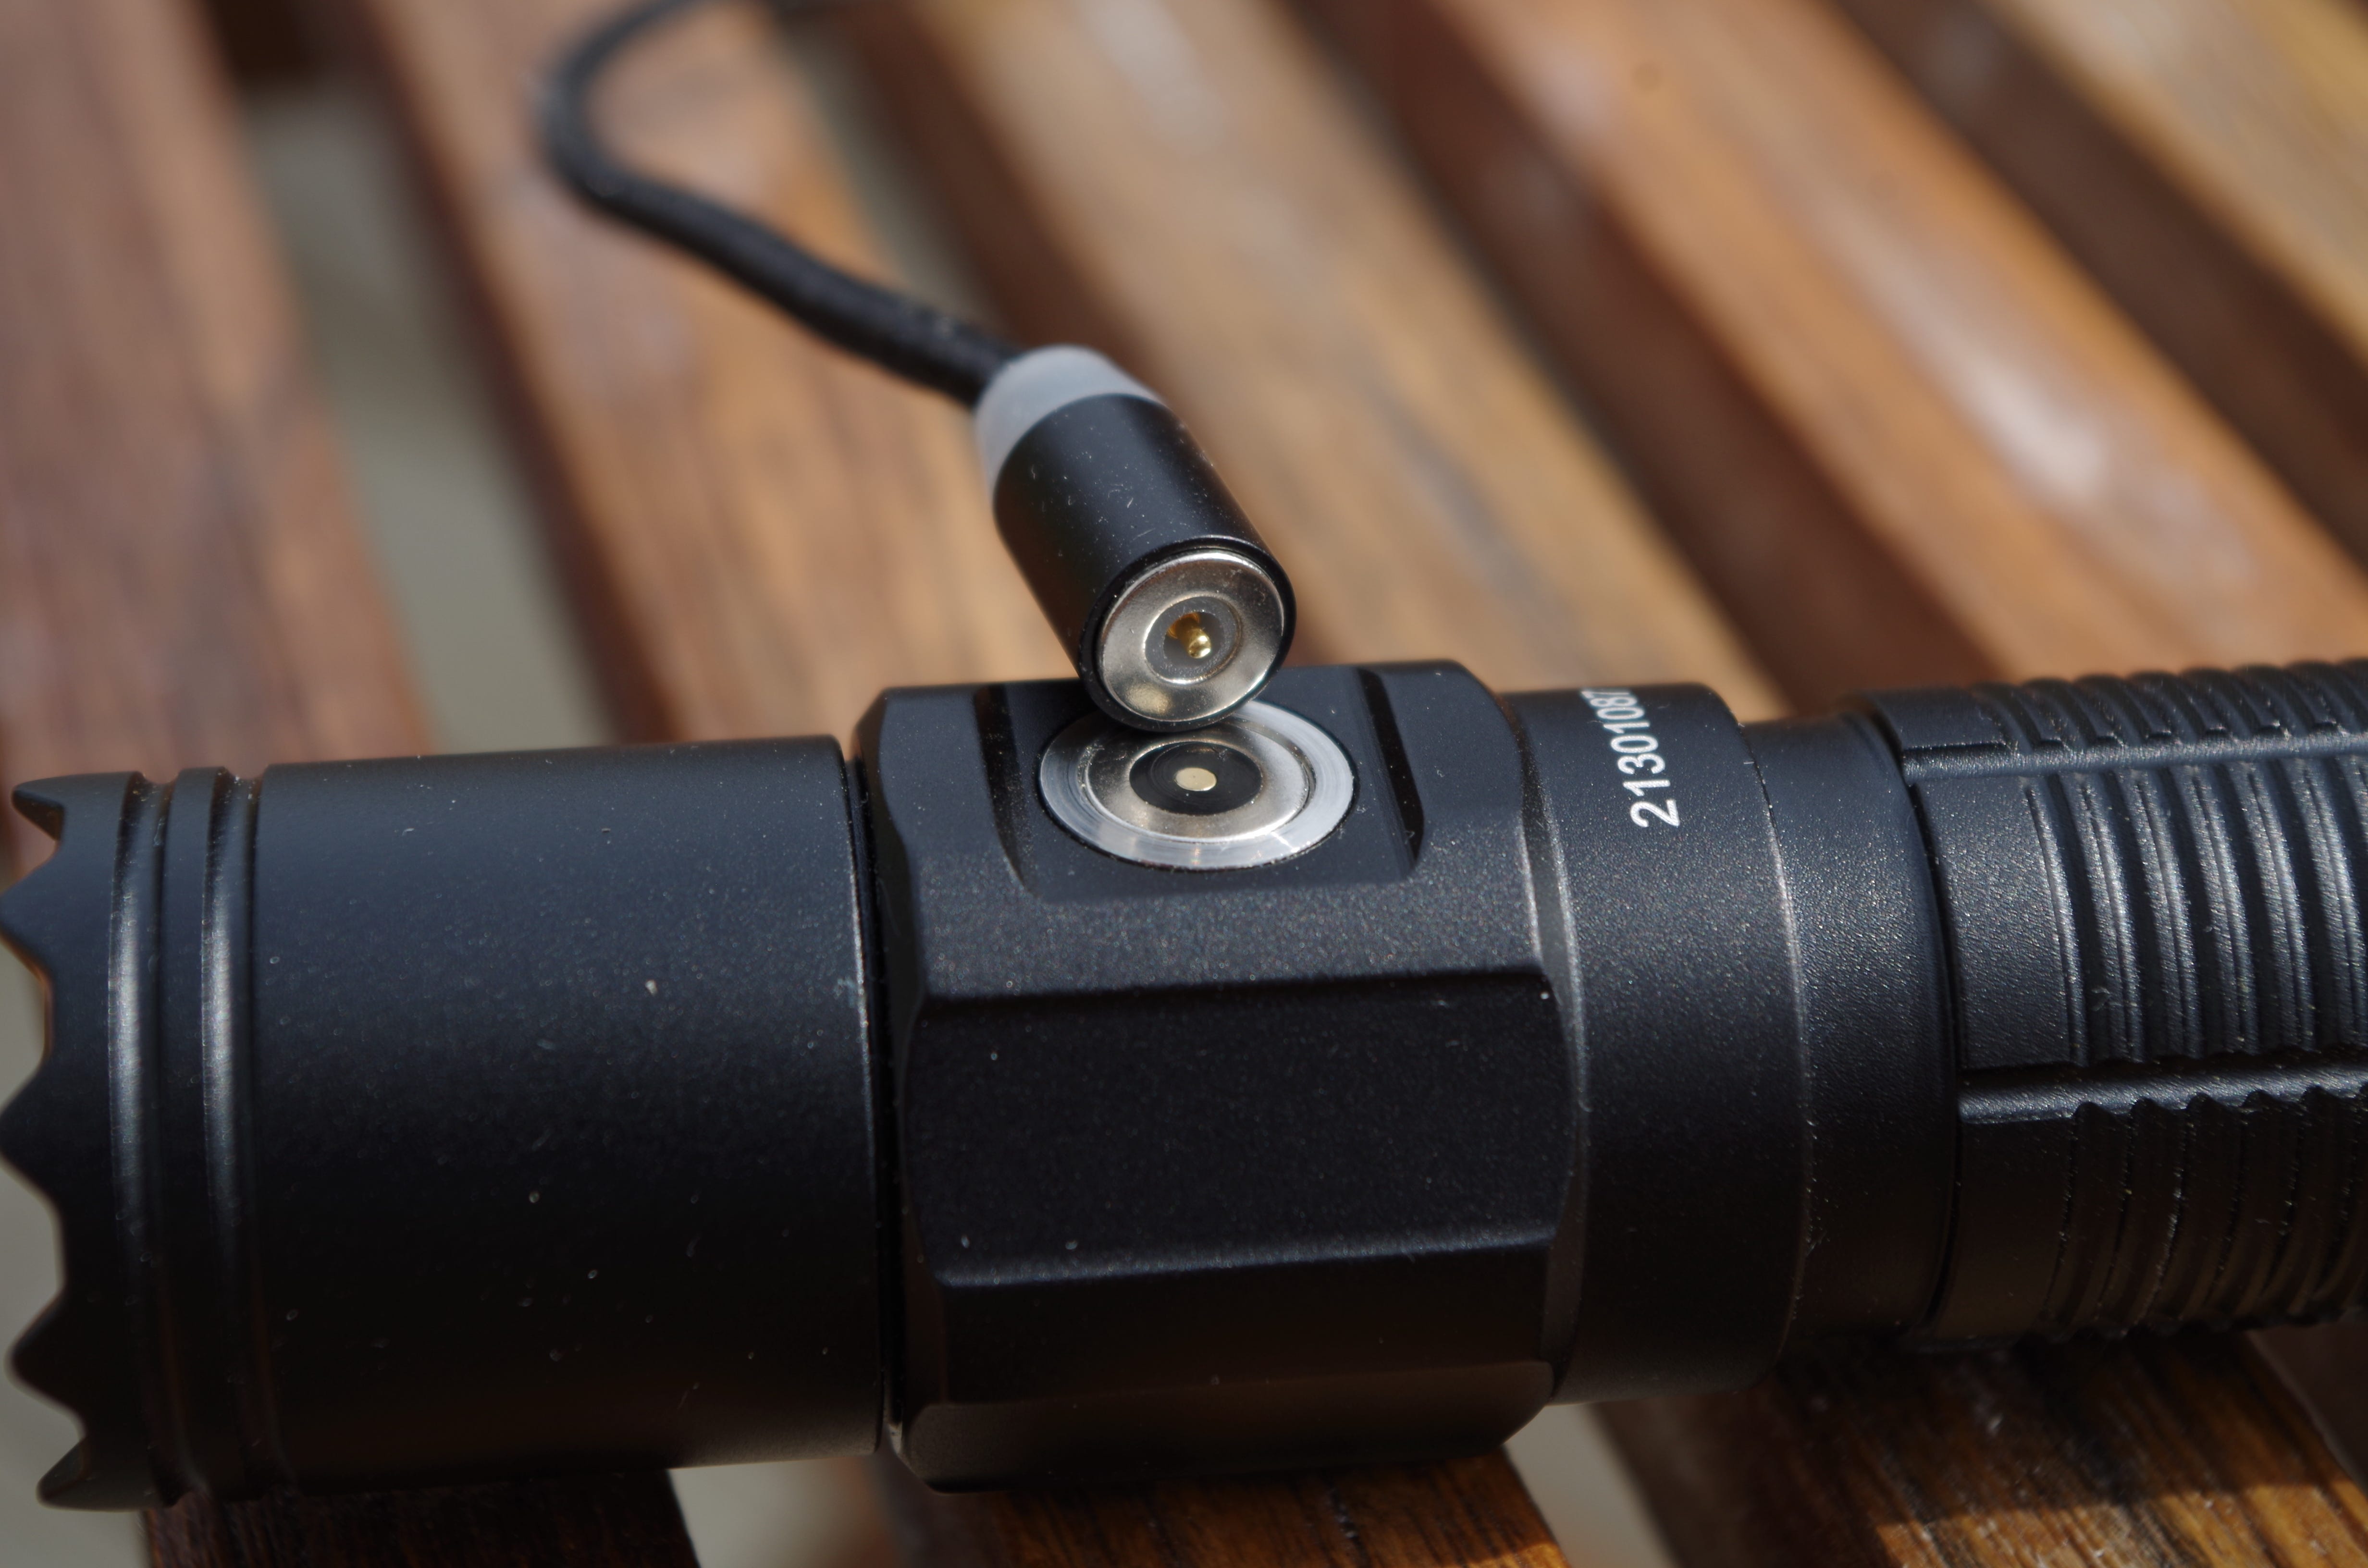
The Charger maintains a strong connection and can’t be easily knocked off while charging. The magnet is strong enough to almost lift the light off the table.
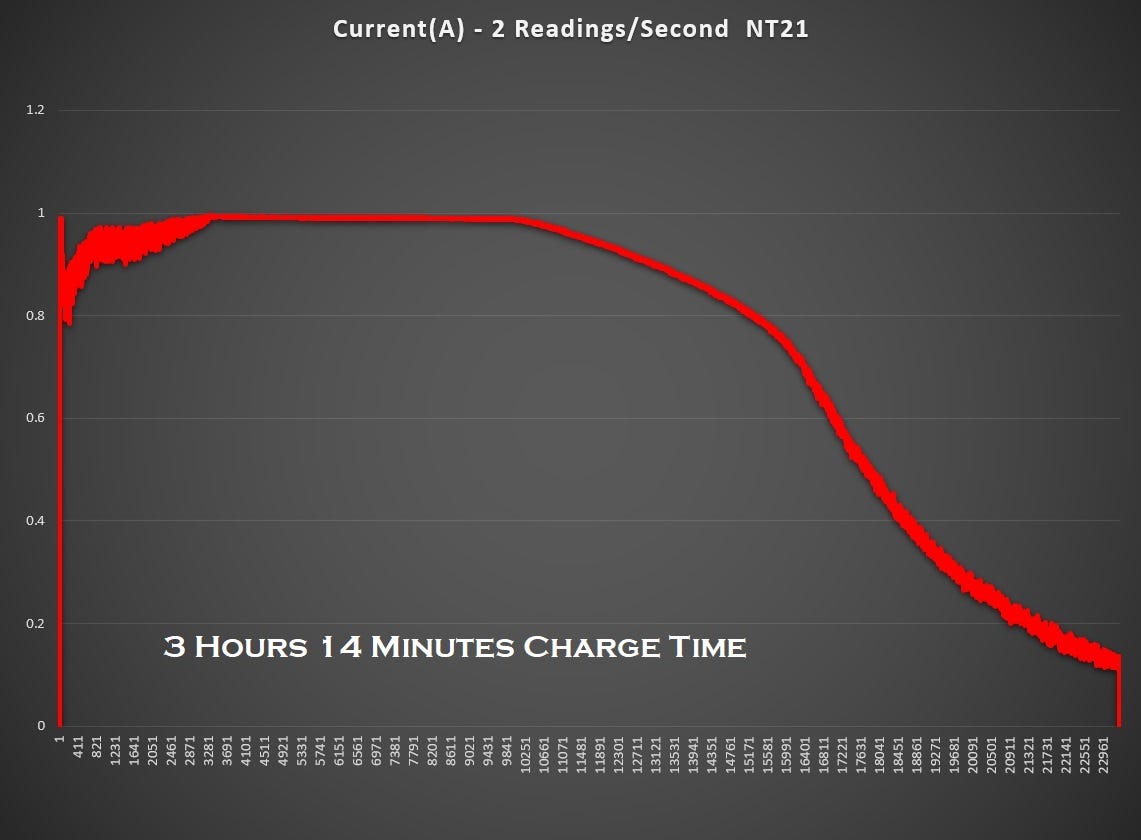
The charging cable or light appeared unharmed with connecting and disconnecting the cable under power. The magnetic end of the cable lights up via a blue LED when power is connected. For charge testing I fully discharged the Odepro cell in my charger to 2.8V and then charged it in the flashlight using a Samsung 2A phone charger. The charging ramped up to 1A and then tapered off until it cut off charging 3 hours and 14 minutes later, showing 2675mAh into the battery. This is faster than the manufacturer specification of 4-5 hours to charge.
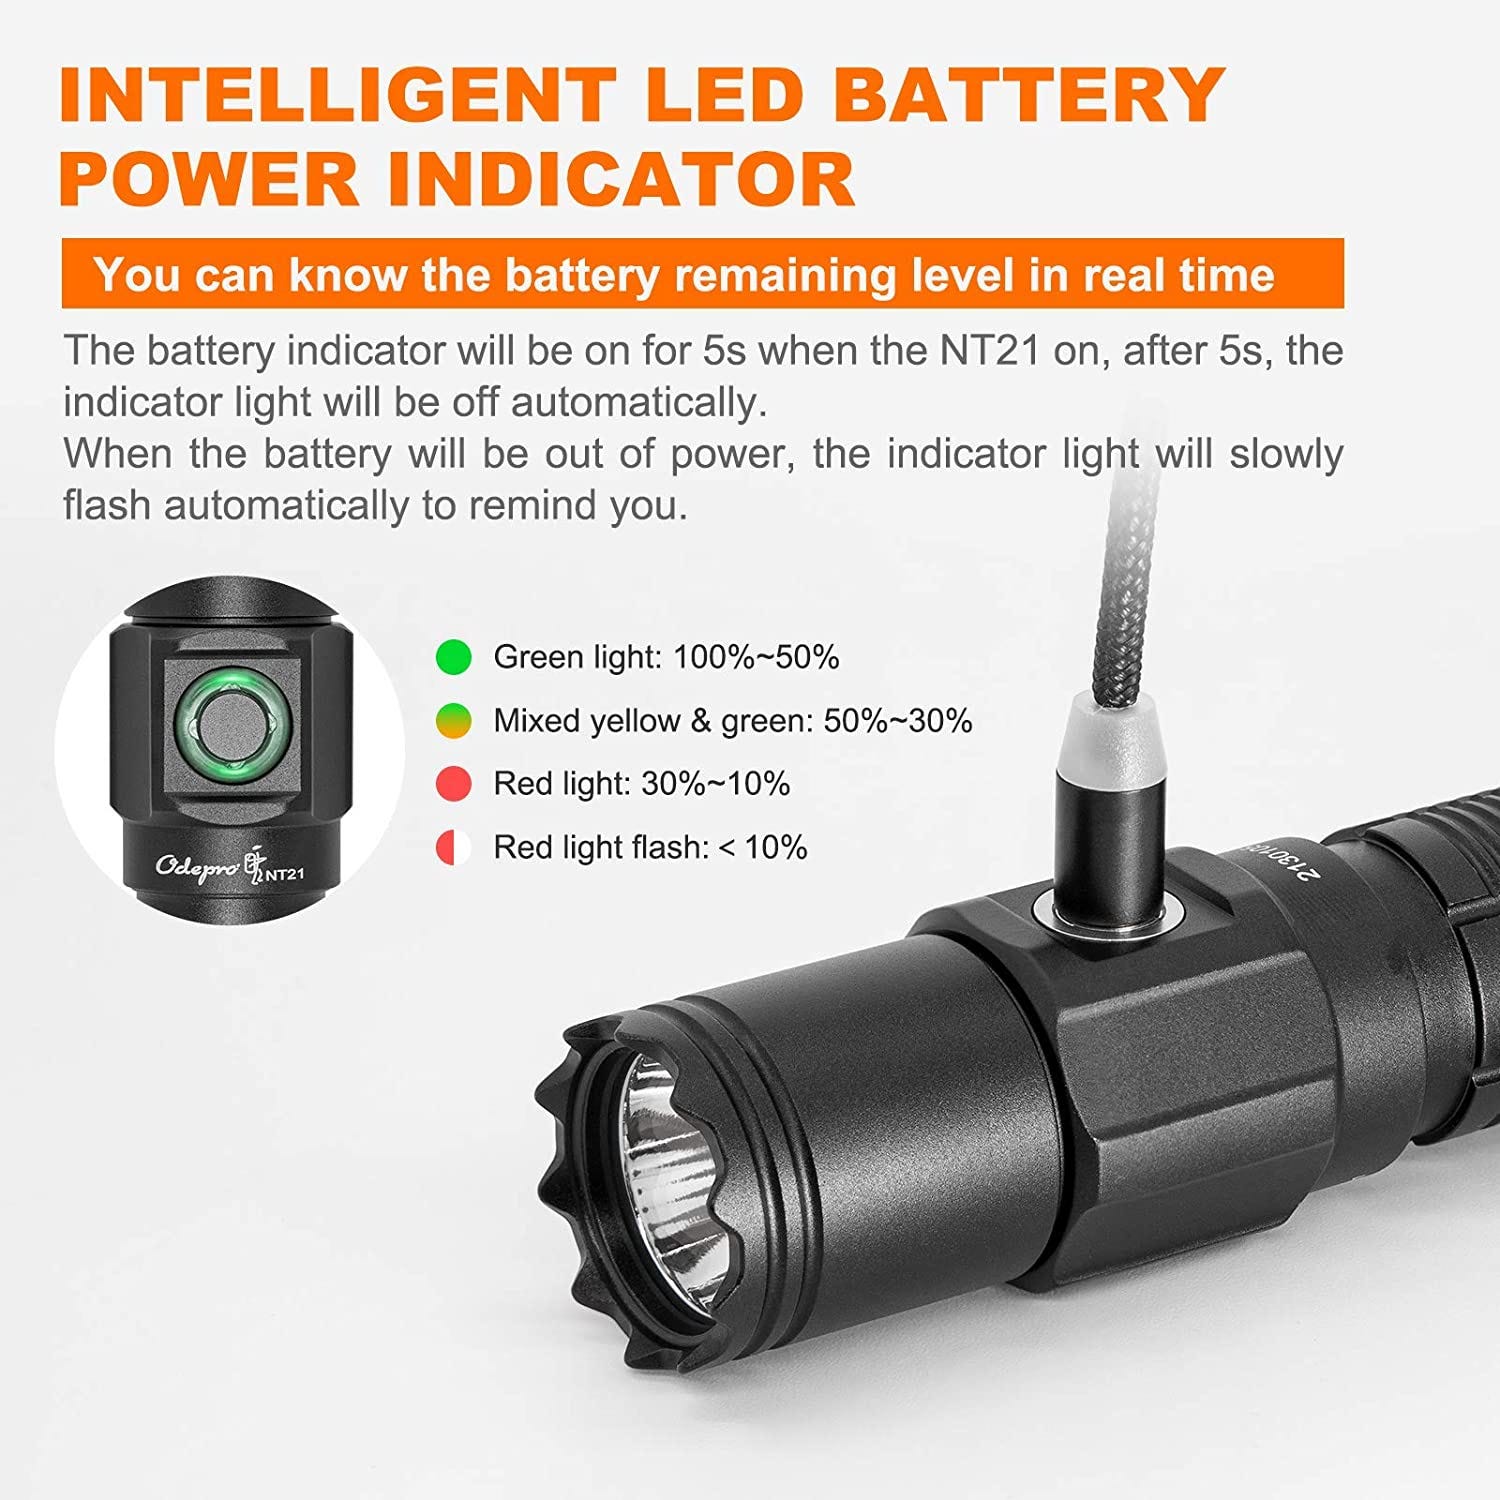
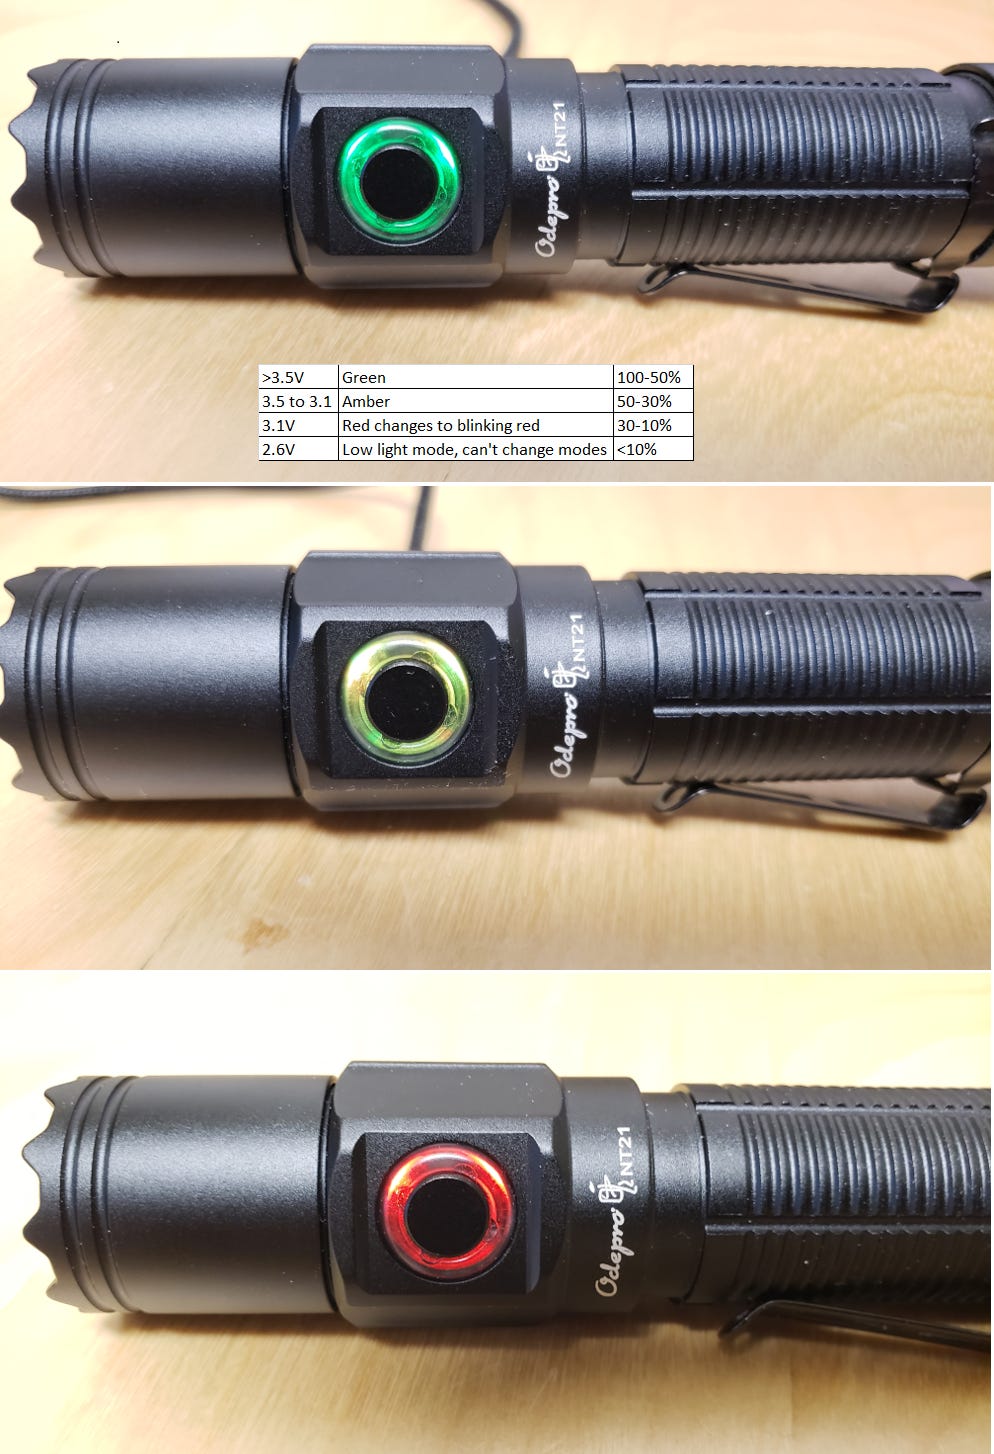
Charging is straightforward, but you may want to know when to charge the light. When turned on, the NT21 shows the battery’s charge level via LEDs around the power switch. The color changes from Green to yellow to red to flashing red as the battery is used. The % charge for each level in the chart is from the light’s documentation. The voltage level is from my testing using a variable power supply in place of the battery.
When the NT21 is turned off, the red illumination around the power switch is used to indicate the lockout condition as well as help find the light in the dark. It turns on approximately 3 minutes after the light was turned off. I checked the current draw to see if this feature would reduce battery life. When the NT21 is turned off but the indicator has not yet illuminated there is a very small current draw for the electronic switch. With a supply voltage of 3.8V the light uses 0.6mA. Once the red LED illuminates at the switch, the draw is unchanged at 0.6mA. This feature has no measurable impact on battery life. With a 3000mAh battery, theoretical storage time would be 5000 hours or 191 days. For extended storage unscrewing the tail cap a quarter turn provides mechanical lockout by breaking the circuit so there is no current used.
How Does It Work in the Real World?
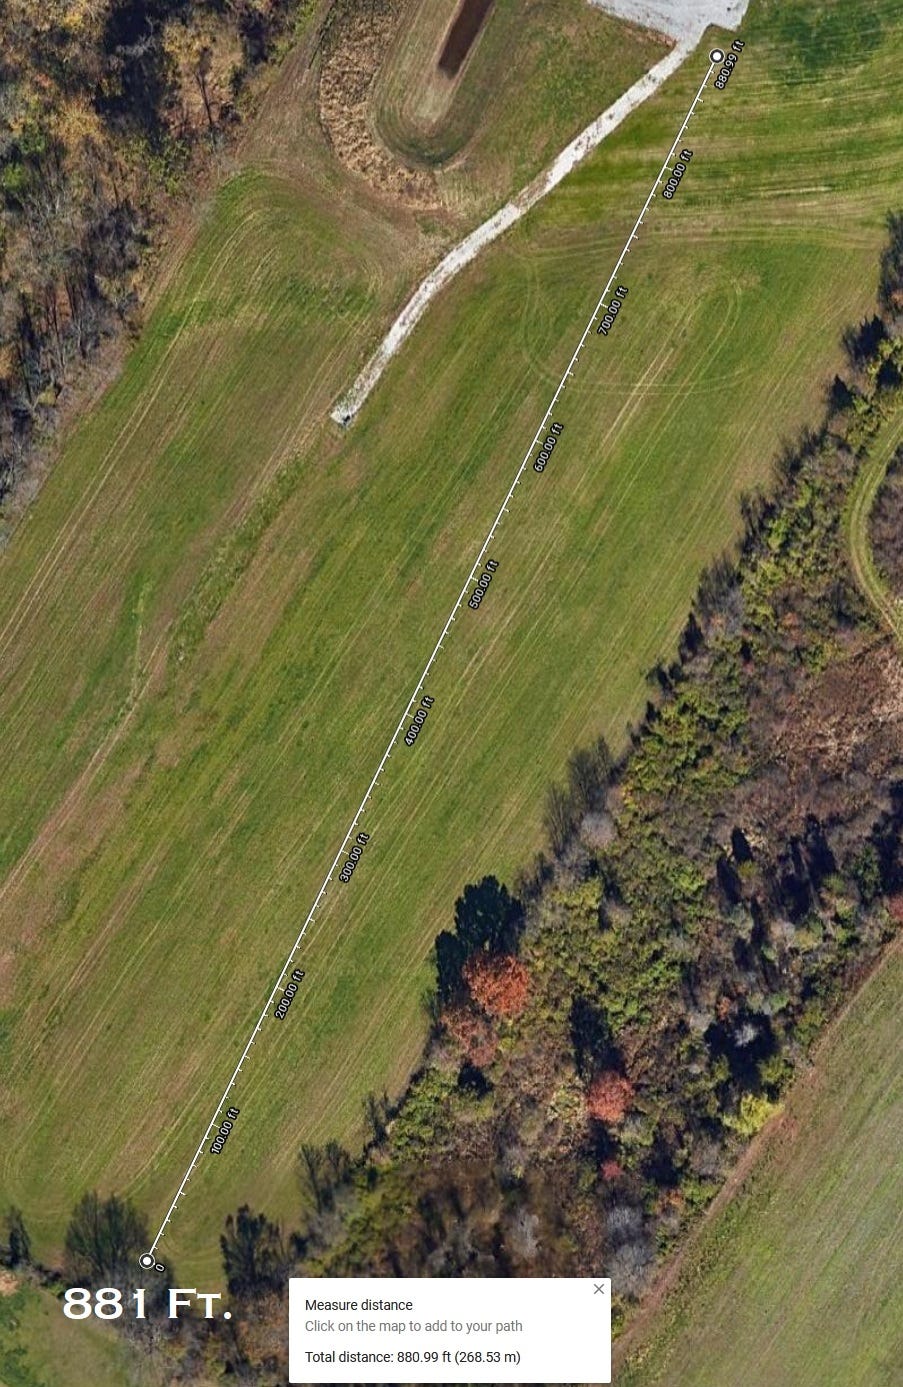
Looking at these specs we can anticipate a light with long throw. The XP-L HI’s well known distance ability and reflector’s deep design should work together to deliver a very long concentrated beam. Initial testing confirmed the long throw. In a residential area with the light on turbo you will light up houses all the way down the street. My previous test site was not large enough for this light. I moved my testing to a new location where I had enough room to use this light to its full potential.
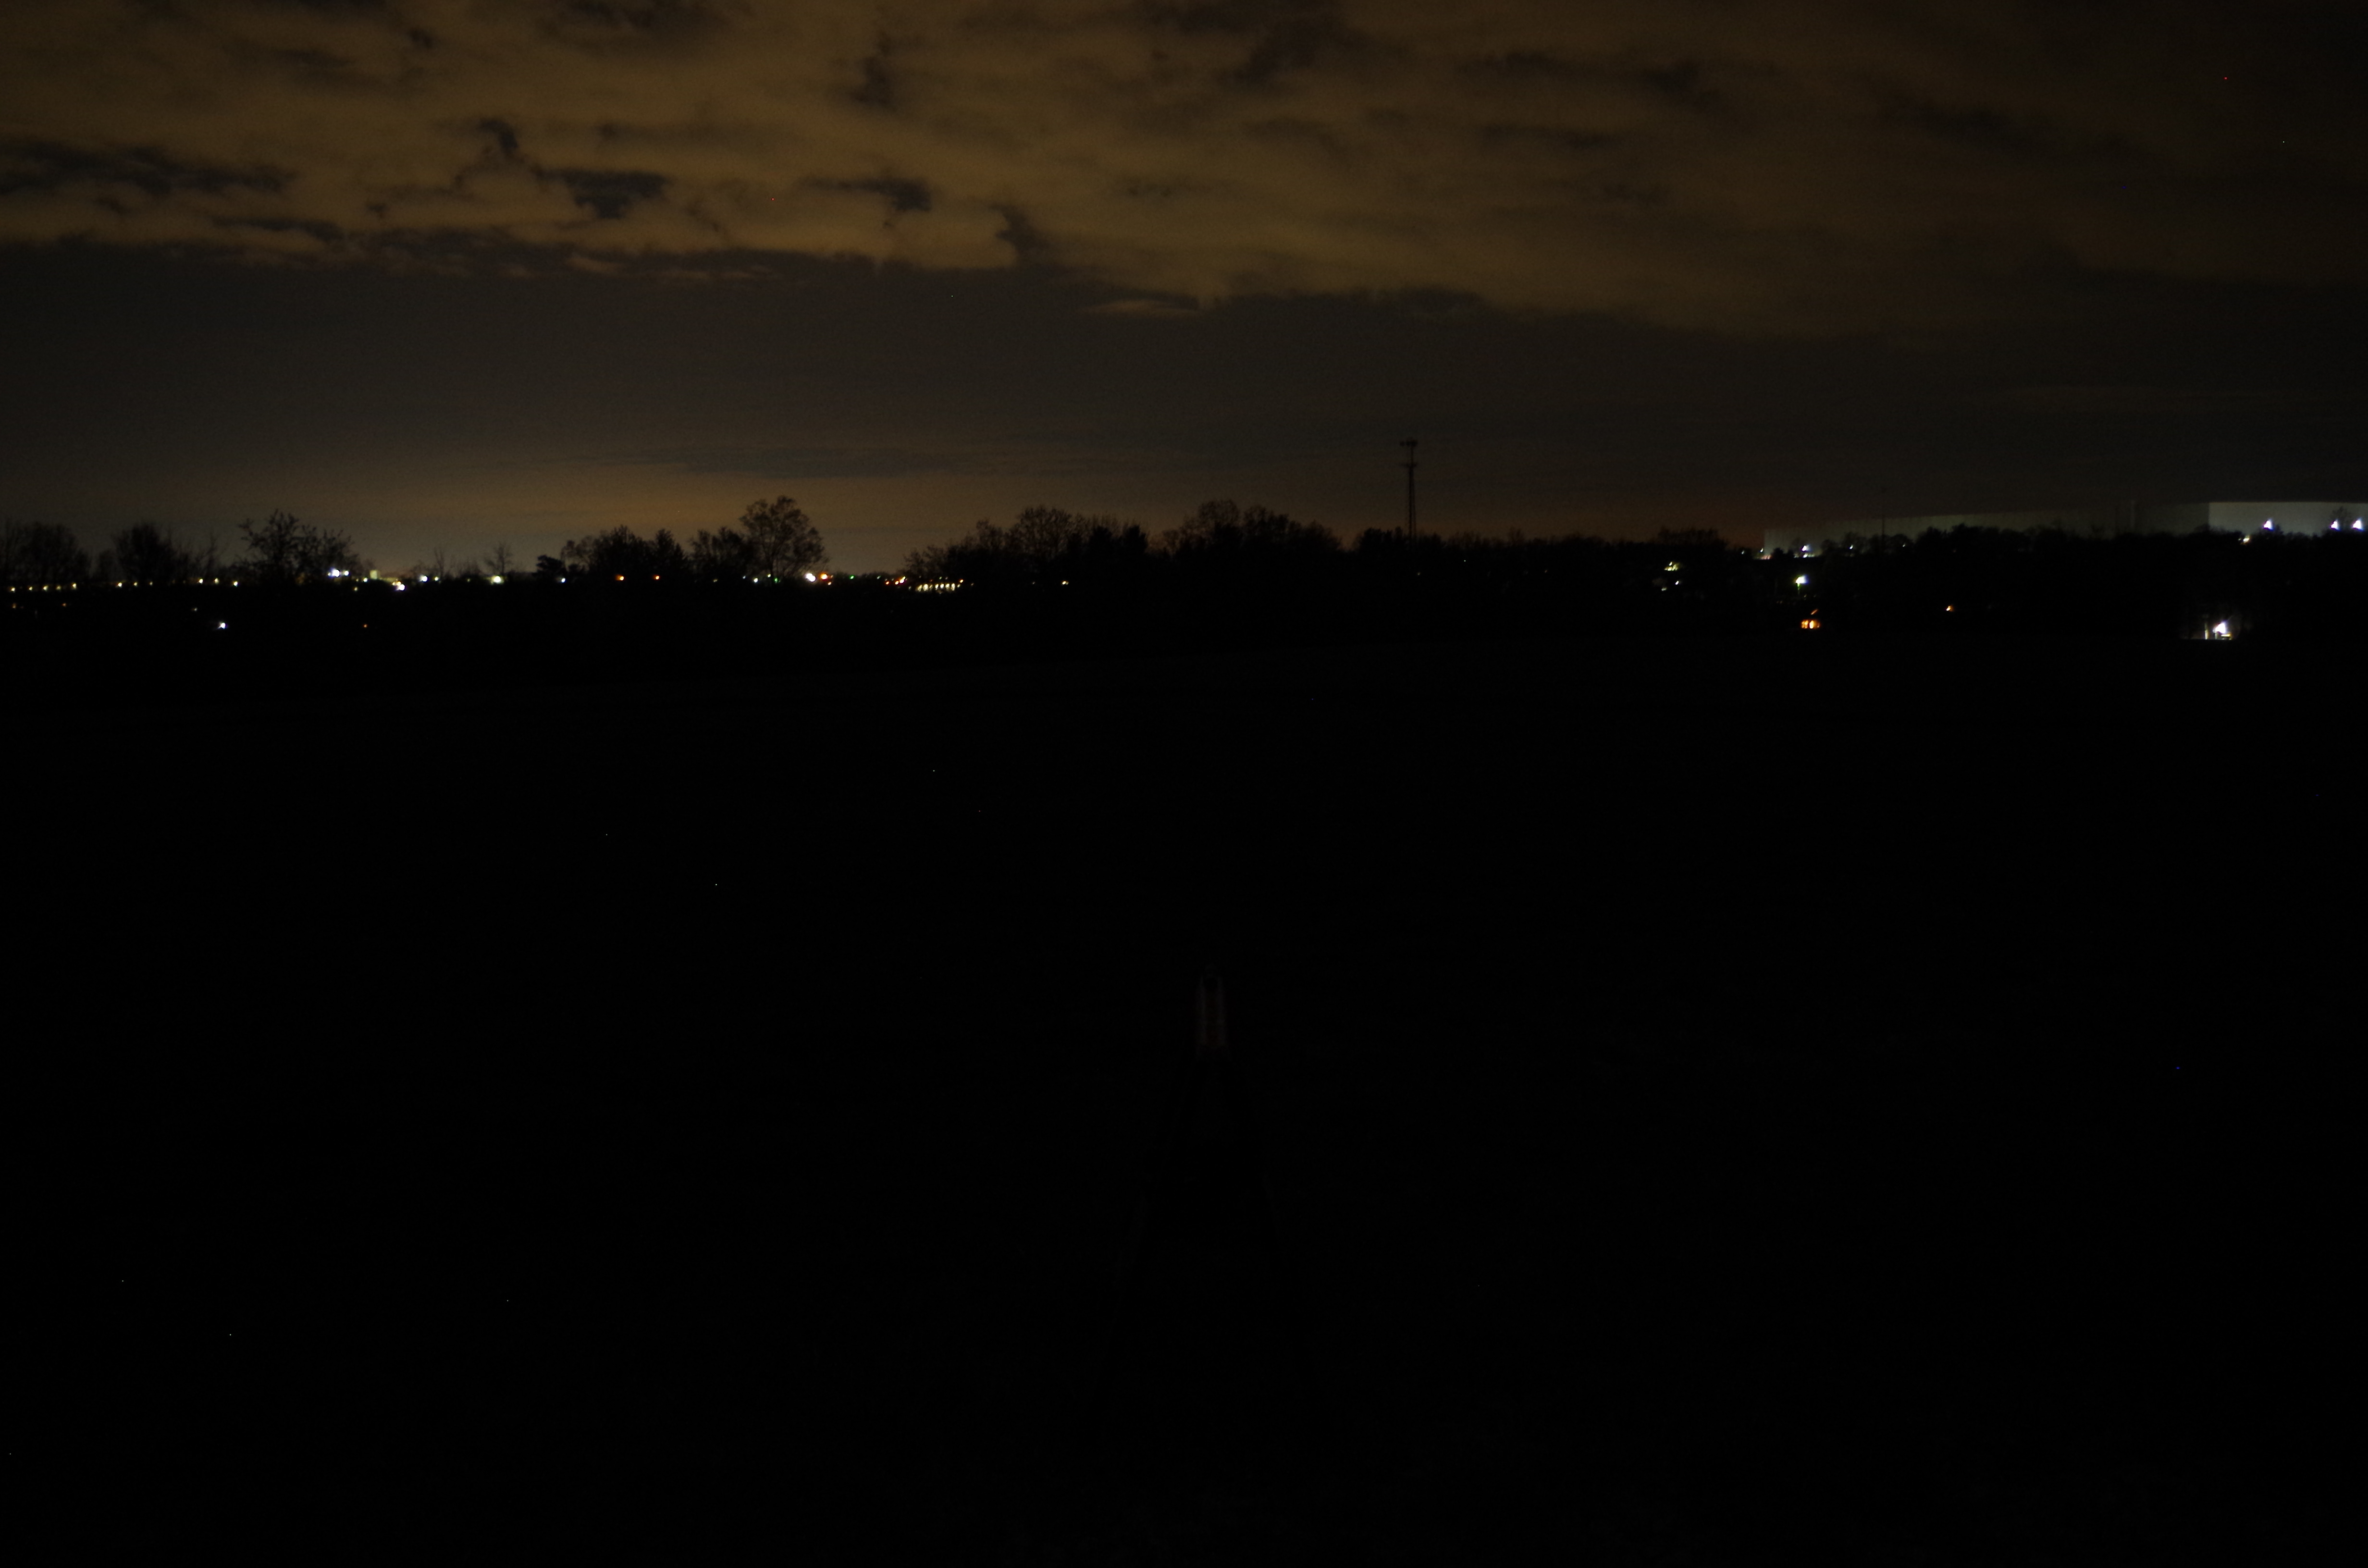
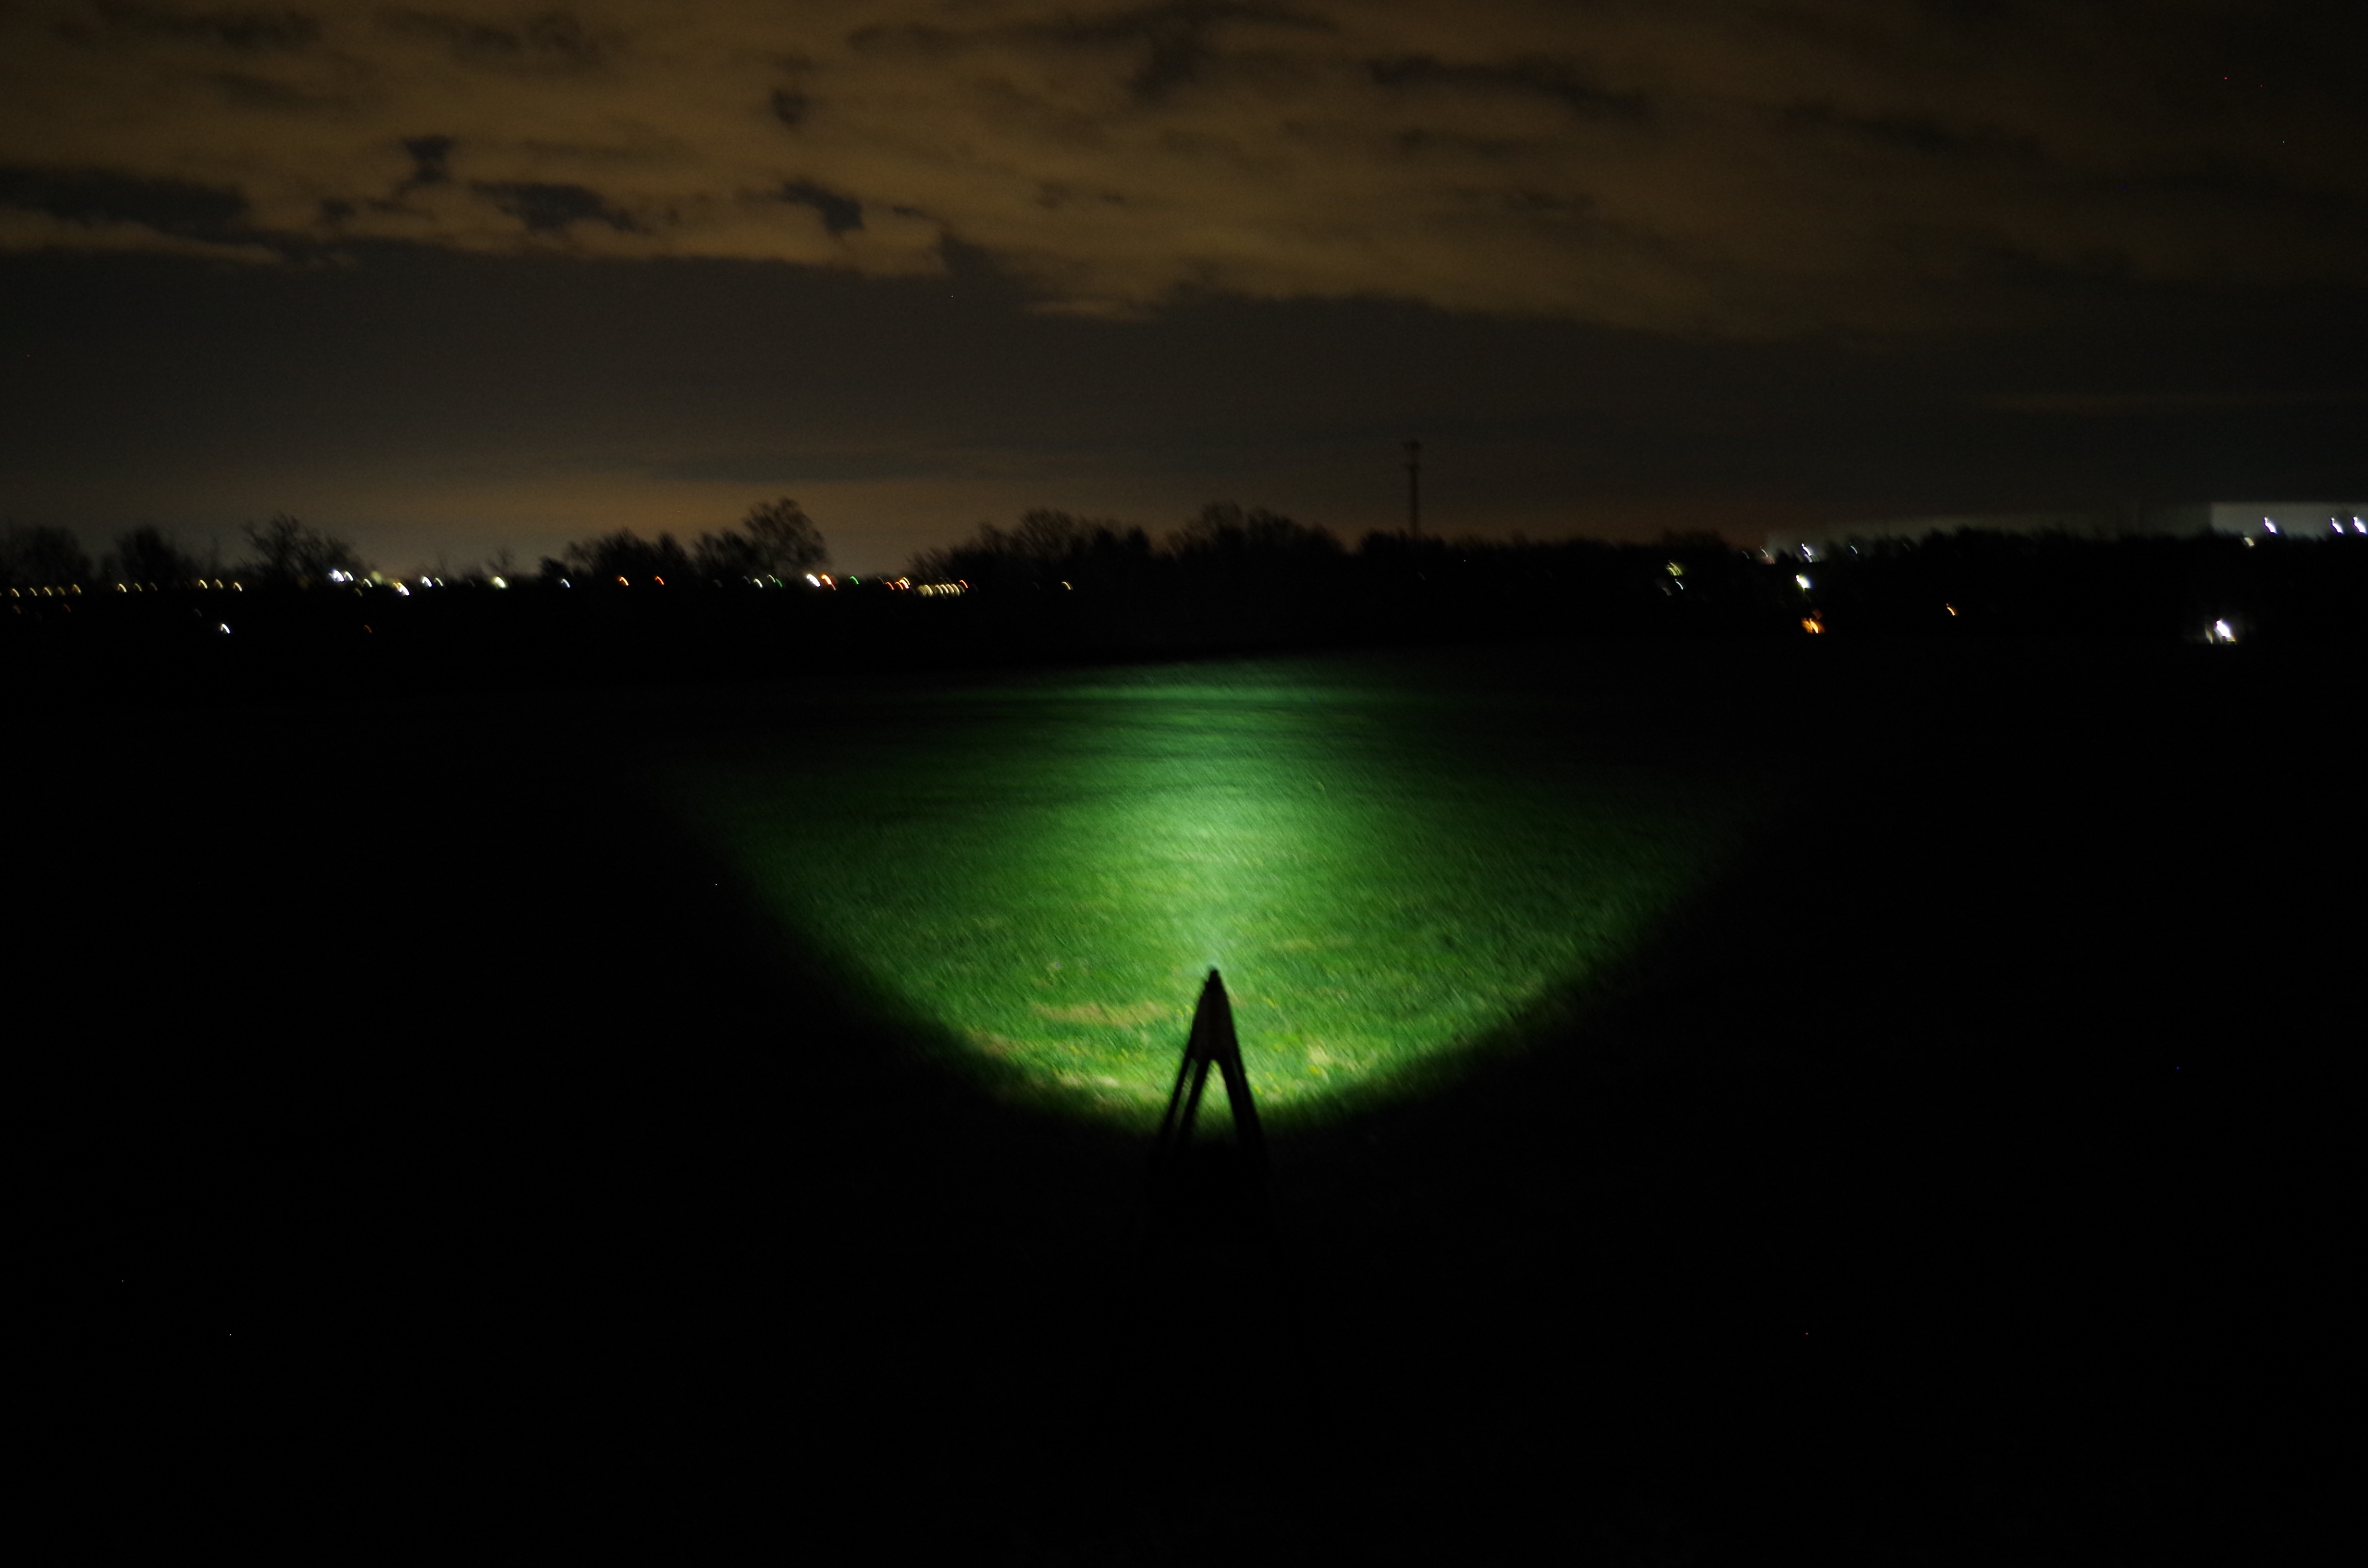
These night photos are all done with the same fixed settings on my DSLR camera to prevent auto adjustments during the session. The settings were chosen to replicate what I saw by eye during the testing. The first image is a control photo with no lights. Some light from a distant town illuminates the cloud cover.
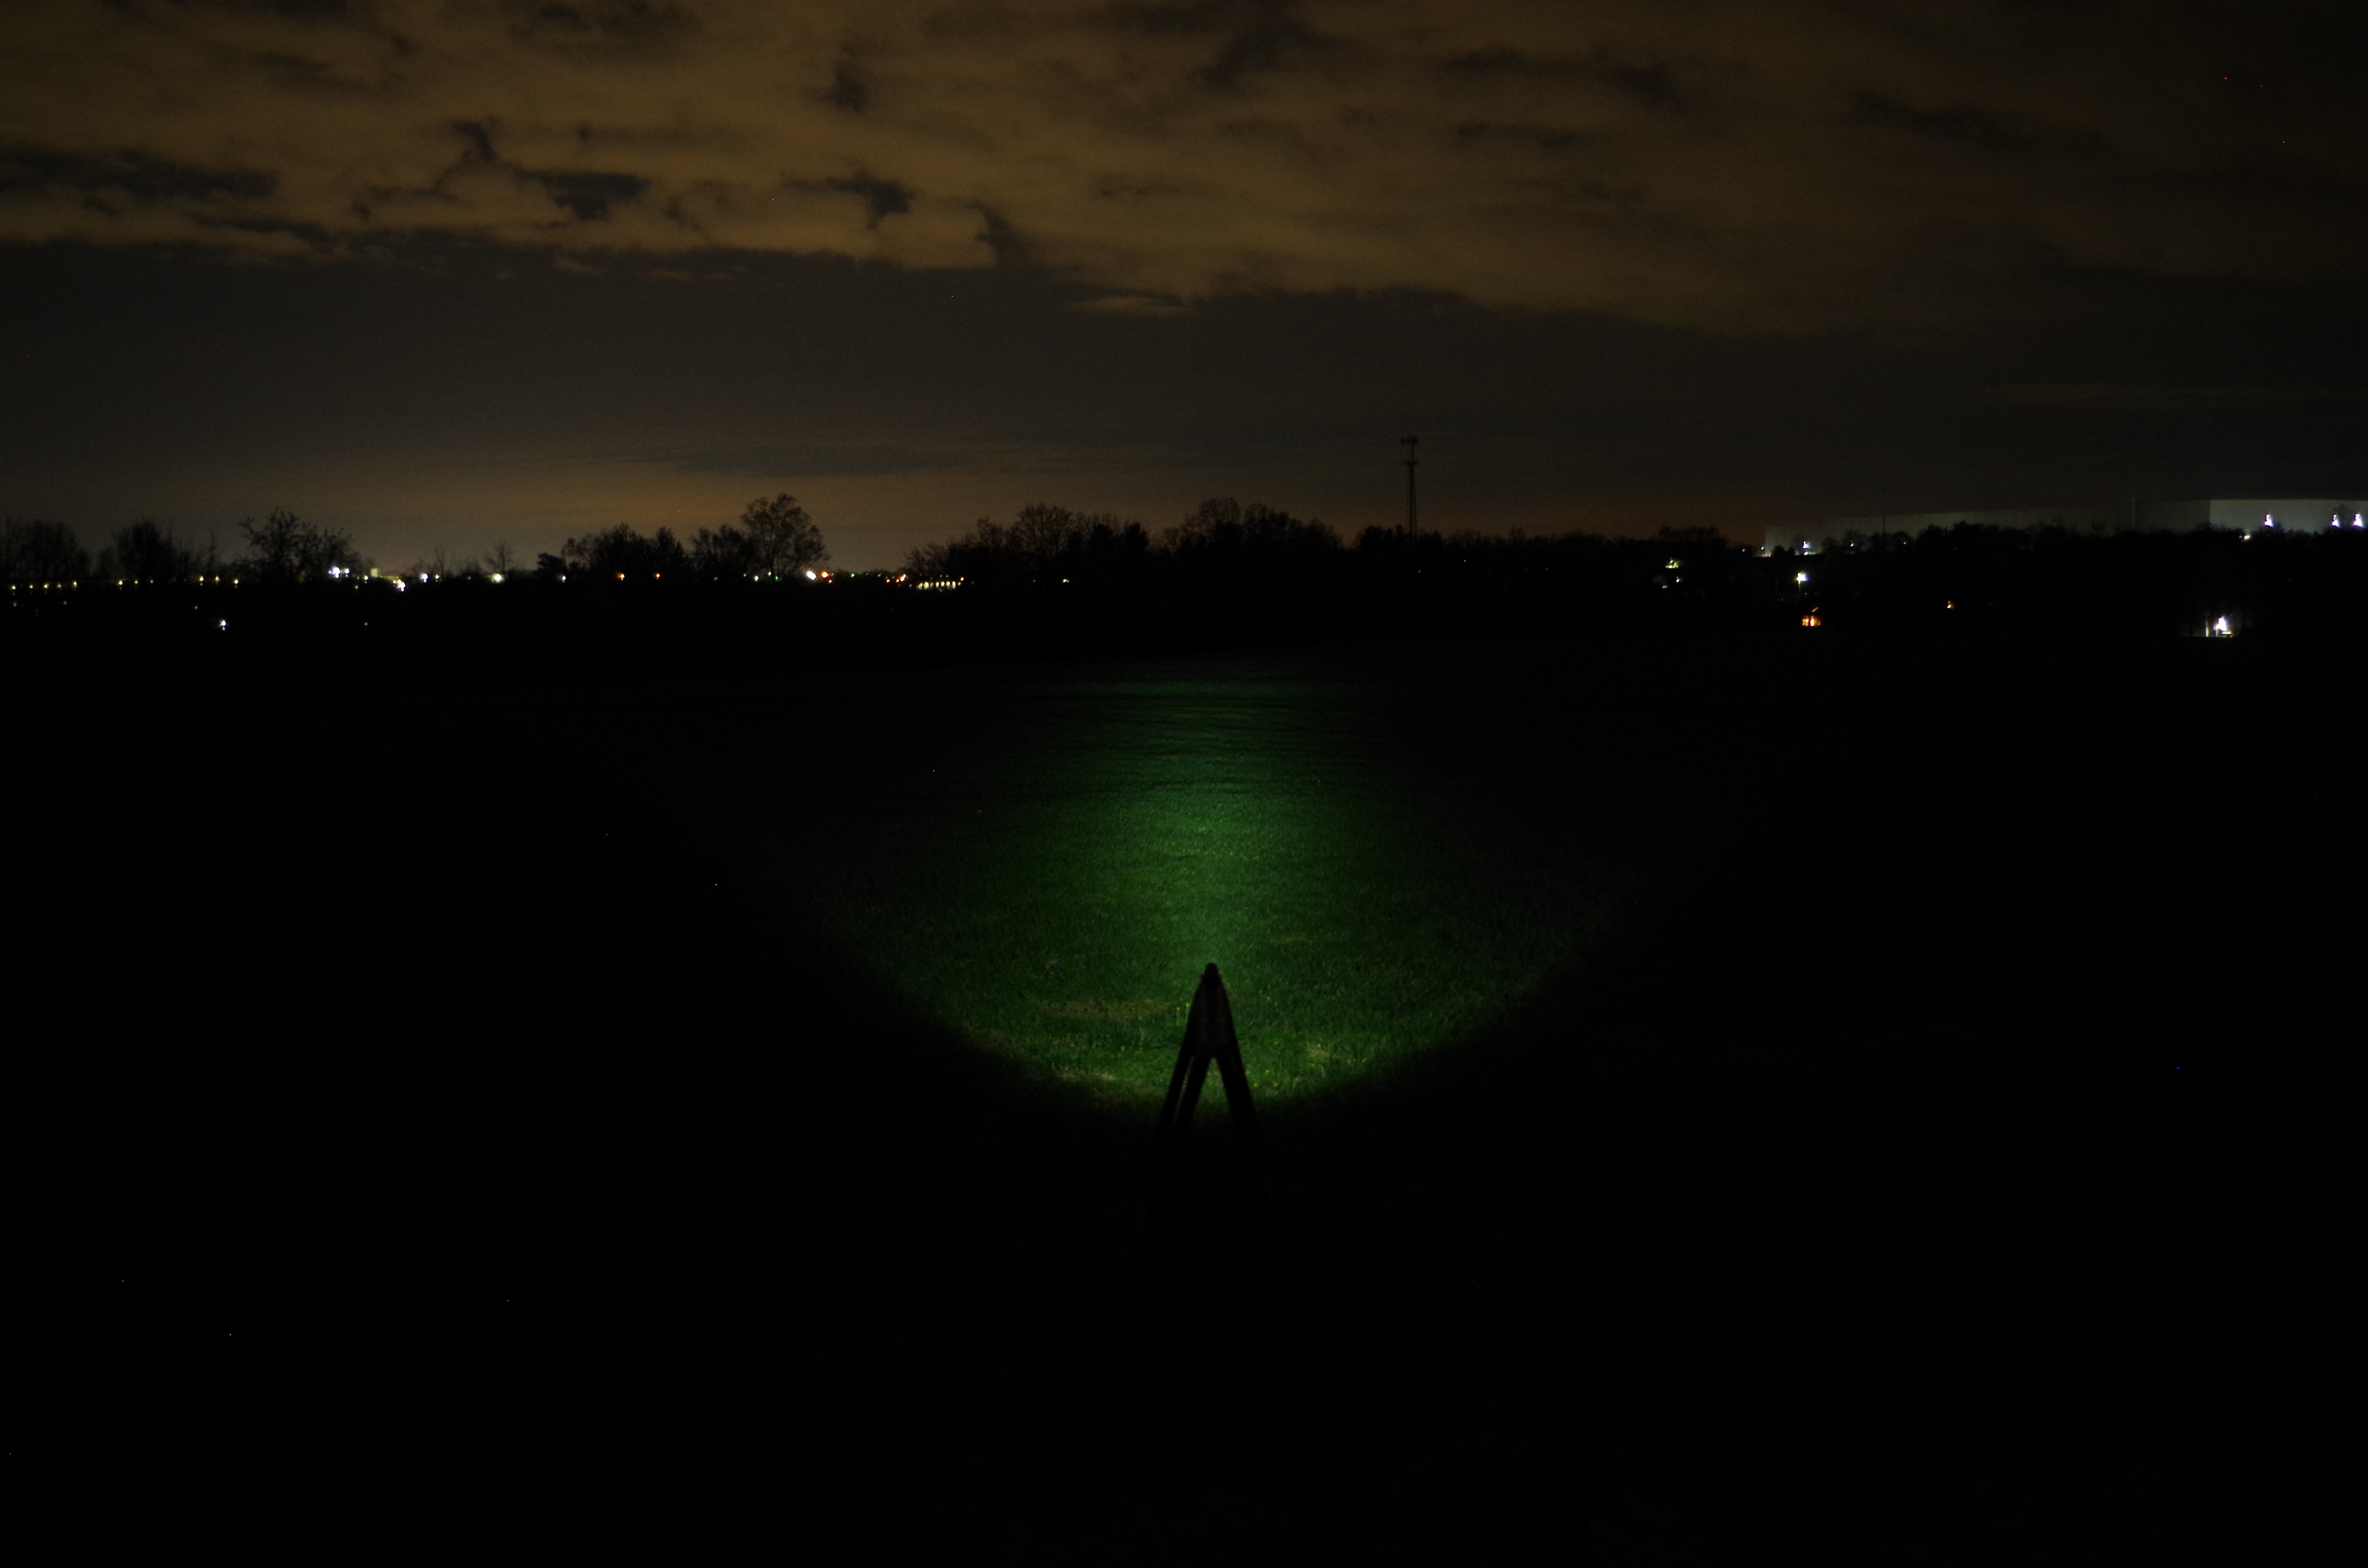
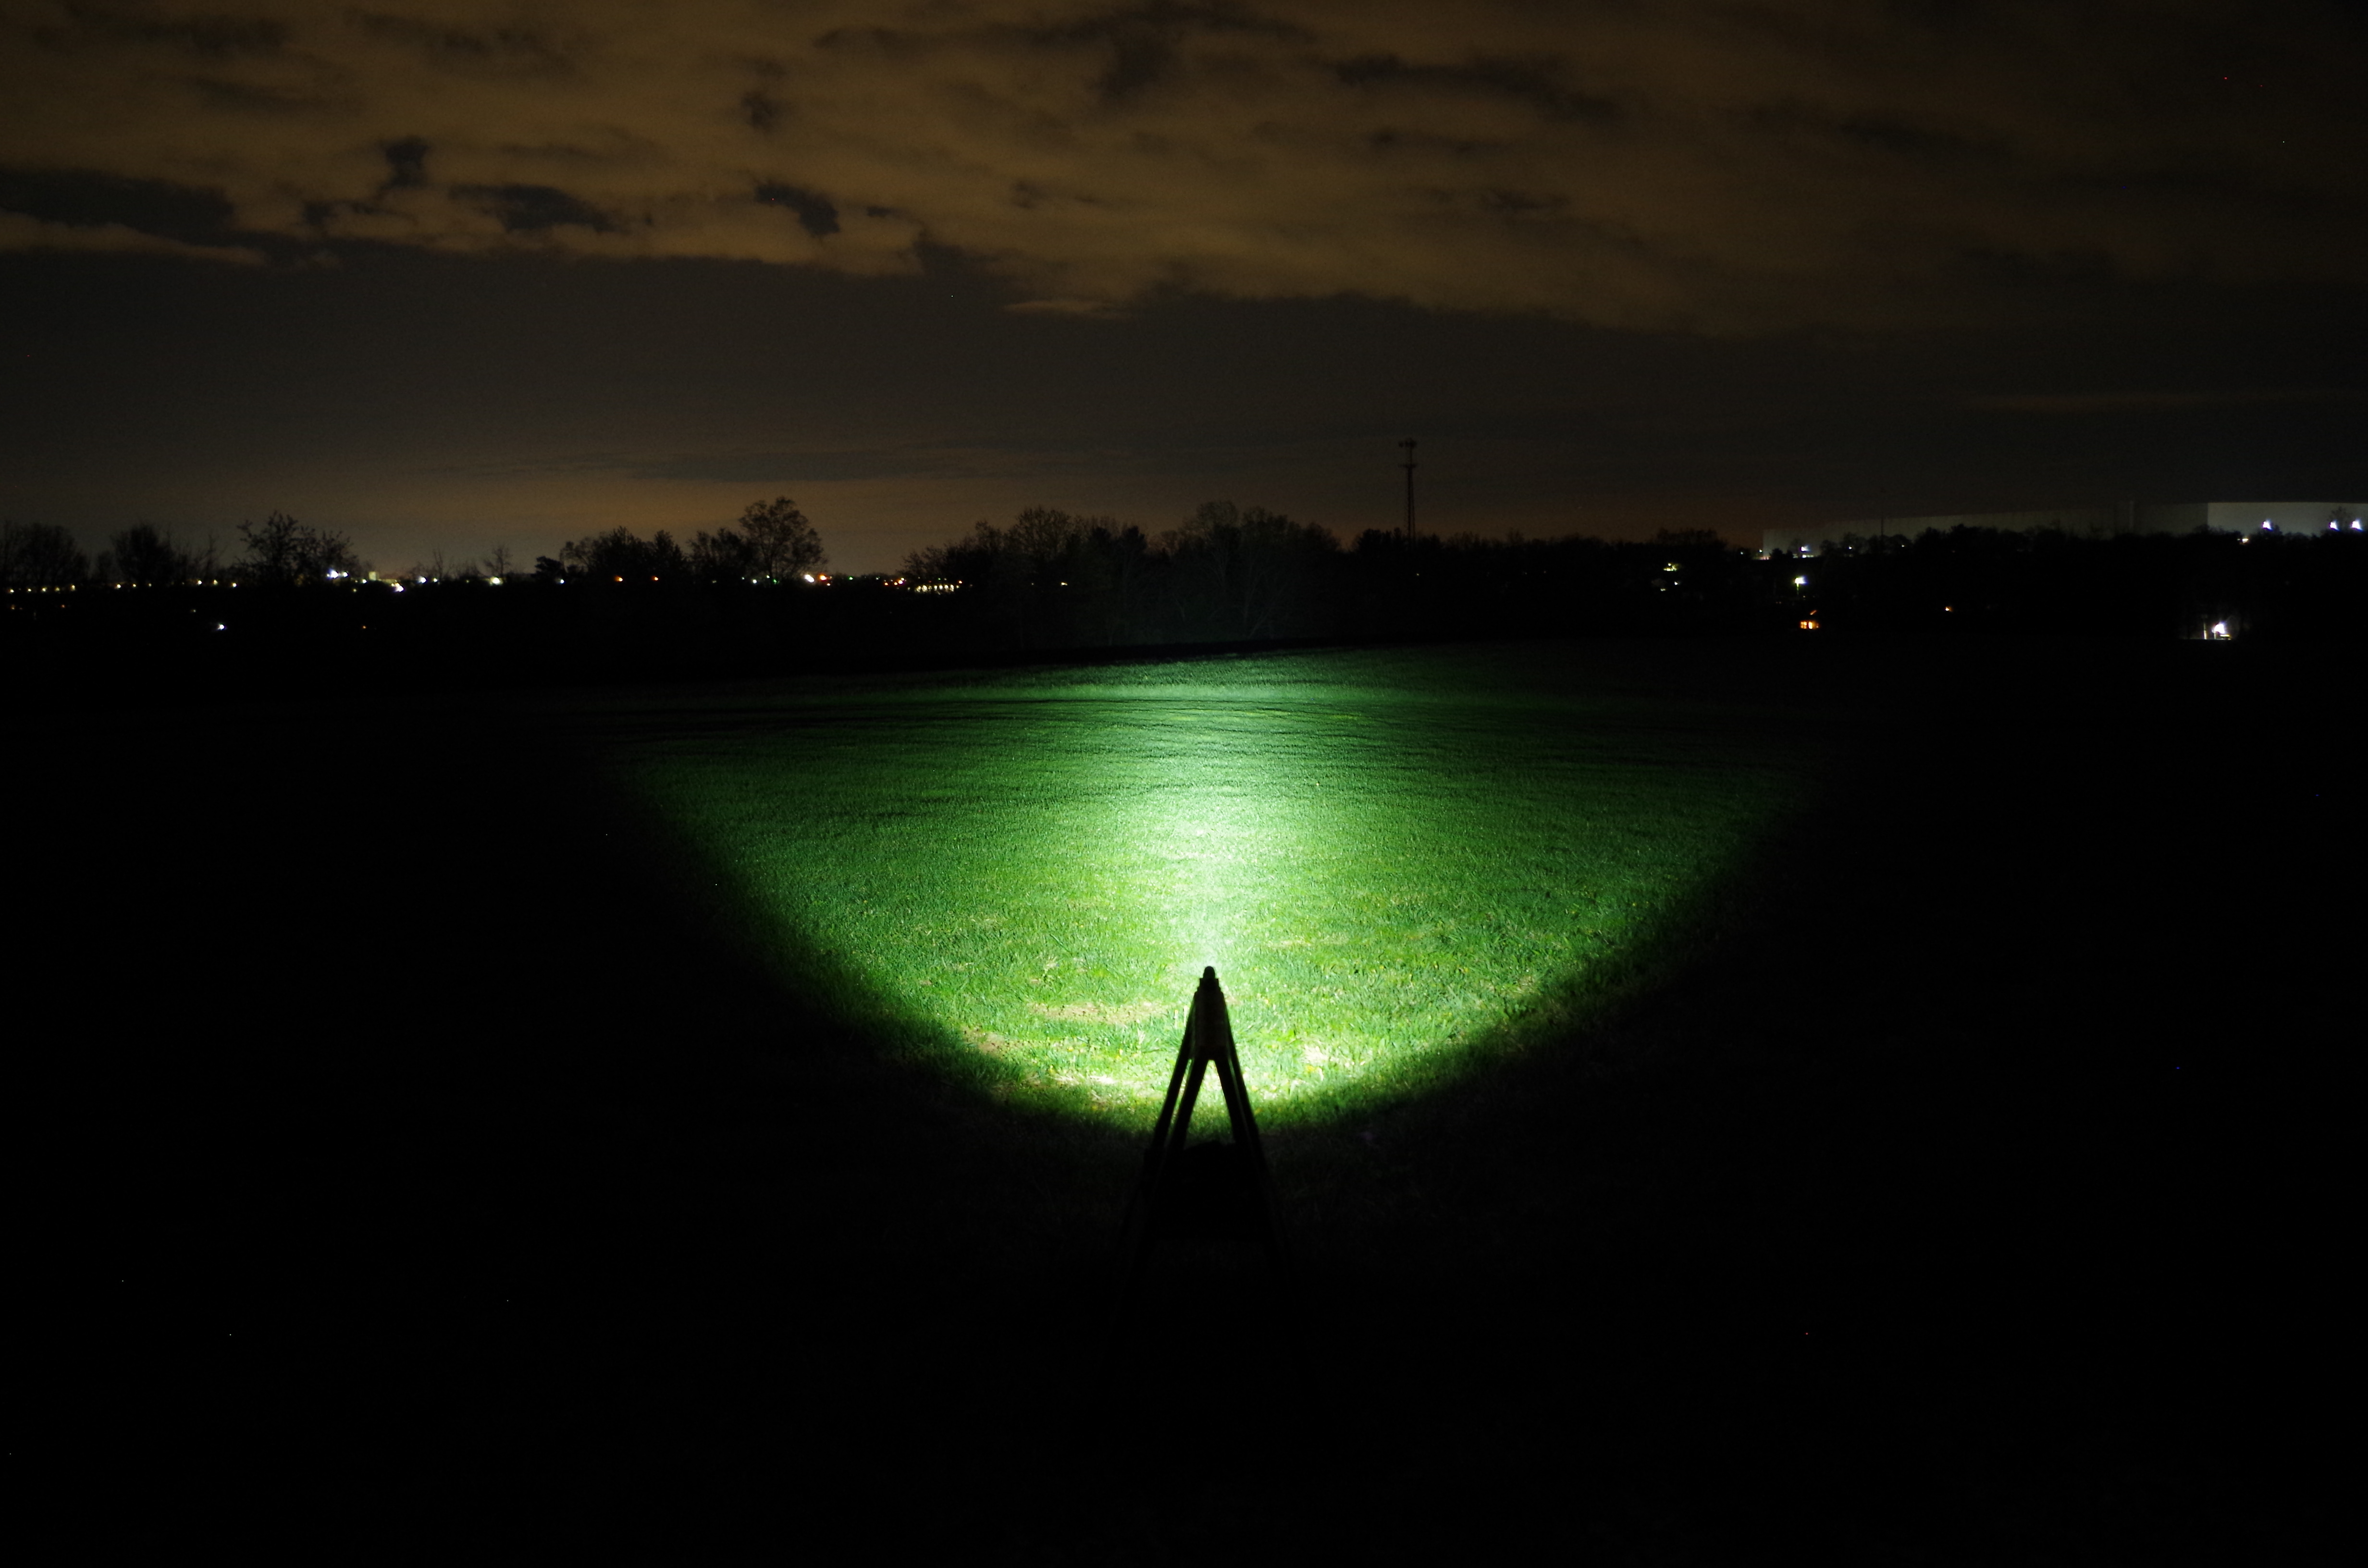
The NT21 was placed on a stand at about waist height, simulating a typical use situation by an adult. The sequence moves through all settings from low to turbo. (low - medium – high – turbo) Beam color is cool but not cold, more like daylight, and there is minimal color change across the beam pattern. The NT21 does not show the green or rose tint shift often seen in other lights at the edges or center of the beam.
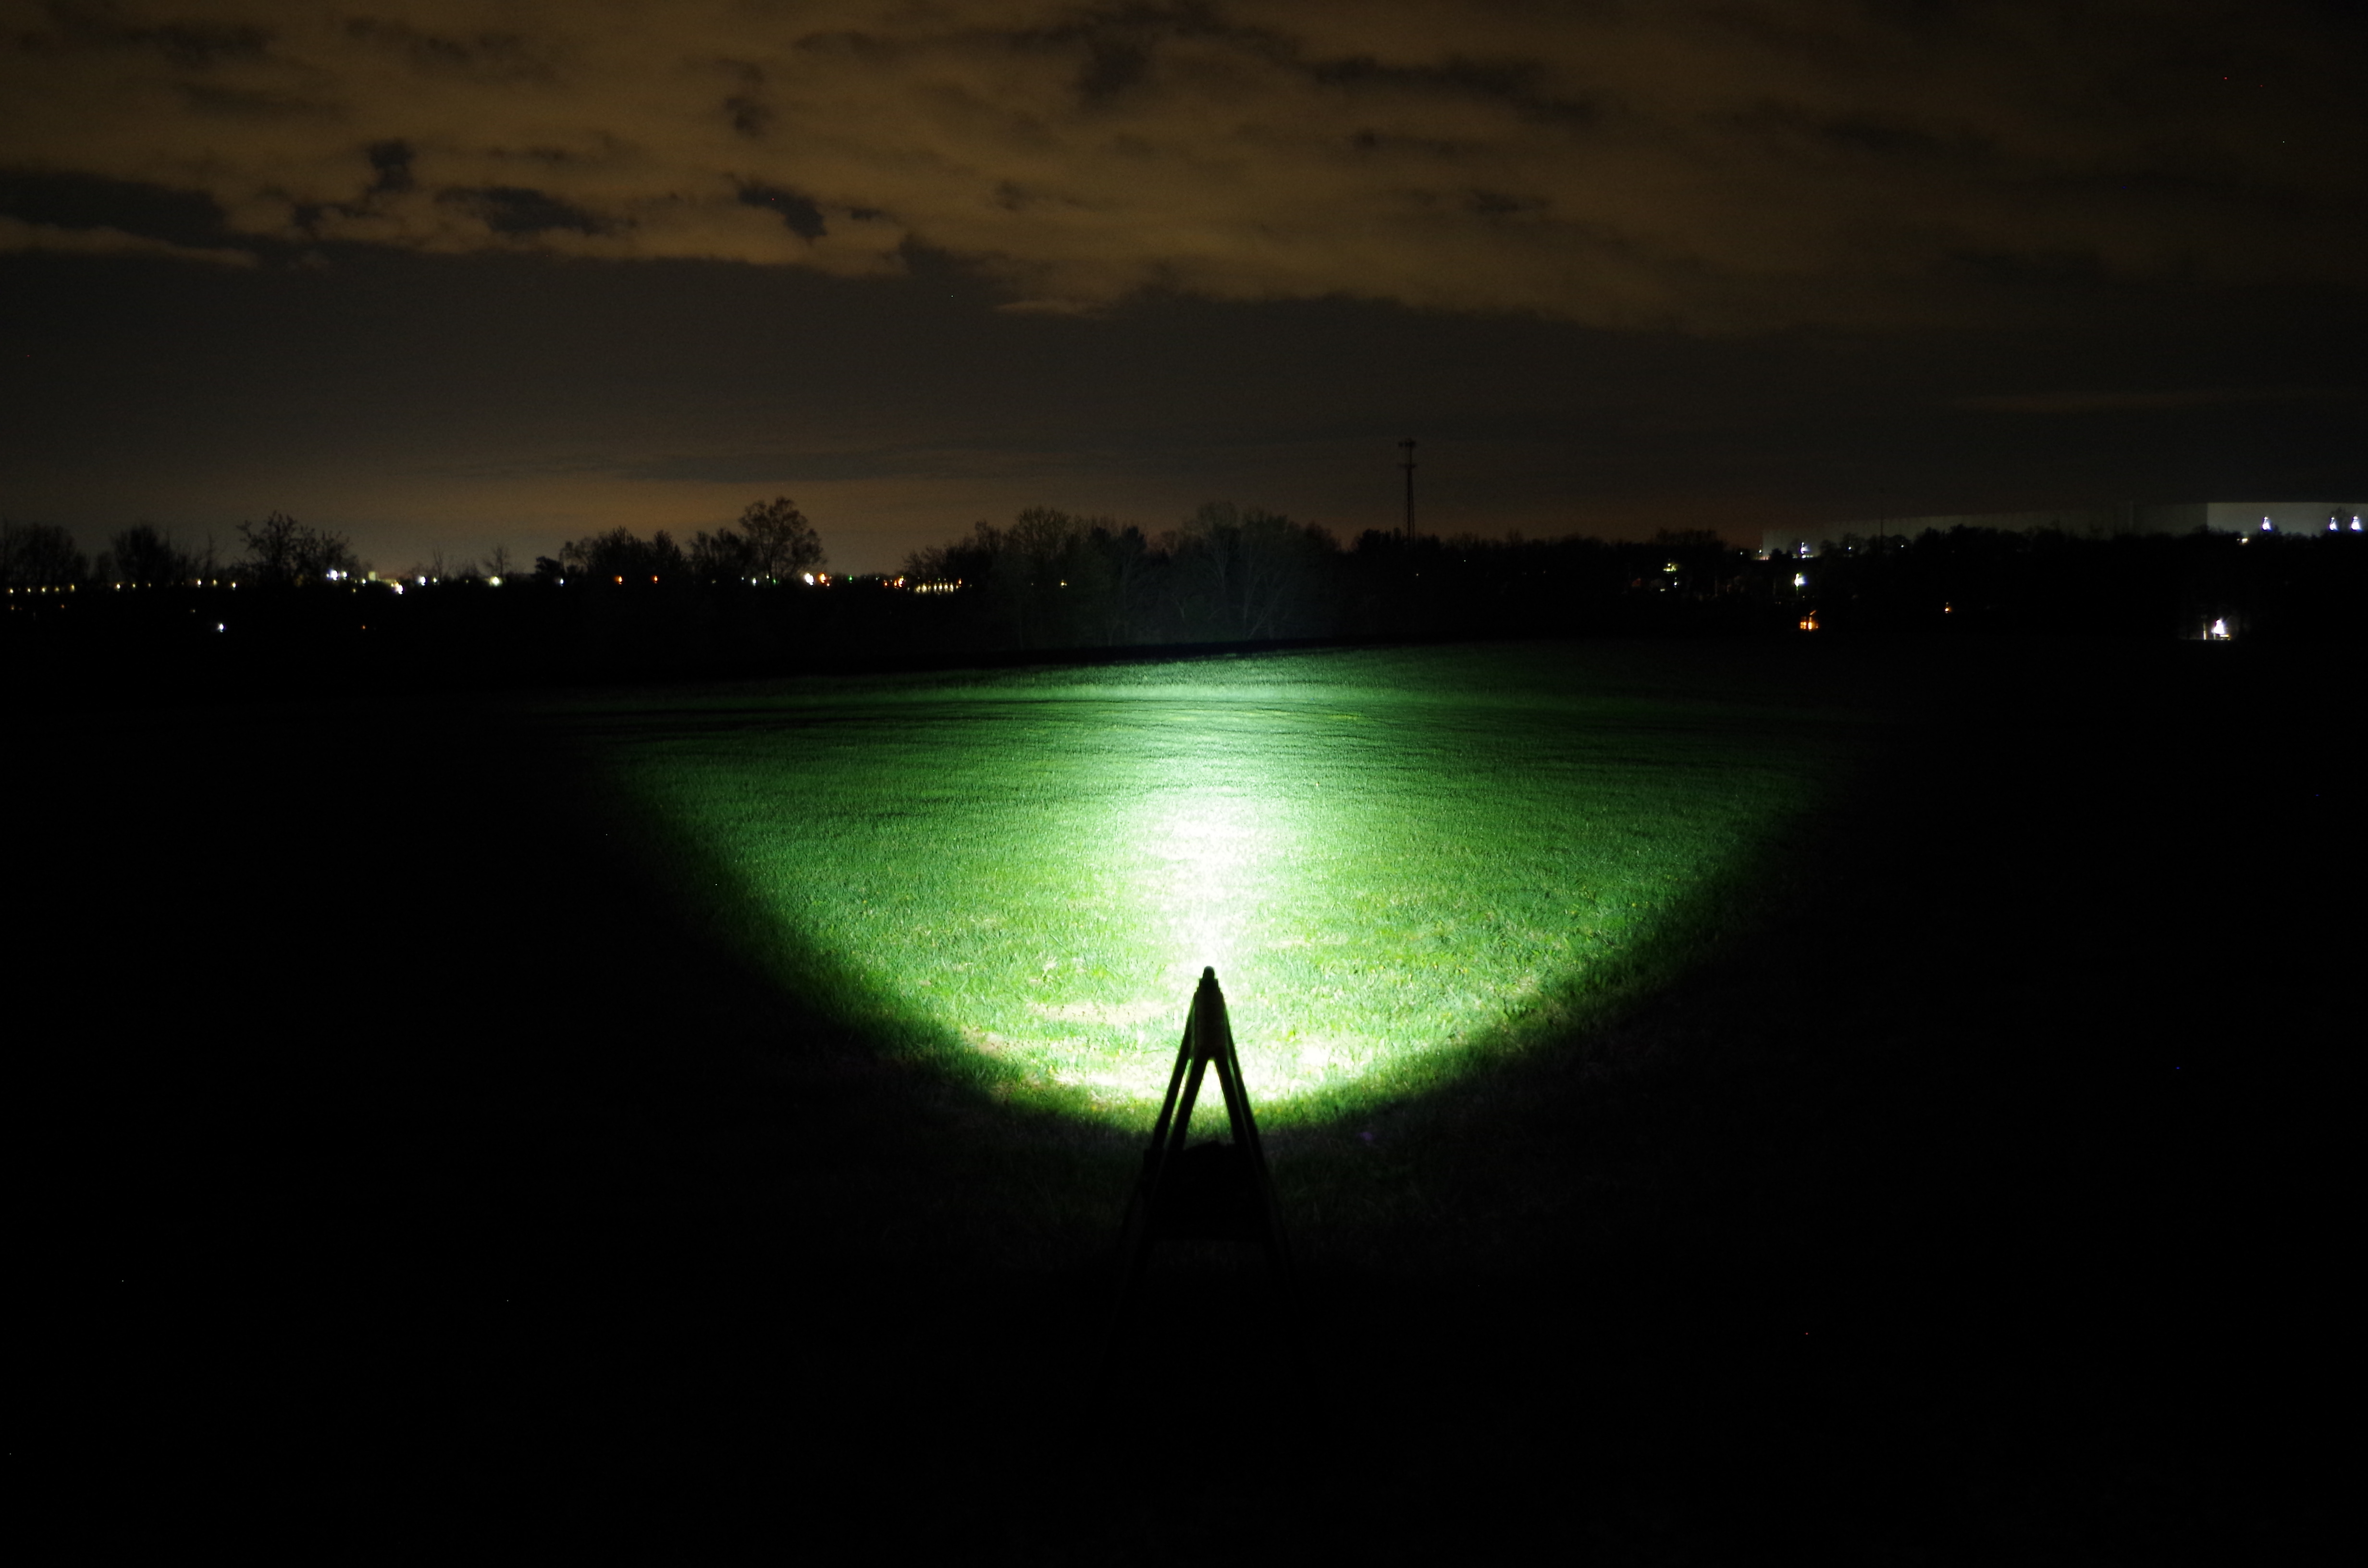
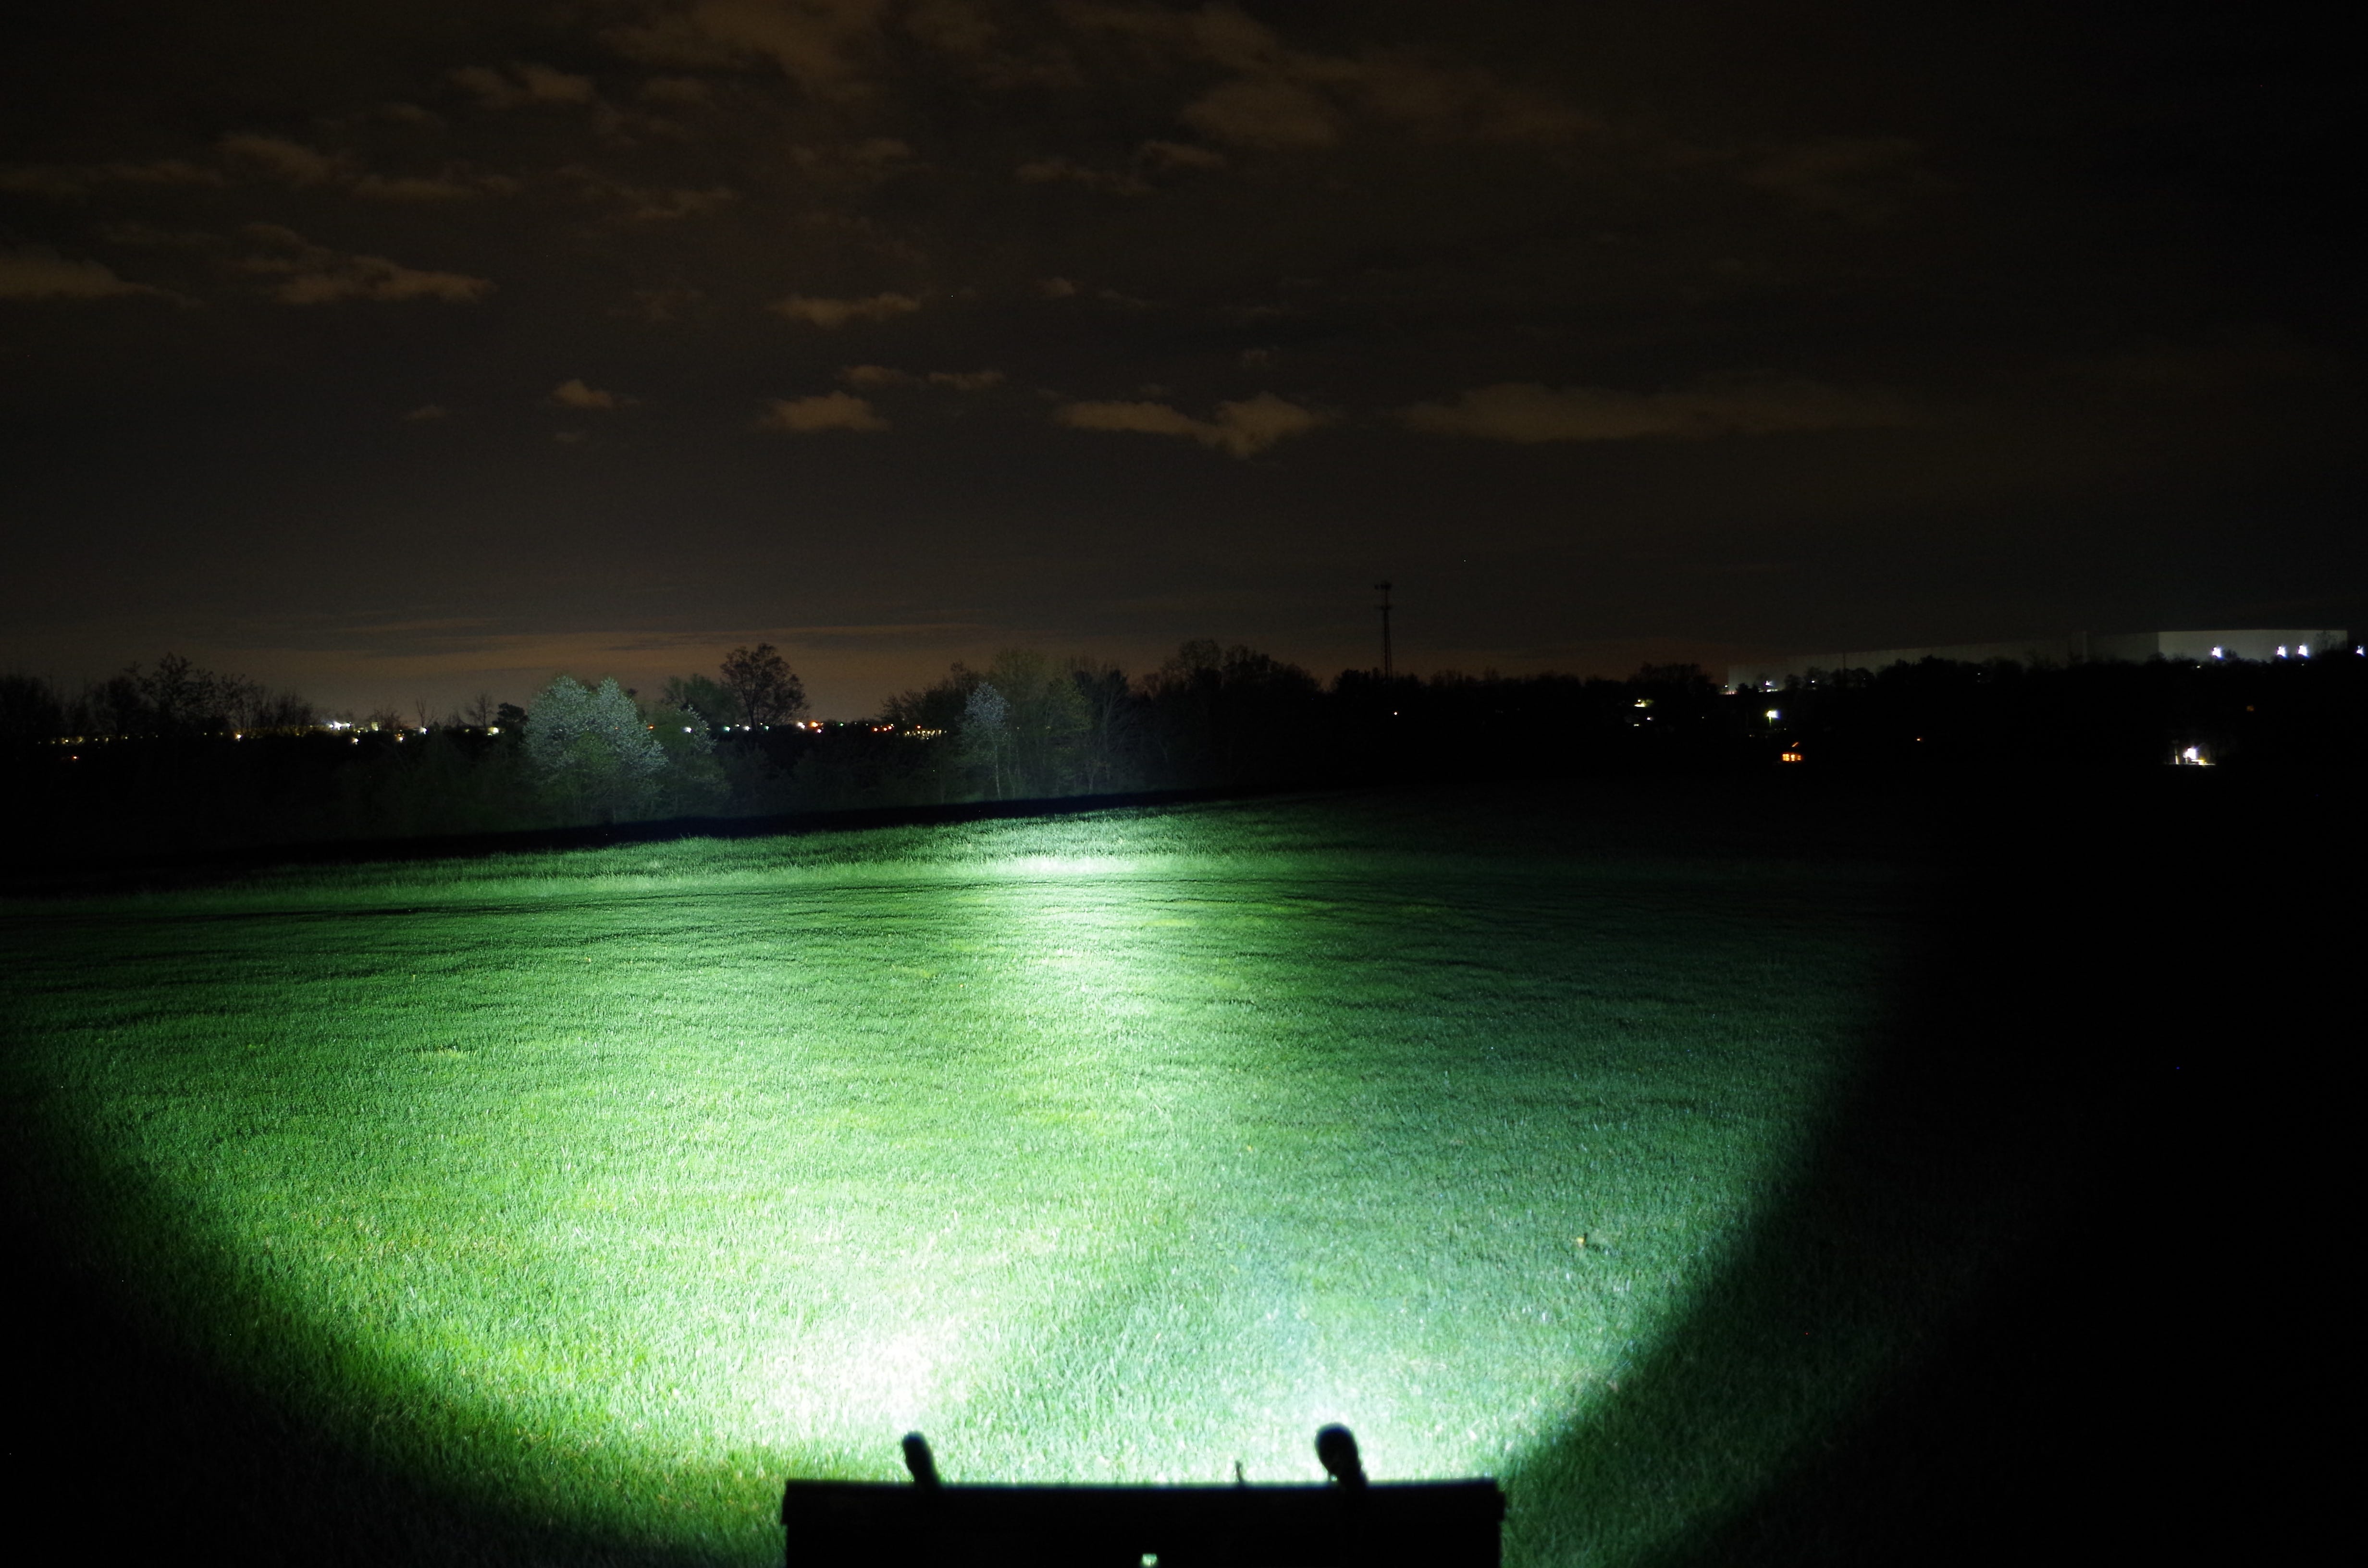
On turbo the trees at the end of the field are illuminated. Odepro’s claim for distance appears correct based on these tests. You can see there is some spill, but this is not a floody light. The NT21 is not designed for closeup work with its pronounced hotspot, but give it some distance and it fulfills its mission well. The user interface that starts at turbo level supports this intended use. I found it well suited for inspecting inside dark attics or similar tasks where its bright compact beam lit up dark corners. Outside, this light is great for far away work. After the photos as I was packing up to leave, I used the light to watch deer move through the field. This is the first time I’ve used a pocket-sized light for spotting.
A very common light known for its pronounced throw is the C8. I compared the two lights and found that the throw was very similar, but the NT21 did have more usable spill. In this photo the NT21 is on the left and the C8 on the right. Note that the spill from the NT21 is brighter and covers the C8’s pattern.
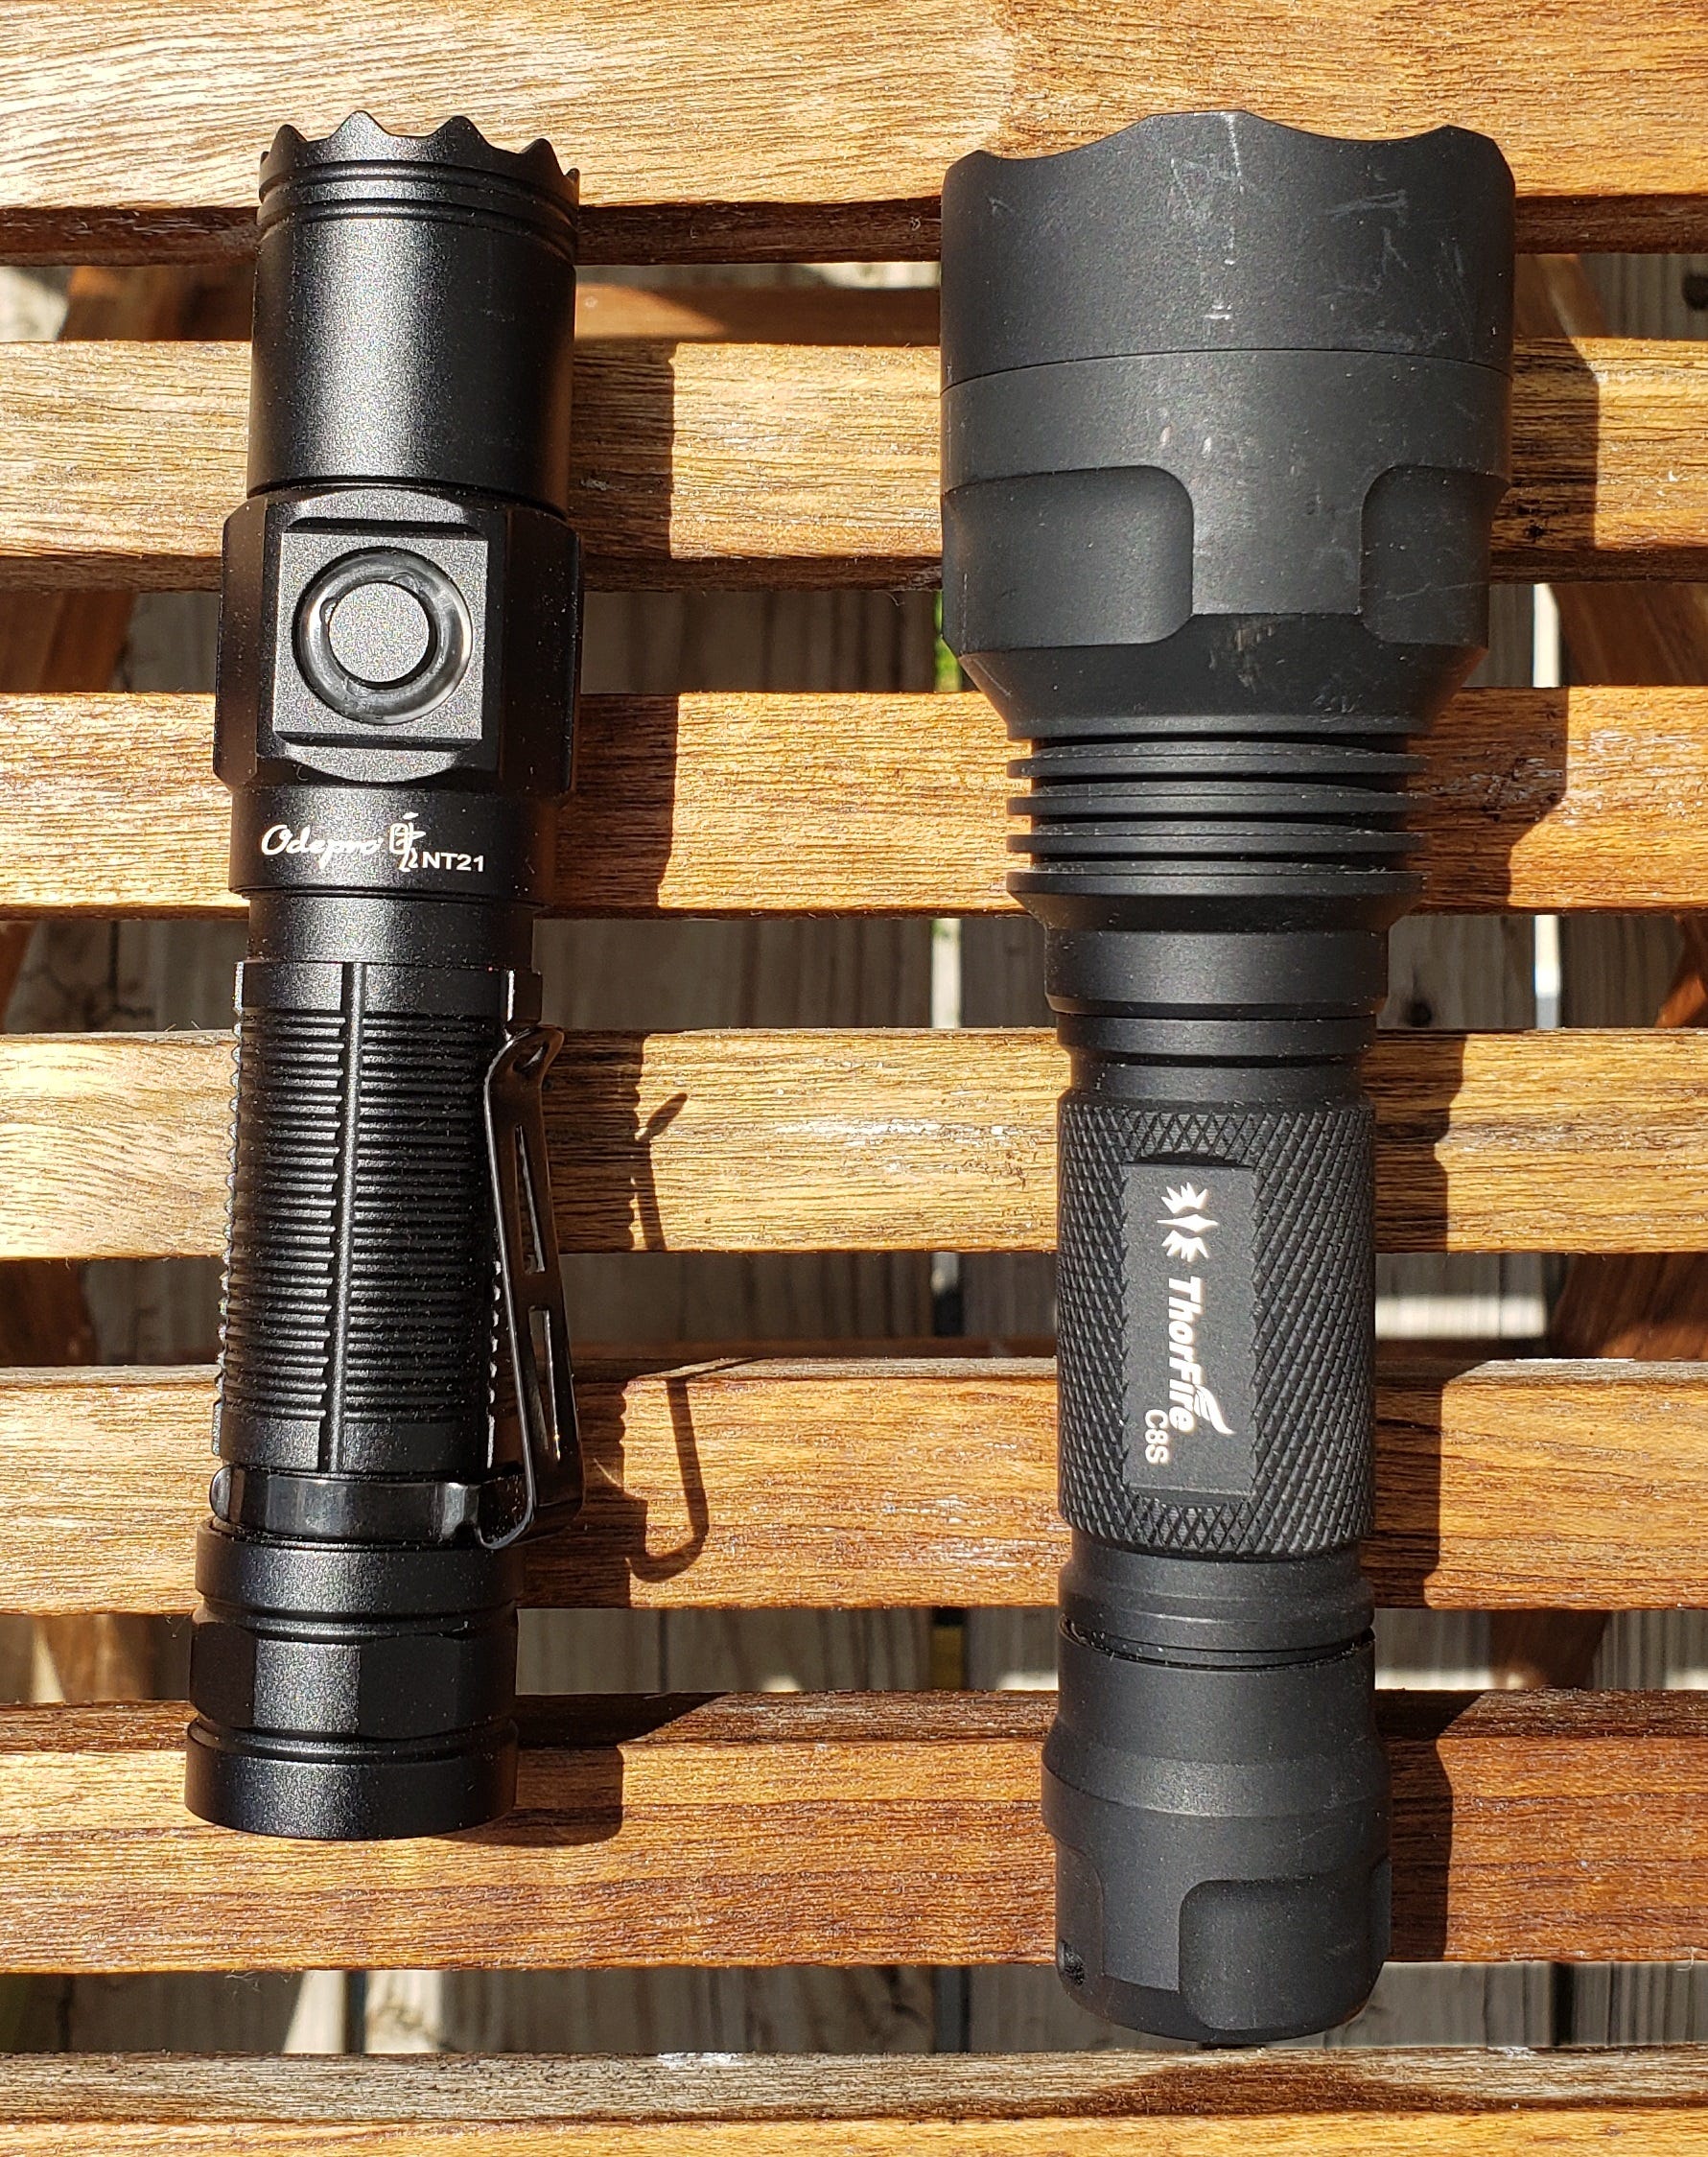
The real advantage of the NT21 is clear when we look at it next to the C8 in daylight. The C8 uses a much larger head, making it not very pocket friendly. The NT21 has a better form factor, better spill, and at least as good beam distance as the much larger light. Which would you want to carry in your pocket?
Conclusion
The Odepro NT21 is a good looking, well built light that serves a definite purpose without trying to be everything to everyone. I would keep this light in my truck for checking fields at night, or carry it night hiking as a compliment to a floody headlight. It would be very good at spotting firetacks while night geocaching. If you are looking for a pocket-sized light that lets you see things at a distance, the NT21 is a good choice.
PRO
Well built
Simple user interface
Good throw with reasonable flood
Built-in charging without rubber plugs or flaps
Charging cable stays connected well
Includes nice accessories and 2 batteries
Built-in lockout to prevent turning the light on accidentally
Red LED lockout indication allows finding the light in the dark
Low voltage indication and protected batteries to prevent over-discharge
CON
No low voltage shutdown in the LED driver circuit for protection when using unprotected batteries
Center hot spot is bright when doing very close work
Charging cable is proprietary
Test Equipment
Protek 506 DMM
Ideal 61-768 clamp meter
Fluke Ti32 thermal imager (E=0.85)
Pentax K50 camera
Opus BT-C3400 charger
Tekpower TP-3003D-3 power supply
Siglent SDS1202X-E oscilloscope
Samsung S9 phone